
This lesson is made with PSPX9
But is good with other versions.
© by SvC-Design

Materialen Download :
Here
******************************************************************
Materials:
aU4rO6C5eUzpAmZKlYFw2GS-w9c
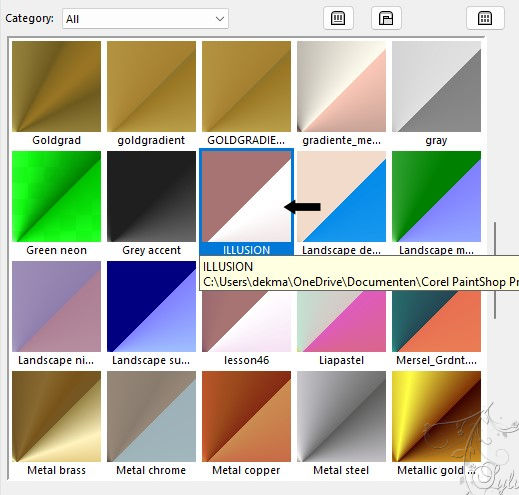
ILLUSION
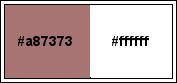
Paleta de colores
paper2-0_688
png_flower-0_600
Swan Lake -12- tubed by A PSP Devil
Texto.ilussion
******************************************************************
Plugin:
Effects – Plugins – Toadies – Weaver
Effecten – insteekfilters – Teph’s Tricks – Inverse Red Transparency
Effects – Plugins – Mura Meister – Copies
Filter - Topaz Labs - Topaz Pas 3 - Mild Contrast Pop
******************************************************************
color palette
:
******************************************************************
methode
When using other tubes and colors, the mixing mode and / or layer coverage may differ
******************************************************************
General Preparations:
First install your filters for your PSP!
Masks: Save to your mask folder in PSP, unless noted otherwise
Texture & Pattern: Save to your Texture Folder in PSP
Selections: Save to your folder Selections in PSP
Open your tubes in PSP
******************************************************************
We will start - Have fun!
Remember to save your work on a regular basis
******************************************************************
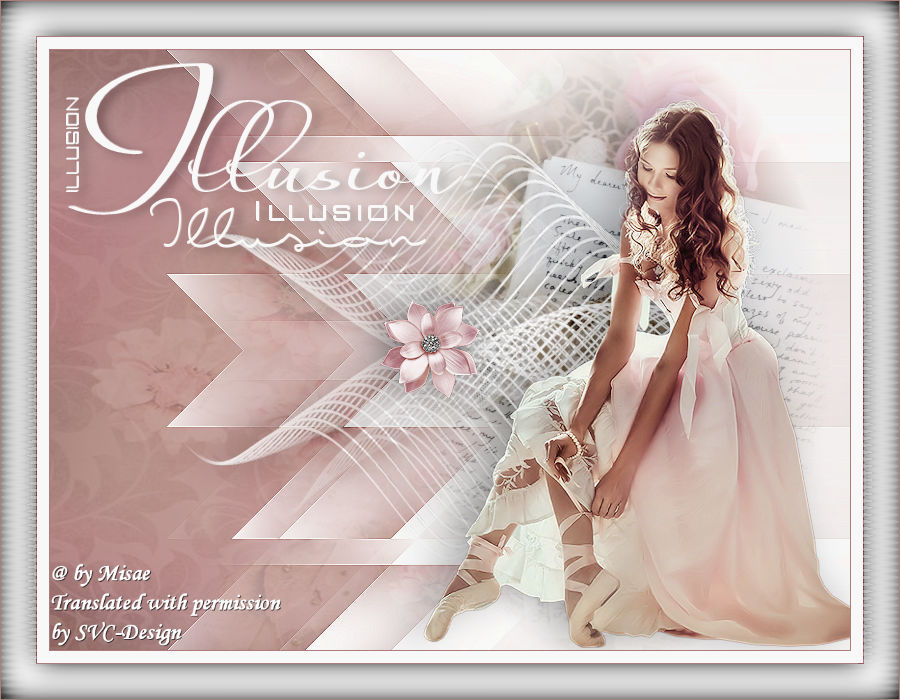
1.
Open a transparent image of 800 x 600 pixels
2.
Set your foreground color: #a87373 and background color #ffffff.
3.
We look for the illusion progression
4.
We make a radial gradient:
angle:45
Reps: 0
Invert : checked
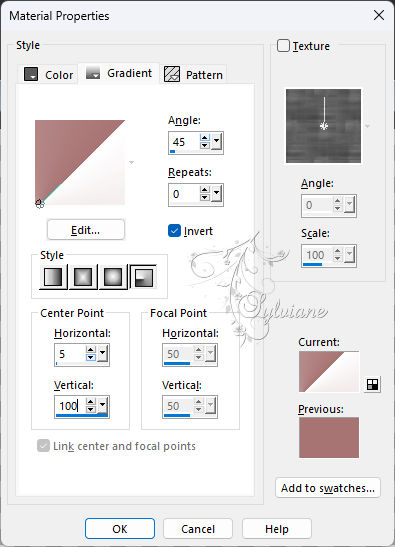
5.
Fill your image with this gradient
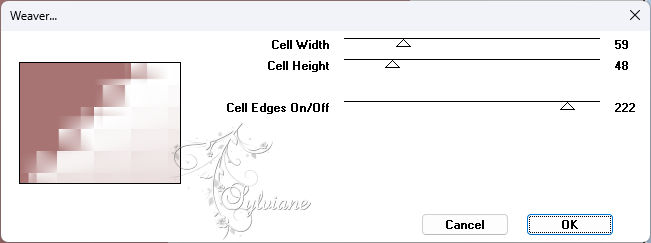
6.
Effects – Plugins – Toadies – Weaver
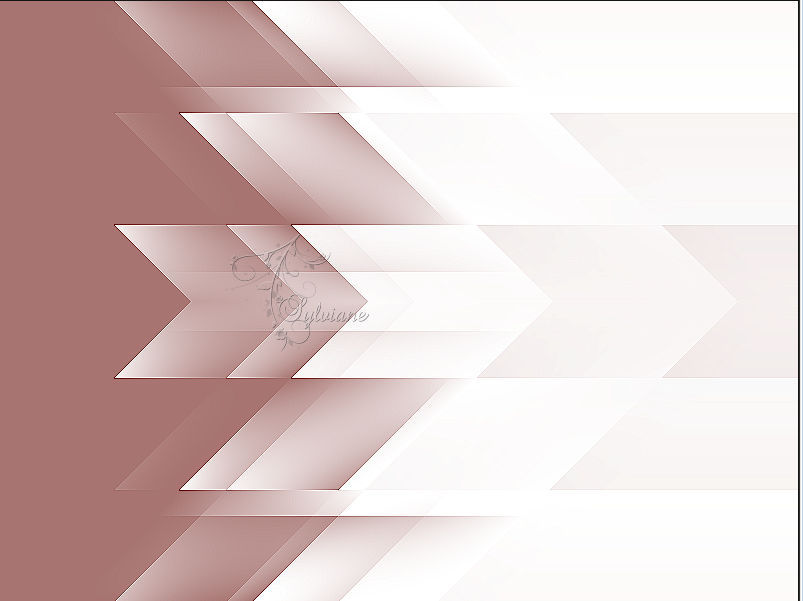
7.
Edit – repeat Weaver
8.
Effects - Edge Effects - Enhance
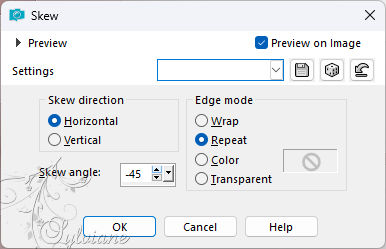
9.
Effects – Geometric Effects – Skew
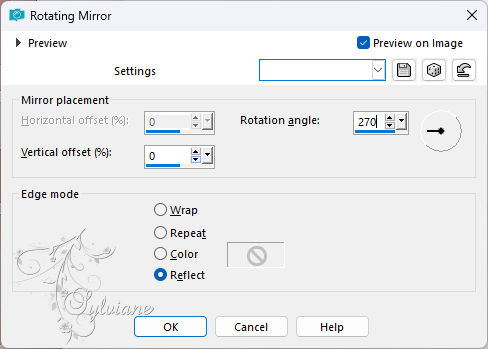
10.
Effects – reflection effects – rotating mirror
11.
Layers – new raster layer
Selection – select all
12.
Open paper2-0_688
Edit – Copy
Edit – paste into the selection
Selection – select none
13.
Layers – Arrange – Down
14.
Activate the top layer
15.
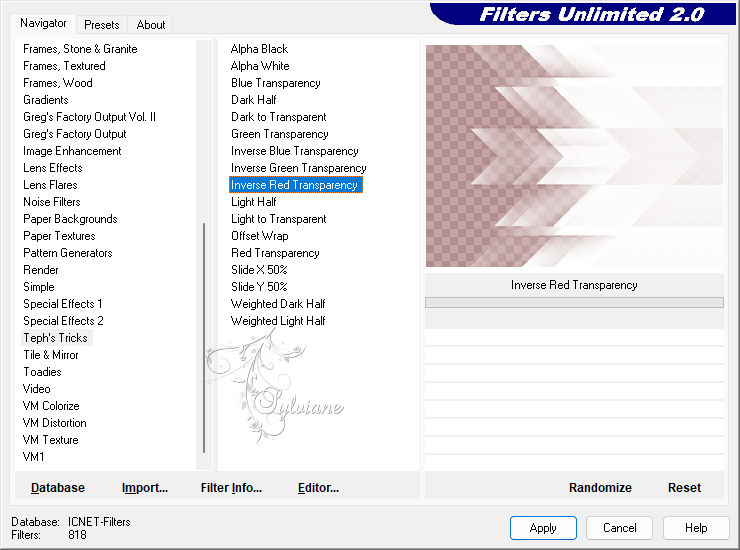
Effecten – insteekfilters – Teph’s Tricks – Inverse Red Transparency
19.
Open in de psp aU4rO6C5eUzpAmZKlYFw2GS-w9c.png.
20.
Edit - copy.
21.
Edit – paste as new layer
22.
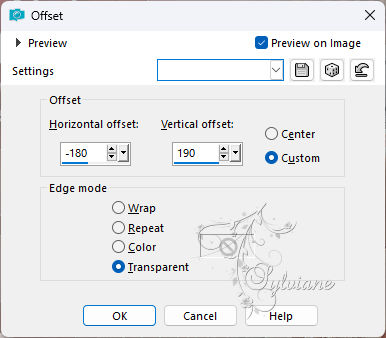
Effects - Image Effects - Offset

23.
Layers – new raster layer
24.
Set your foreground color to #FFFFFF
25.
Fill it with your foreground color
26.
Image – resize 85%
Don't check the box for resizing all layers
27.
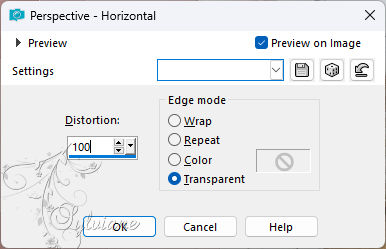
Effects – Geometric Effects – Perspective Horizontal
28.
Image – Flip – Flip Horizontally
29.
Edit – Repeat Horizontal Perspective
30 .
Image – resize 70%
Don't check the box for resizing all layers
31.
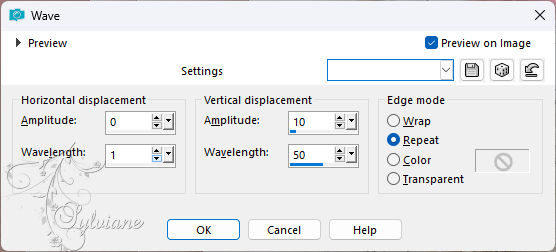
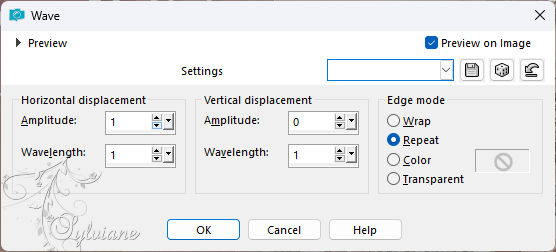
Effects – Distortion Effects – Wave
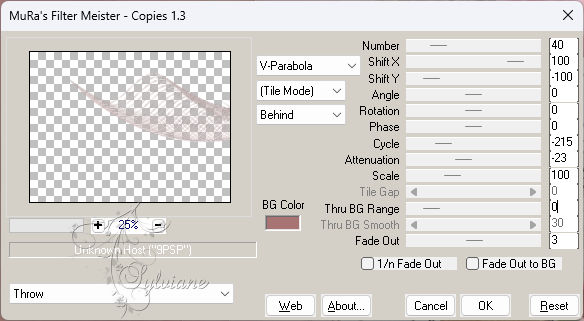
32.
Effects – Plugins – Mura Meister – Copies
33.
Layers - Duplicate
Image – Flip – Flip Vertical
34.
Layers – Merge – Merge Down
35.
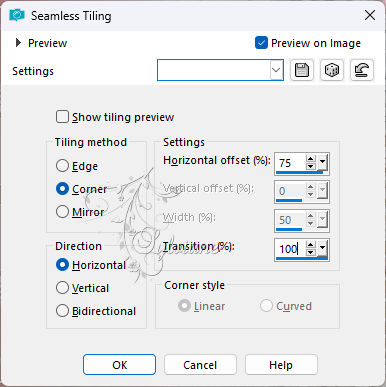
Effects - Image Effects - Seamless Tiling
36.
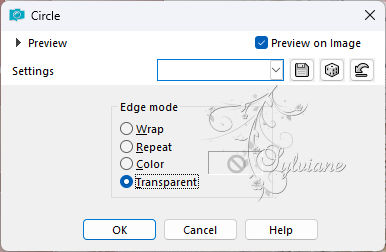
Effects – Geometric Effects – Circle
37.
Effects – 3D Effects – Drop Shadow
-2/-6/45/55 -color:#000000
38.
In the psp png_flower-0_600.png.
39.
Edit – Copy
Edit – paste as new layer
40.
Image – resize 30%
Don't check the box for resizing all layers
41.
Adjust – Sharpness – Sharpen
42.
Effects - Image Effects - Offset
43.
Effects – 3D Effects – Drop Shadow
-2/-6/45/55 -color:#000000
44.
In the psp, open the tube Swan Lake -12-tubed by a PSP Devil.pspimage.
45.
Edit – Copy
Edit – paste as new layer
46.
Image – resize 80%
Don't check the box for resizing all layers
47.
Adjust – Sharpness – Sharpen
48.
Effects - Image Effects - Offset

49.
Effects – 3D Effects – Drop Shadow
-5/-15/30/55 – color:#000000
50.
Open in psp Texto.ilussion.pspimage.
51.
Edit - copy
52.
Edit – paste as new layer
53.
Effects - Image Effects - Offset
54.
Image – add borders - 1pixel - color # a87373.
55.
Image – add borders – 12 pixels – color # FFFFFF
56.
Image – add borders - 1pixel - color # a87373.
57.
Image – add borders – 35 pixels – color # FFFFFF
58.
Activate the wand and select the border
59.
Selection – layer to make a selection
60.
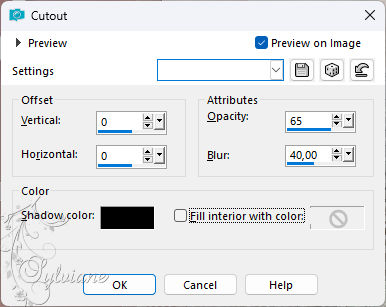
Effects - 3D effects – Cutout
61.
Layers - Duplicate
62.
Selections – select none
63.
Effects – Distortion Effects – Wave
64.
blendmode: Overlay.
65.
Image – add borders - 1pixel - color # a87373.
66.
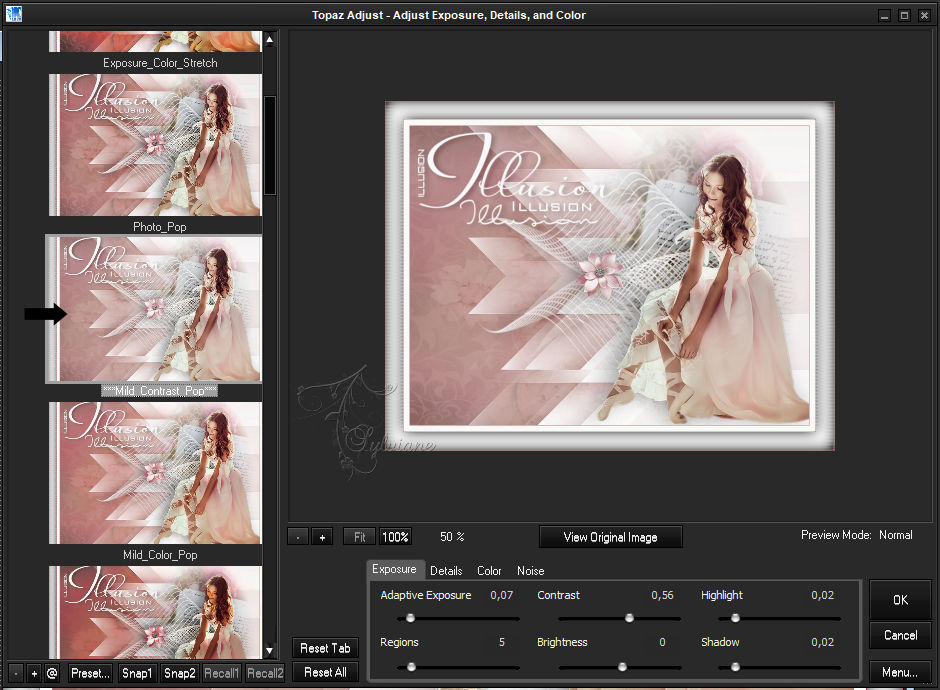
Filter - plugin - Topaz Labs - Topaz Pas 3 - Mild Contrast Pop.
67.
put your watermark on it
Layers - merge - merge all layers
68.
Save as jpeg
Back
Copyright Translation 2024 by SvC-Design
------------------------------------------------------------------------------
Thanks to all who created