But is good with other versions.
******************************************************************
Materials:
edith_1
gen_accents_pointyflowers
Narah_Mask_1416
Texto._1pspimage
******************************************************************
Plugin:
Effects – user defined filter - emboss 3
effects – plugin - Toadies - Sucking Toad Bevel I
Effects - plugin - Xero - Porcelain
******************************************************************
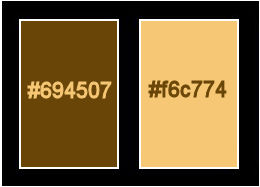
color palette
:
******************************************************************
methode
When using other tubes and colors, the mixing mode and / or layer coverage may differ
******************************************************************
General Preparations:
First install your filters for your PSP!
Masks: Save to your mask folder in PSP, unless noted otherwise
Texture & Pattern: Save to your Texture Folder in PSP
Selections: Save to your folder Selections in PSP
Open your tubes in PSP
******************************************************************
We will start - Have fun!
Remember to save your work on a regular basis
******************************************************************
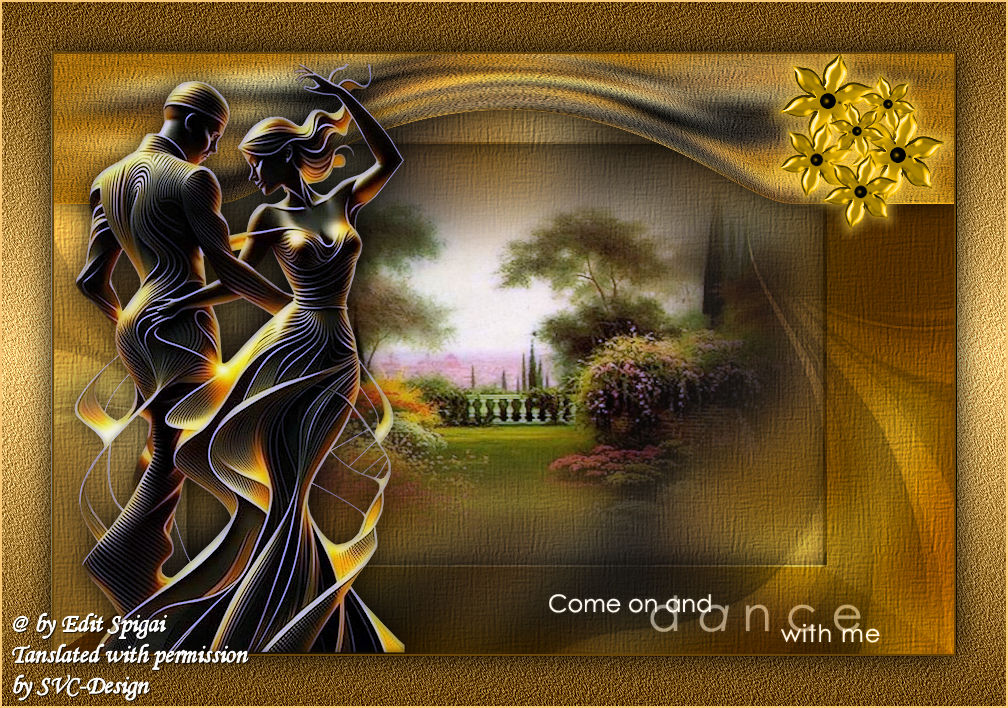
1.
Put in the foreground the color #694507 and no background a color #f6c774
2.
Open a transparency of 900 x 600px.
Fill it out with the color # 694507
3.
Selections – select All
Edit copy in misted of your choice
paste into selection in your work.
4.
Selection - Select None
5.
Adjust - blur - gaussian blur
range: 30,00
6.
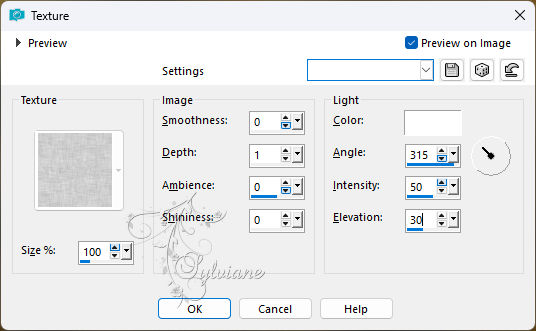
Effects - Texture Effects – Texture – canvas fine
7.
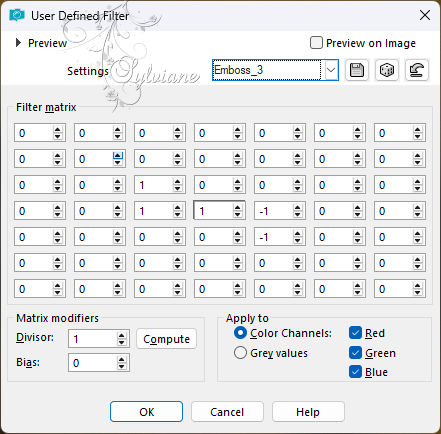
Effects – user defined filter - emboss 3
8.
Adjust – scharpness – scharpen
9.
Layers - duplicate
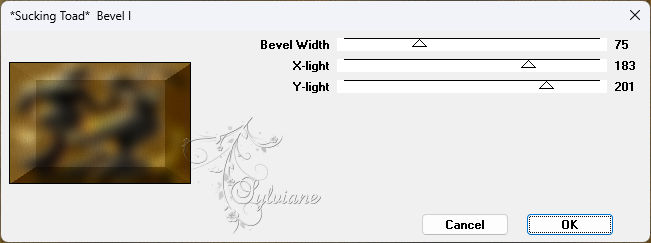
10.
effects – plugin - Toadies - Sucking Toad Bevel I
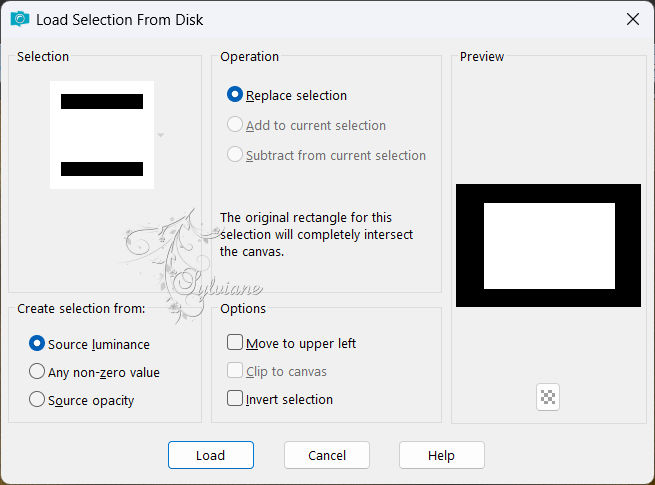
11.
Selections - Load / Save - Load selection from disk - edith_1
12.
Layers - New Raster Layer
Edit copy in misted of your choice
paste into selection in your work.
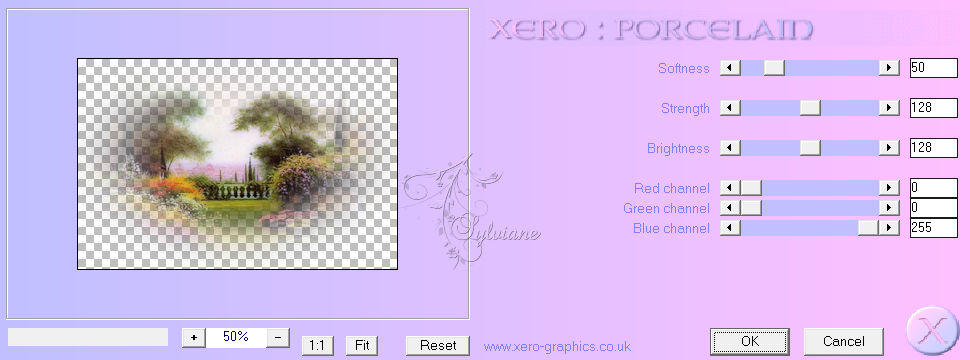
13.
Effects - plugin - Xero - Porcelain (Default)
14.
Selections - Invert
15.
Effects - 3 D effects - Drop shadow
0/0/80/40 - color:#000000
Selection - Select None
16.
Layers - New Raster Layer
fill in the color ?ffffff
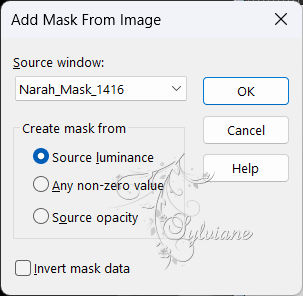
17.
Layers - New Mask Layer - From Image - Mask Narah_1416
Layers - Merge - Merge Group
18.
Blend Mode :Overlay
19.
Adjust – scharpness – scharpen more
20.
Activate Raster_1
21.
Activate Pick Tool Tool elevate up to 150 as in print
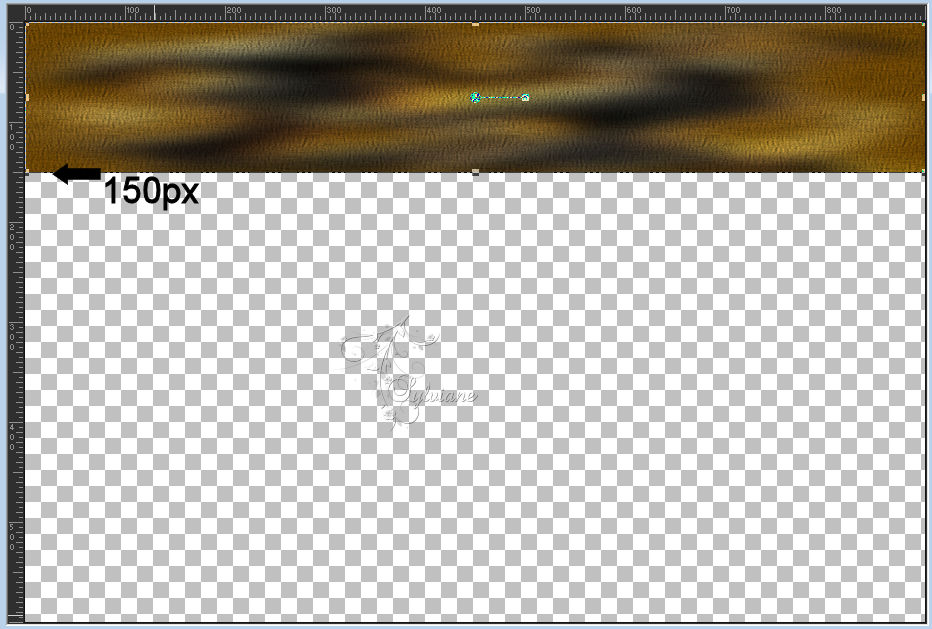
22.
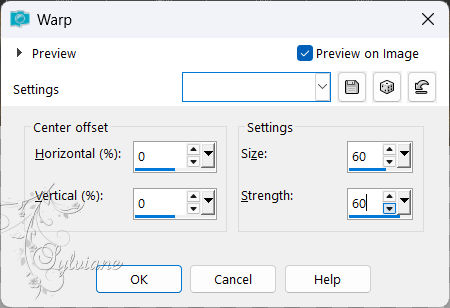
Effects - Distortion Effects - warp
23.
Adjust - One-Step Photo Fix
24.
Effects - 3 D effects - Drop shadow
0/0/80/40 - color:#000000
Selection - Select None
25.
Layers – arrange – bring to top
open gen_accents_pointyflowers
Edit – Copy
Edit - Paste as new layer
26.
Open Texto._1pspimage
Edit – Copy
Edit - Paste as new layer
27.
Open main tube
Edit – Copy
Edit - Paste as new layer
using drop shadow
Adjust – scharpness – scharpen
If you prefer to use xero ? porcelain (item 14 )

28.
Image - Add Borders – Symmetric - 2 px - color Foreground( #694507)
29.
Image - Add Borders – Symmetric -50 px - color #ffffff
30.
Select with Magic Wand fill with a Gradient Radial in the colors of item 1.

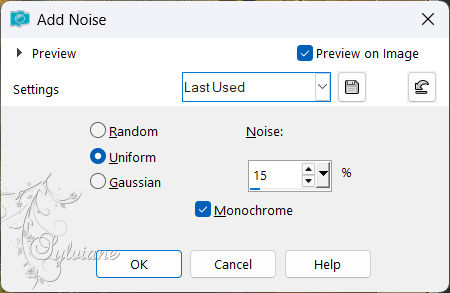
31.
Adjust - Add / Remove Noise - Add Noise
32.
Effects - user defined filter - emboss 3
33.
Adjust – scharpness – scharpen
34.
Selections - Invert
35.
Effects - 3 D effects - Drop shadow
?0/0/100/50 - color #000000
Selection - Select None
36.
Image - Add Borders – Symmetric - 2 px. - Backgroud's color (?f6c77 )
37.
Resize for 950 px
38.
put your watermark on it
Layer – merge – merge all (flatten)
Save as JPEG
Back
Copyright Translation 2024 by SvC-Design
------------------------------------------------------------------------------
Thanks to all who created