
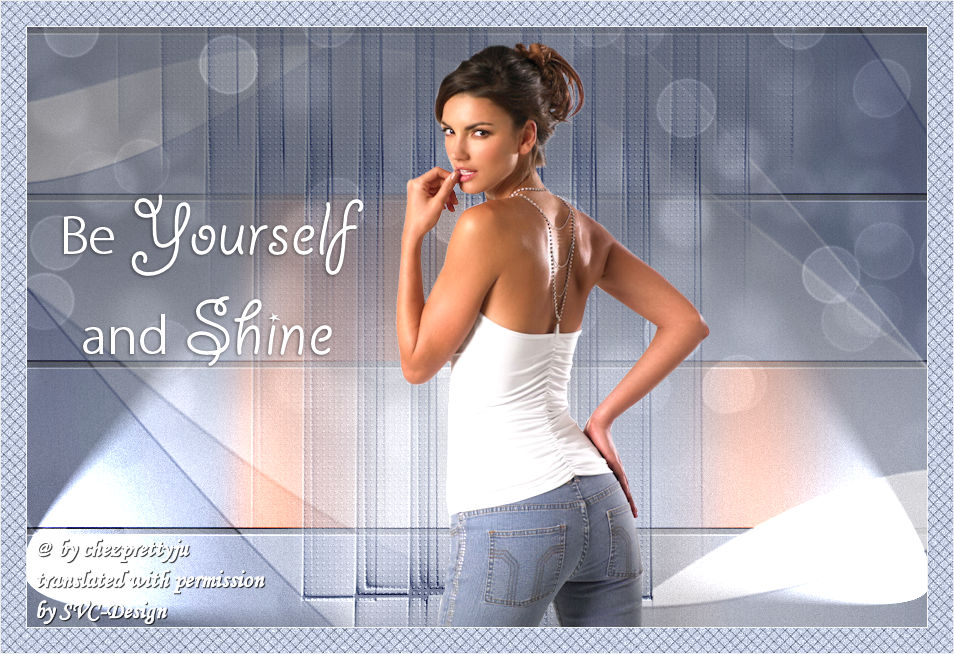
This lesson is made with PSPX9
But is good with other versions.
© by SvC-Design
Materialen Download :
Here
******************************************************************
Materials:
Preset_Lights_PrettyJu_BeYourself_spots.PspScript
PrettyJu_BeYourself_Ligths.png
PrettyJu_BeYourself_Mask1.jpg
PrettyJu_BeYourself_Mask2.jpg
PrettyJu_BeYourself_Wa.png
******************************************************************
Plugin:
Plug-ins - I.C.NET Software - Filter Unlimited - It@lian Editors Effect - Effetto Tv
Plug-ins - Carolaine and Sensibility - CS LDots
Plug-ins - Flaming Pear - BossEmboss
Plug-ins - Carolaine and Sensibility - CS DLines
******************************************************************
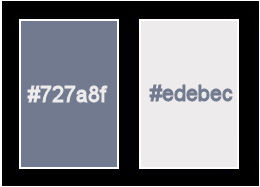
color palette
:
******************************************************************
methode
When using other tubes and colors, the mixing mode and / or layer coverage may differ
******************************************************************
General Preparations:
First install your filters for your PSP!
Masks: Save to your mask folder in PSP, unless noted otherwise
Texture & Pattern: Save to your Texture Folder in PSP
Selections: Save to your folder Selections in PSP
Open your tubes in PSP
******************************************************************
We will start - Have fun!
Remember to save your work on a regular basis
******************************************************************
1.
Open your tube
Edit – Copy
edit - paste as a new image
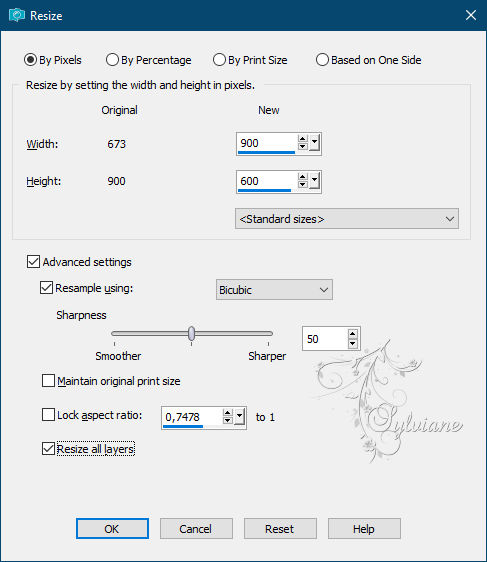
Image - Resize 900 x 600 (all layers, DO not lock proportions)
2.
Layers - New Raster Layer
3.
Fill it with your forground color
4.
Layers – arrange – move down
5.
Layers - Merge - Merge visible layers
6.
Adjust - blur - gaussian blur
Blur (15).
7.
Plug-ins - I.C.NET Software - Filter Unlimited - It@lian Editors Effect - Effetto Tv
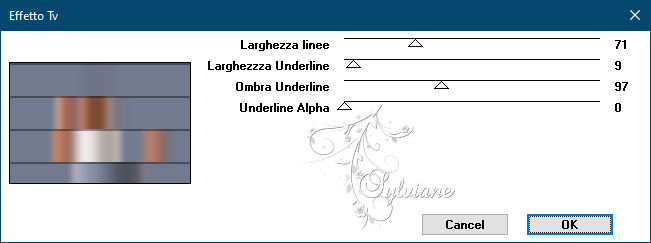
8.
Layers - New Raster Layer
9.
Fill it with your background color
10.
Layers - New Mask Layer - From Image - PrettyJu_BeYourself_Mask1.jpg
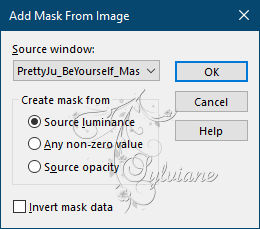
11.
Layers - Merge - Merge Group
12.
Lower the opacity of the layer to 80%.
13.
Layers - New Raster Layer
14
Fill it with your forground color
15.
Layers - New Mask Layer - From Image - PrettyJu_BeYourself_Mask2.jpg
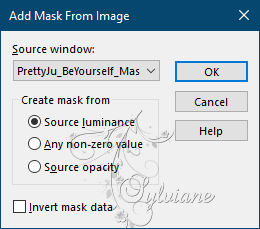
16.
Layers - Merge - Merge Group
17.
Effects - 3 D effects - Drop shadow
1/-1/60/30 color:#ffffff
18.
Plug-ins - Carolaine and Sensibility - CS LDots
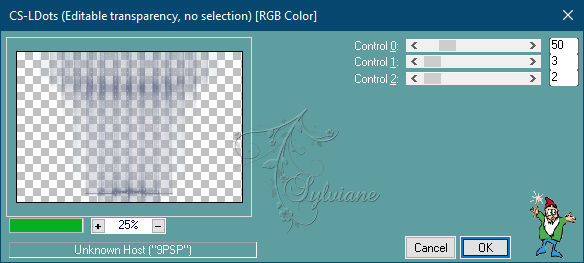
19.
Layers - Merge - Merge visible layers
20.
Plug-ins - Flaming Pear - BossEmboss
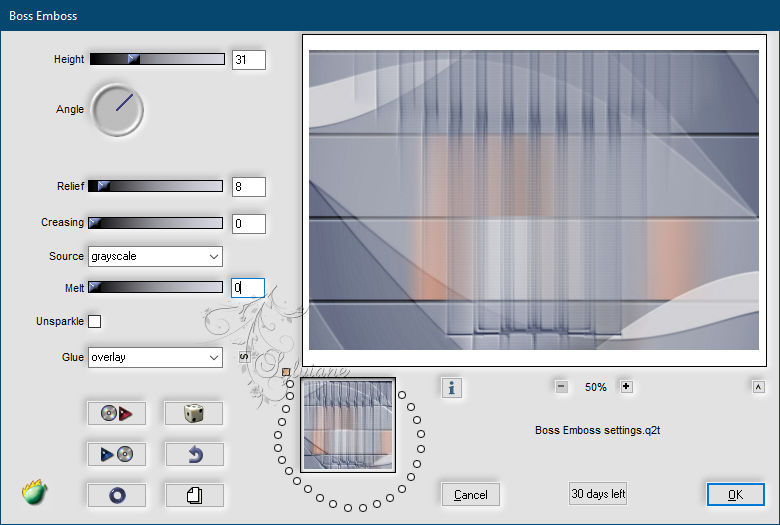
21.
Adjust - Add / Remove Noise - Add Noise
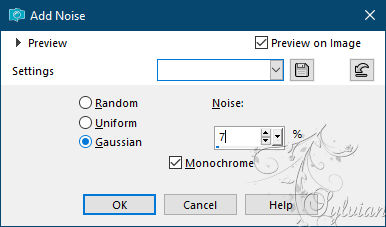
22.
Open PrettyJu_BeYourself_Ligths.png
Edit – Copy
Edit - Paste as new layer
Blenmode : Luminance H.
23.
Lower the opacity of the layer to 70%.
24.
Open your tube
Edit – Copy
Edit - Paste as new layer
Resize the character tube if necessary.
put it in the example
25.
Layers - Merge - Merge visible layers
26.
Effects - Lighting effects - Projectors...: Apply the preset "PrettyJu_BeYourself_spots"

27.
Open PrettyJu_BeYourself_Wa.png
Edit – Copy
Edit - Paste as new layer
put it in the example
Color it according to your colors
28.
Effects - 3 D effects - Drop shadow
1/-1/50/5 color:#000000
29.
Image - Add Borders – Symmetric – 1 pixel – background color
30.
Image - Add Borders – Symmetric – 25 pixels – foreground color
31.
activate the magic wand and select the border
32.
Plug-ins - Carolaine and Sensibility - CS DLines
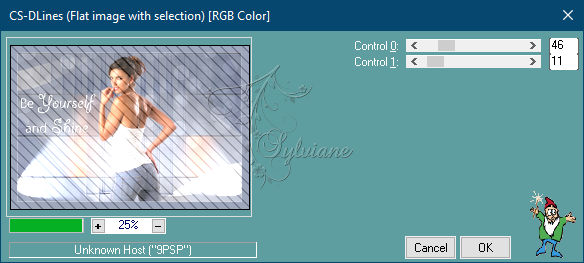
33.
Image - Mirror – mirror Horizontal
34.
Plug-ins - Carolaine and Sensibility - CS DLines (same parameters)

35.
Adjust - Add / Remove Noise - Add Noise
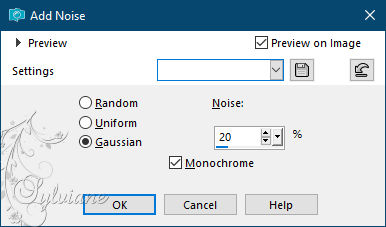
36.
Selection - Select None
37.
Image - Add Borders – Symmetric – 1 pixel – background color
38.
put your watermark on it
Layer – merge – merge all (flatten)
39.
Save as JPEG
Back
Copyright Translation © 2021 by SvC-Design