
This lesson is made with PSPX9
But is good with other versions.
© by SvC-Design
Materialen Download :
Here
******************************************************************
Materials:
©BelindaGraphic.Mask24
NarahsMasks_1726
nature
Preset-Nature-Flexify2.q2q
Nature-Preset
Nature-1.PspSelection
Nature-2.PspSelection
Nature-3.PspSelection
Deco-1
Deco-2
Deco-3
Deco-4
Leny-gezicht306
CalqueAlpha-Nature
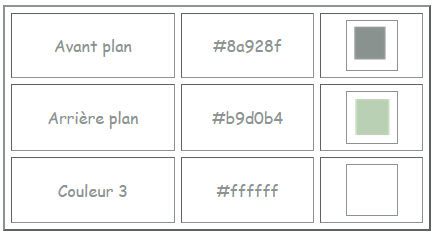
PALETTE
******************************************************************
Plugin:
Effects – plugins - Flaming pear - Flexify2
Effects – plugins - Carolaine&Sensibillity - CS LDots.
Effects – plugin - Carolaine&Sensibility - CSHlines.
Effects – plugin - Mura's Meister - Perspective tiling
Effects – plugins - Alien skin eyes Candy5 :Impact – Perspective shadow
Effects – plugins - AAA Frames - Foto frame
******************************************************************
color palette
:
******************************************************************
methode
When using other tubes and colors, the mixing mode and / or layer coverage may differ
******************************************************************
General Preparations:
First install your filters for your PSP!
Masks: Save to your mask folder in PSP, unless noted otherwise
Texture & Pattern: Save to your Texture Folder in PSP
Selections: Save to your folder Selections in PSP
Open your tubes in PSP
******************************************************************
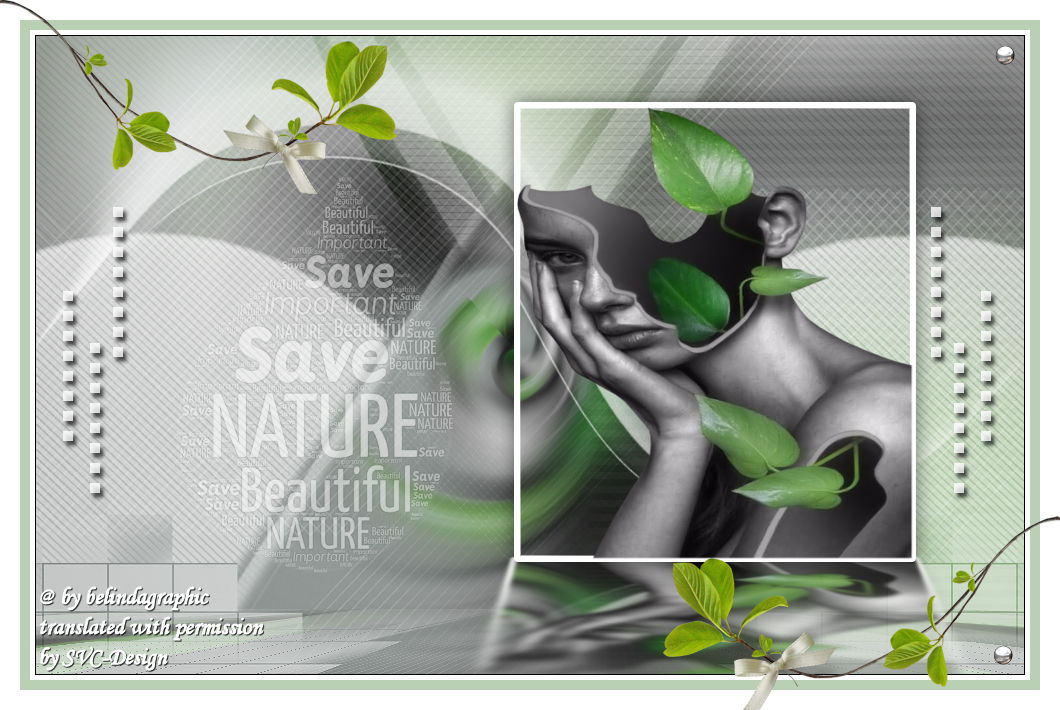
We will start - Have fun!
Remember to save your work on a regular basis
******************************************************************
Foreground color # 1
Background color # 2
1.
Open CalqueAlpha-Nature
Window - duplicate
Minimize the original - we are working on the copy
Or Open a new transparent image of1000x650 pixel
Fill the layer with color #8a928f
Selections - Select all
Layers - New raster layer.
Open Leny-gezicht306
Edit - Copy
Edit - Paste into selection
Selection - Select None
2.
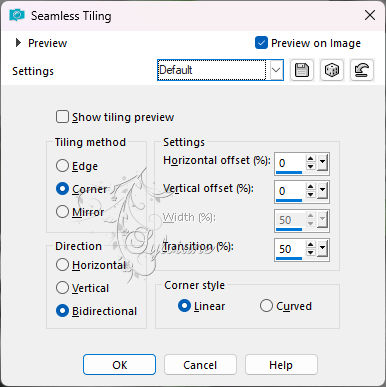
Effects - Image Effects - Seamless Tiling - default
3.
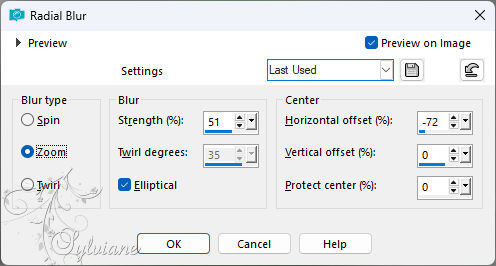
Adjust - blur - radial blur
Adjust – scharpness – scharpen
4.
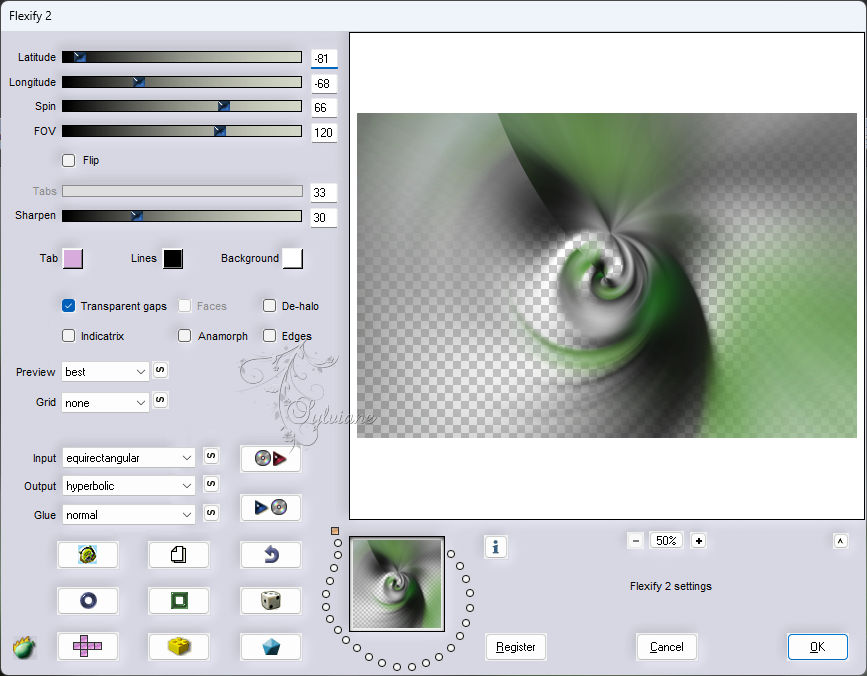
Effects – plugins - Flaming pear - Flexify2
Load the preset by clicking on the red arrow as shown below.

5.
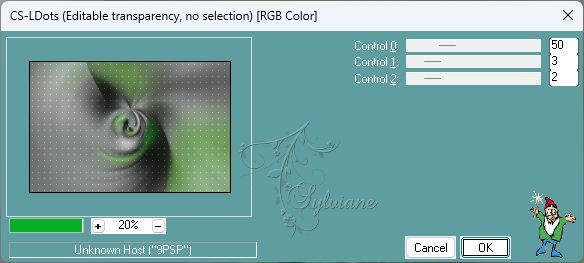
Effects – plugins - Carolaine&Sensibillity - CS LDots.
Layers - Merge - Merge visible layers
6.
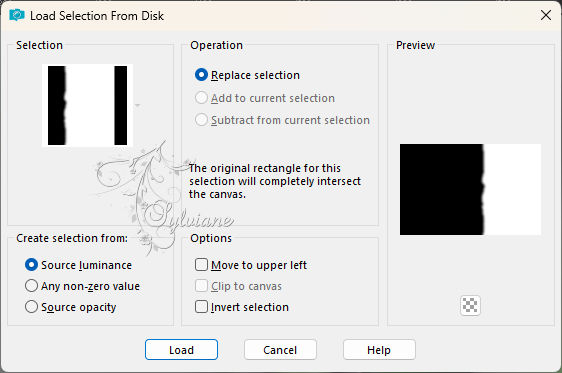
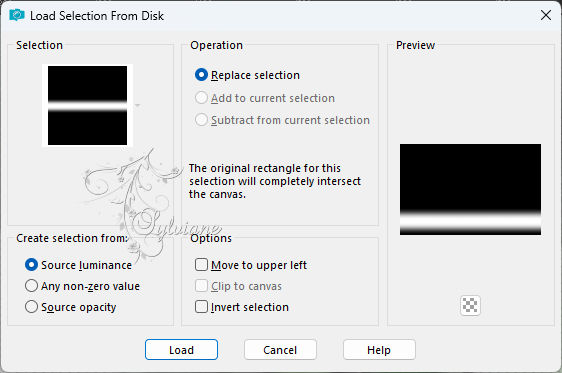
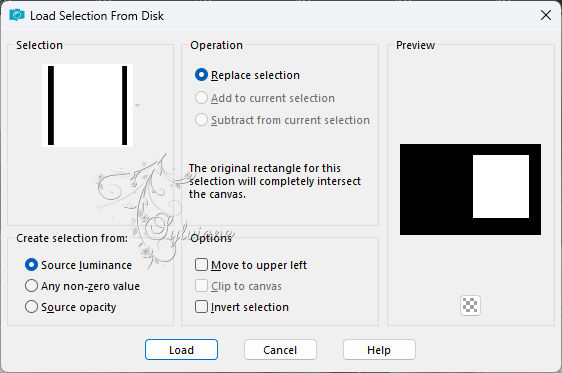
Selections - Load / Save - Load selection from Alpha Channel - selection#1.
Selections – Promote selections to layer
7.
Effects – plugin - Carolaine&Sensibility - CSHlines
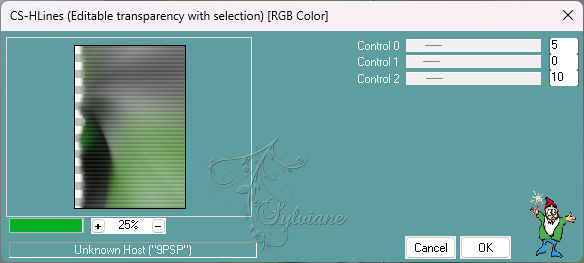
Selection - Select None
opacity: 32%.
Layers - Merge - Merge visible layers
8.
Layers - New raster layer.
Fill layer with color 3.
Open ©BelindaGraphic.Mask24
Layers - New Mask Layer - From Image - ©BelindaGraphic.Mask24

9.
Layers – duplicate the mask.
Layers - Merge - Merge Group
Blend mode: Soft light.
Adjust – scharpness – scharpen
10.
Layers - New raster layer.
Fill layer with color 3.
Open NarahsMasks_1726
Layers - New Mask Layer - From Image - NarahsMasks_1726

11.
Layers – duplicate the mask.
opacity: 46%.
Layers - Merge - Merge visible layers
12.
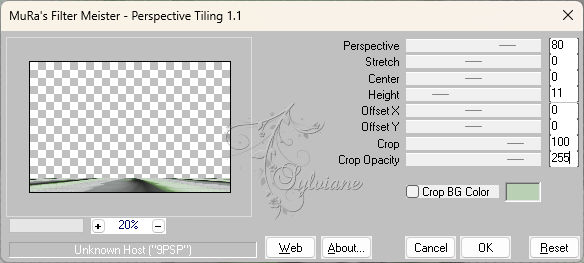
Layers - Duplicate.
Effects – plugin - Mura's Meister - Perspective tiling
13.
Stay on this layer.
Selections - Load / Save - Load selection from Alpha Channel - selection#2
Edit - Cut or press the “DELETE” key on your keyboard.
Selection - Select None
Adjust – scharpness – scharpen
14.
Open Deco-1
Edit - Copy.
Edit - Paste as new layer.
Using the “Move” tool, move the layer to the top of your document.
opacity: 67%.
Layers - Merge - Merge visible layers
15.
Selections - Load / Save - Load selection from Alpha Channel - selection#3
Selections – Promote selections to layer
Layers - New raster layer.
16.
Open Leny-gezicht306
Edit - Copy.
Edit - Paste into selection.
Keep selected.
17.
Activate Promoted Selection
Selections - modify - select selection borders
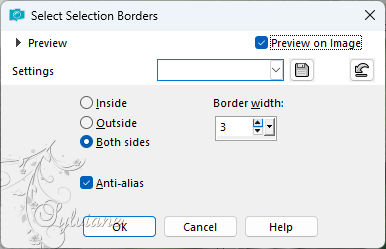
Fill border with color 3.
Selection - Select None
18.
Activate top layer.
Adjust – one step noise removal
Layers – merge – merge down
Effects - 3D Effects - Drop Shadow
0/ 0/ 50/ 30 - color #000000
19.
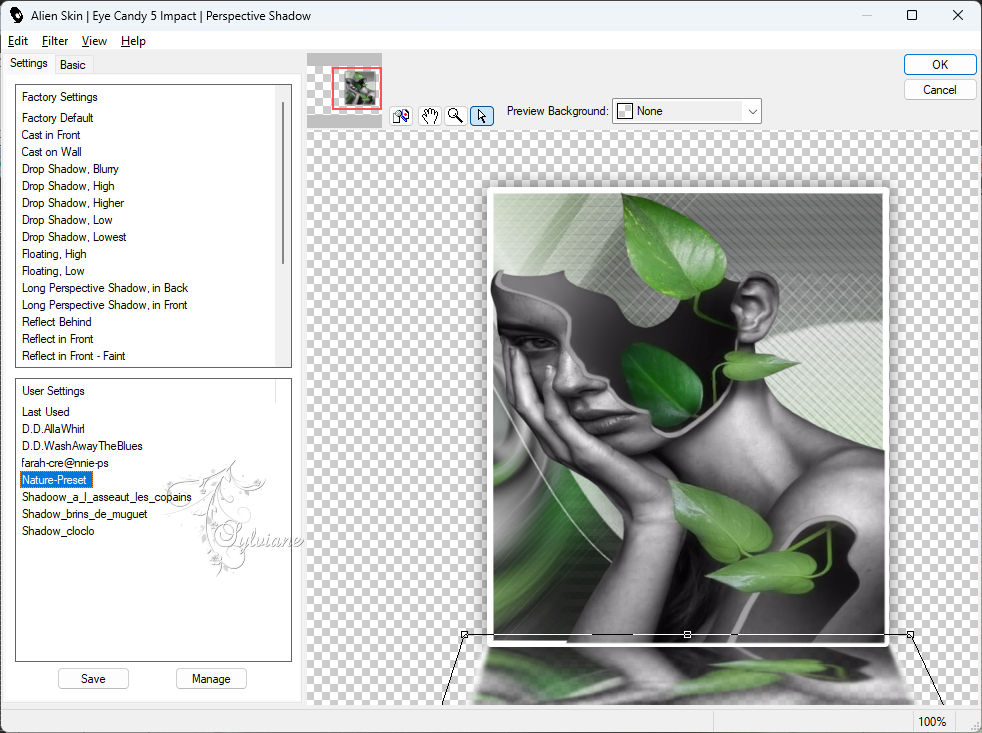
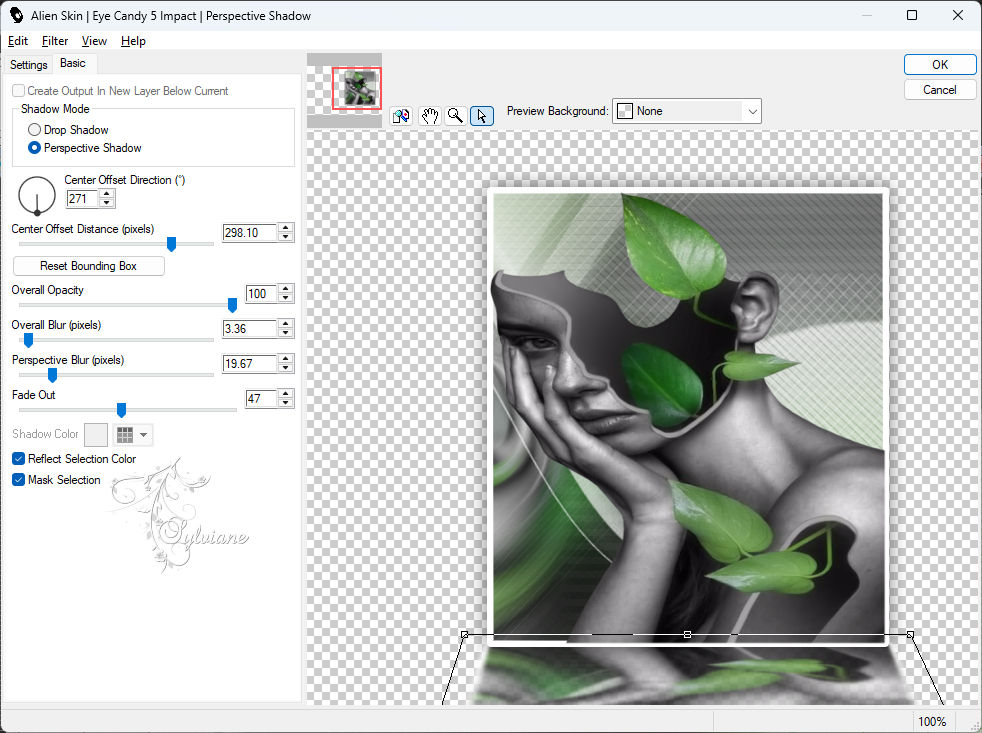
Effects – plugins - Alien skin eyes Candy5 :Impact – Perspective shadow
Apply “Nature” preset.
20.
Activate selection tool (Press K on your keyboard)
And enter the following parameters:
Pos X : 422 – Pos Y : 50
Press M.
21.
Layers - New raster layer.
Place color 3 in foreground.
Brush tool - Select “Nature” Brush.
Set tool parameters as follows:

Left-click and place as on final image.
Adjust – scharpness – scharpen
22.
Open Deco-2
Edit - Copy.
Edit - Paste as new layer.
It's in place.
23.
Open Deco-3
Edit - Copy.
Edit - Paste as new layer.
Activate selection tool (Press K on your keyboard)
And enter the following parameters:
Pos X : 15 – Pos Y : 15
Press M.
24.
Layers - Duplicate.
Image - Mirror – mirror Horizontal
Layers - Merge - Merge visible layers
25.
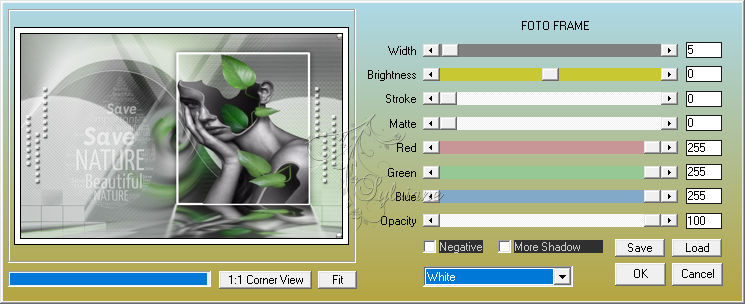
Effects – plugins - AAA Frames - Foto frame
26.
Image - Add Borders – Symmetric -10-pixel - background color.
Image - Add Borders – Symmetric -20-pixel - color 3
27.
Open Deco-4
Edit - Copy.
Edit - Paste as new layer.
It's in place.
28.
Add your signature on a new layer.
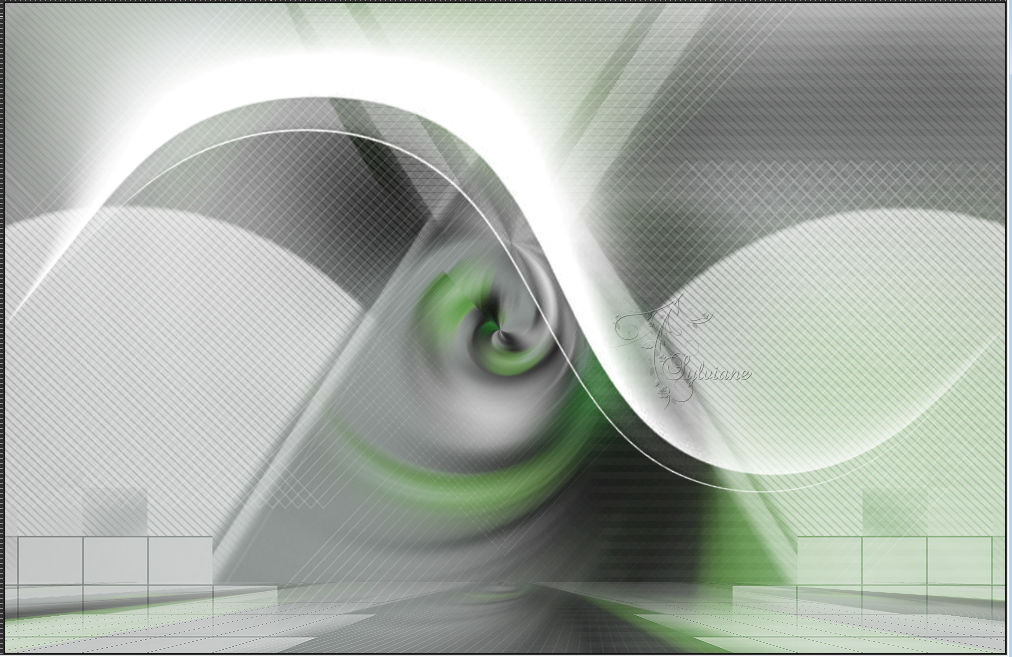
Layer – merge – merge all (flatten)
Image - Resize to 950 pixels wide.
Save as JPEG
Back
Copyright Translation 2024 by SvC-Design
------------------------------------------------------------------------------
Thanks to all who created