But is good with other versions.
******************************************************************
Materials:
ec02da17529d642a1f6e16d73a60b1e8
COULEURS VERSION 1
SELECTION 1 219.PspSelection
SELECTION 2 219.PspSelection
SELECTION 3 219.PspSelection
SELECTION 4 219.PspSelection
SELECTION 5 219.PspSelection
SELECTION 6 219.PspSelection
SELECTION 7 219.PspSelection
fc3a501b6d6a5b10b42529c5e880143f
JANVIER 2025 DOUCEUR 22 01 25 SWEETY
JANVIER 2025 ANNELAURE 20 01 25 SWEETY
SIGNATURE TUTORIELS
******************************************************************
Plugin:
Effects – plugin - Carolaine And Sensibility - CS Texture:
Effects – plugin - MuRa's Seamless - Emboss At Alpha
Effects – plugin - Toadies - What Are You
Effects – plugin - AP1 (Innovations) - Lines SilverLining - Breaks In Fence
******************************************************************
color palette
:

******************************************************************
methode
When using other tubes and colors, the mixing mode and / or layer coverage may differ
******************************************************************
General Preparations:
First install your filters for your PSP!
Masks: Save to your mask folder in PSP, unless noted otherwise
Texture & Pattern: Save to your Texture Folder in PSP
Selections: Save to your folder Selections in PSP
Open your tubes in PSP
******************************************************************
We will start - Have fun!
Remember to save your work on a regular basis
******************************************************************
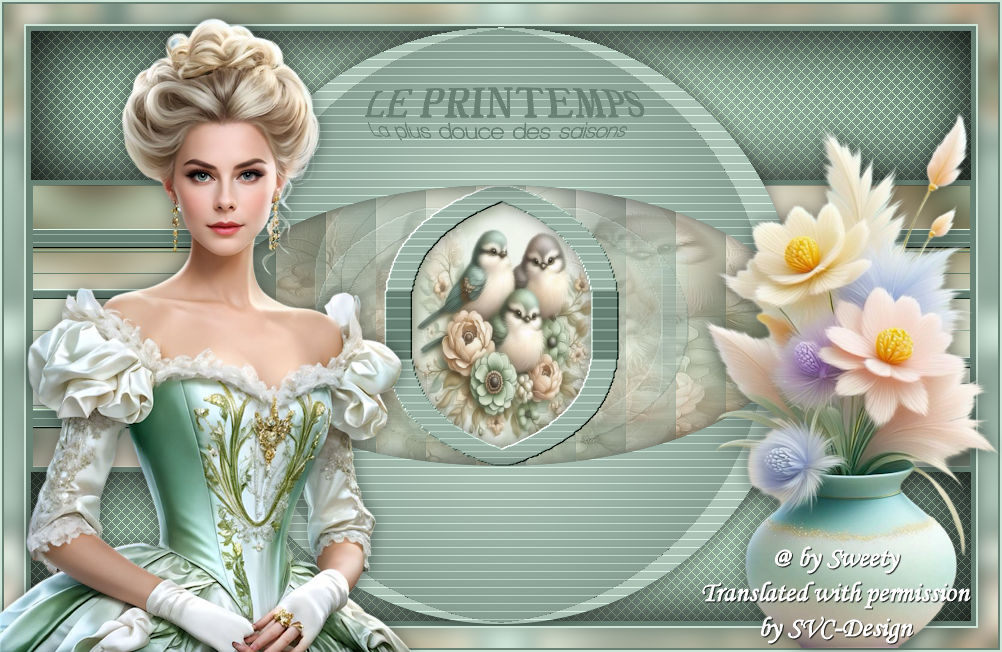
1.
Choose an image you like. Take two colours from it: Foreground(AVP): Dark
Background(ARP): Light.
Open a new transparent image of 950 x600px
Selections – select All
Open fc3a501b6d6a5b10b42529c5e880143f
Edit – Copy
Edit - Paste into selection
Selection - Select None
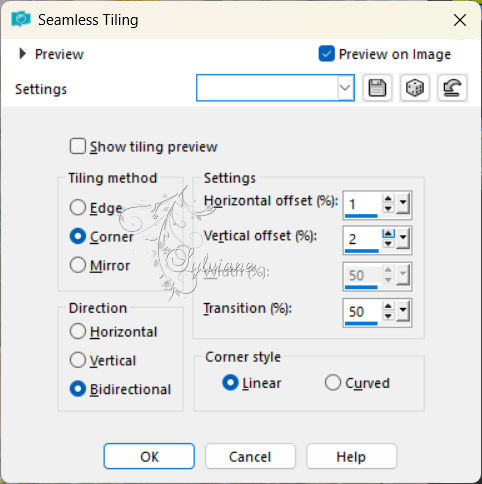
Effects - Image Effects - Seamless Tiling
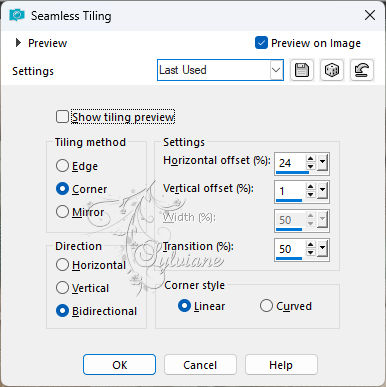
Adjust - blur - gaussian blur
Range: 15
==================================================
2.
Layers - New Raster Layer
Fill it with the AVP colour
OPTIONAL(I did it on my 2nd version) Depending on the colours you choose, you can apply : Graphics Plus Cross Shadow: Everything at 50 except the last line at 128
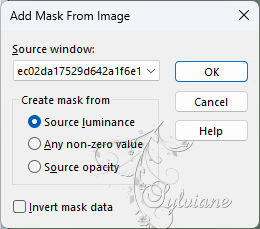
Open the mask * ec02da17529
Layers - New Mask Layer - From Image - ec02da17529d642a1f6e16d73a60b1e8
Layers - Merge - Merge Group
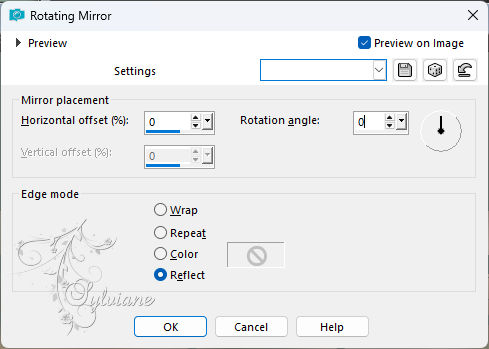
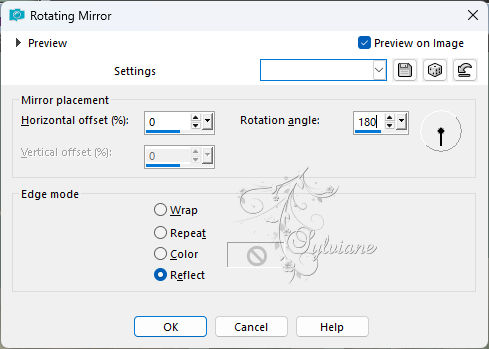
Effects – reflection effects – rotating mirror
==================================================
3.
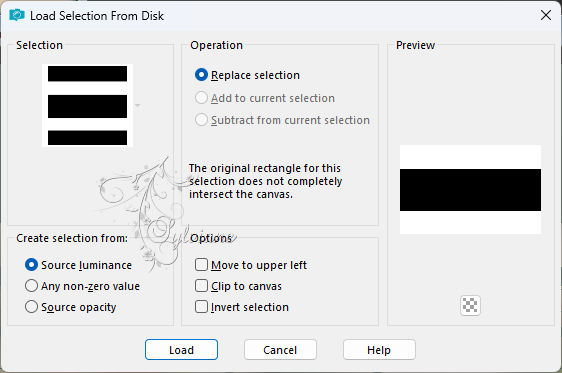
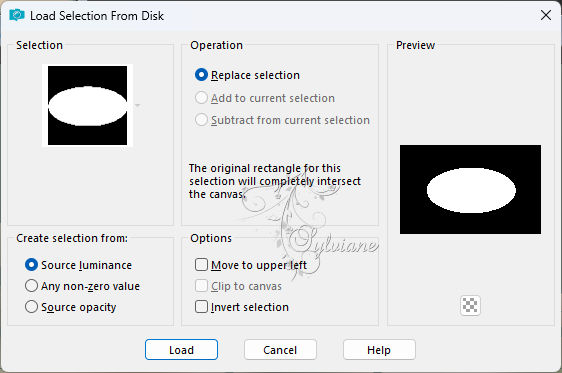
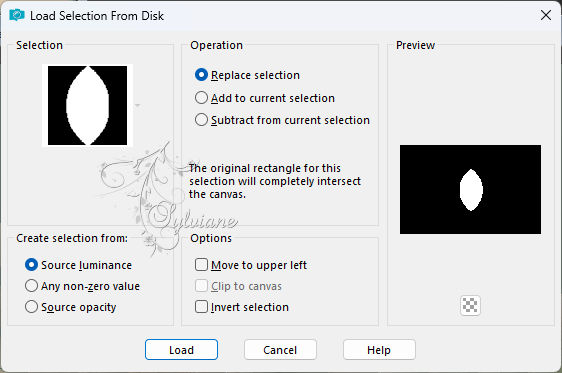
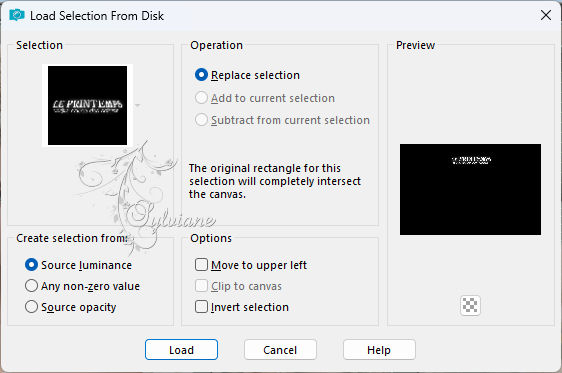
Selections - Load / Save - Load selection from disk - SELECTION 1 219.PspSelection.
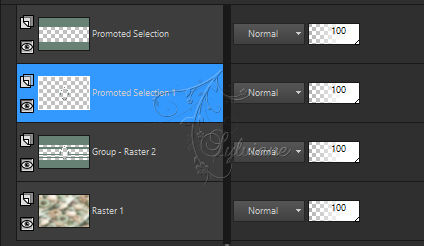
Selections – Promote selections to layer
Selection - Select None
Activate Group - Raster 2
Selections - Load / Save - Load selection from disk - SELECTION 2 219.PspSelection
Selections – Promote selections to layer
Selection - Select None
==================================================
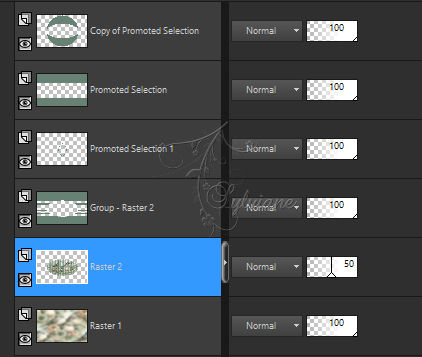
4.
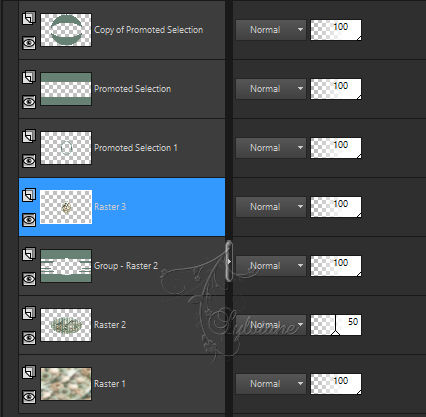
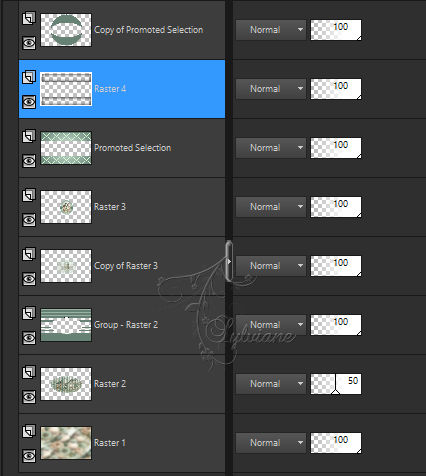
At the moment we have this:
We are stil on Promoted Selection 1
Activate Promoted Selection
Layers - duplicate
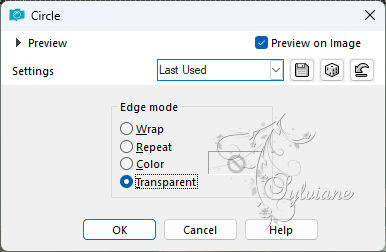
Effects - geometric effects – Circle
==================================================
5.
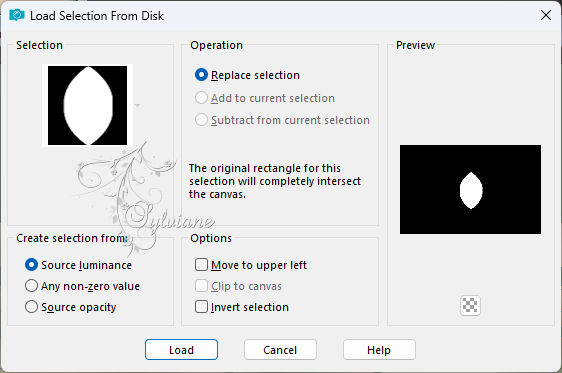
Selections - Load / Save - Load selection from disk - SELECTION 3 219.PspSelection
Return to the mask layer(Group - Raster 2)
press delete on your keyboard
KEEP SELECTION ACTIVE . ..
Layers - New Raster Layer
Edit - Paste into selection
Layers – arrange – move down
opacity : 50%.
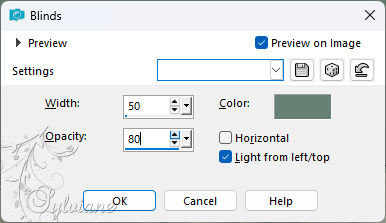
Effects - Texture Effects - Blinds color: ARP
Selection - Select None
Adjust – scharpness – scharpen
==================================================
6.
This is what we have:
We are on Raster 2
Activate Promoted Selection 1
Selections - Load / Save - Load selection from disk - SELECTION 2 219.PspSelection
Edit – clear
Selections - Load / Save - Load selection from disk - SELECTION 4 219.PspSelection (it replaces the previous selection)
Fill the selection with the AVP or ARP colour
Keep the selection active
==================================================
7.
Selection - modify - contract -20 px
DELETE or DELETE using the keyboard.
Selections – select All
Selections – float
Selections – defloat
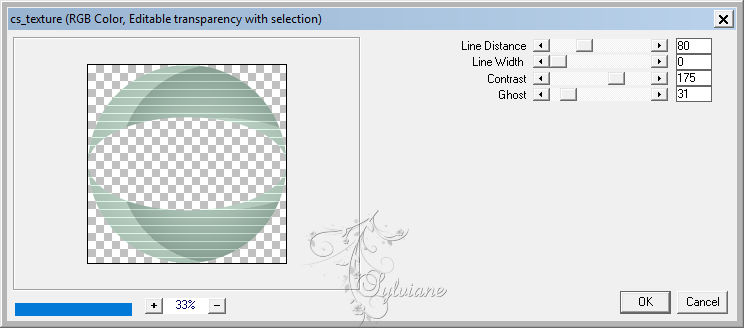
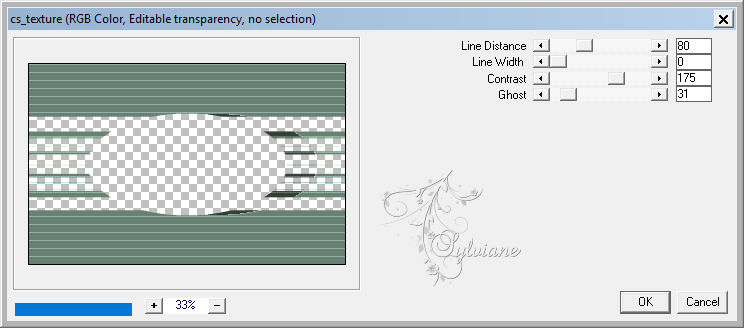
Effects – plugin - Carolaine And Sensibility - CS Texture:
Selection - Select None
Effects – reflection effects – rotating mirror
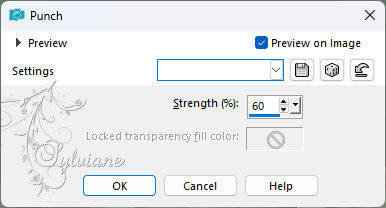
Effects – distortion effects – punch
==================================================
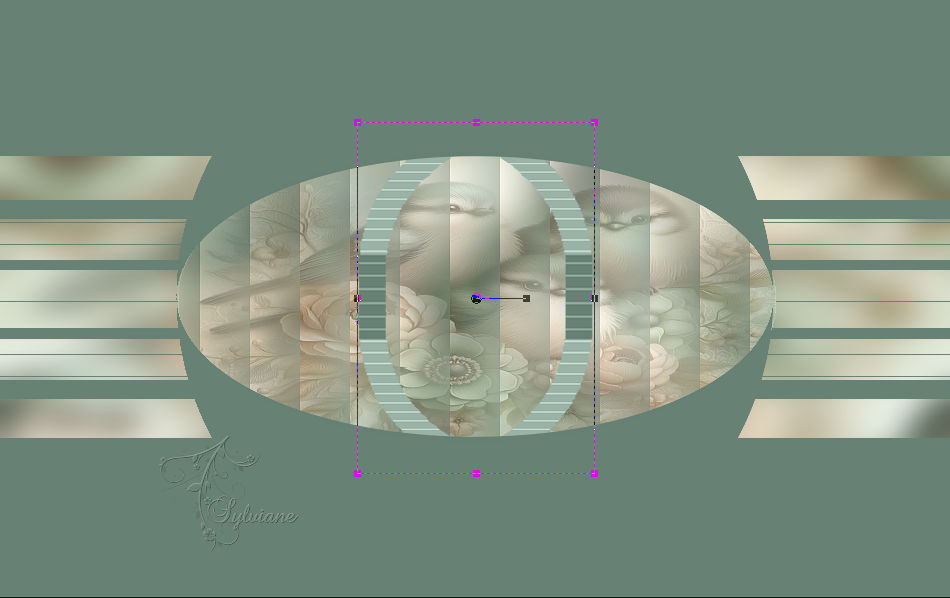
8.
We are still Promoted Selection 1
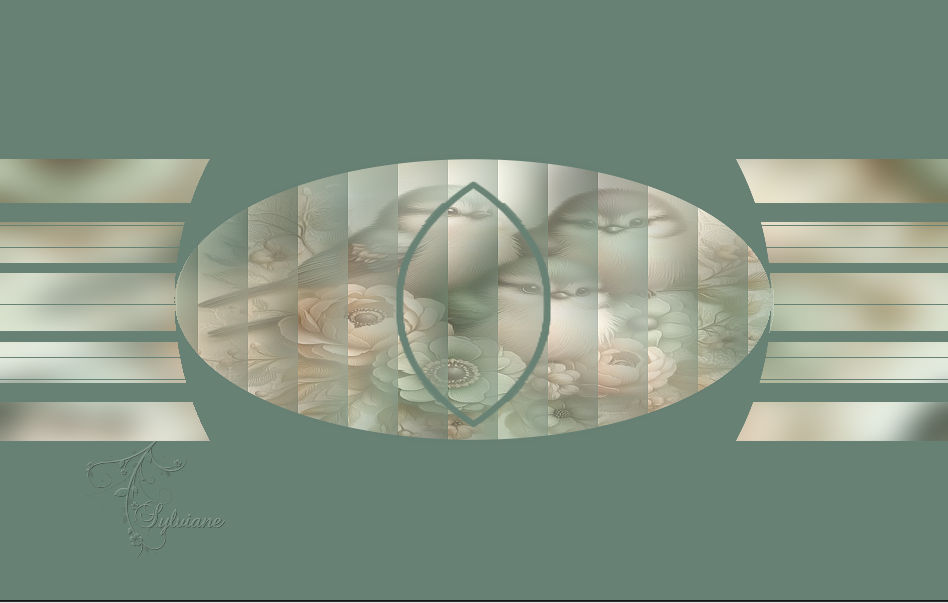
Activate the selector tool (K on the keyboard) and arrange as shown in my screenshot:
before:
after :

Magic Wand====> Tolerance 0

Click inside the shape we have just made:
Layers - New Raster Layer
Layers – arrange – move down
Selections – modify – expand – 1px
Activate fc3a501b6d6a5b10b42529c5e880143f
Edit – Copy
Edit - Paste into selection
Selections - Invert
Effects - 3 D effects - Drop shadow
0 / 0 / 50 / 25 - color: Black
Selection - Select None
==================================================
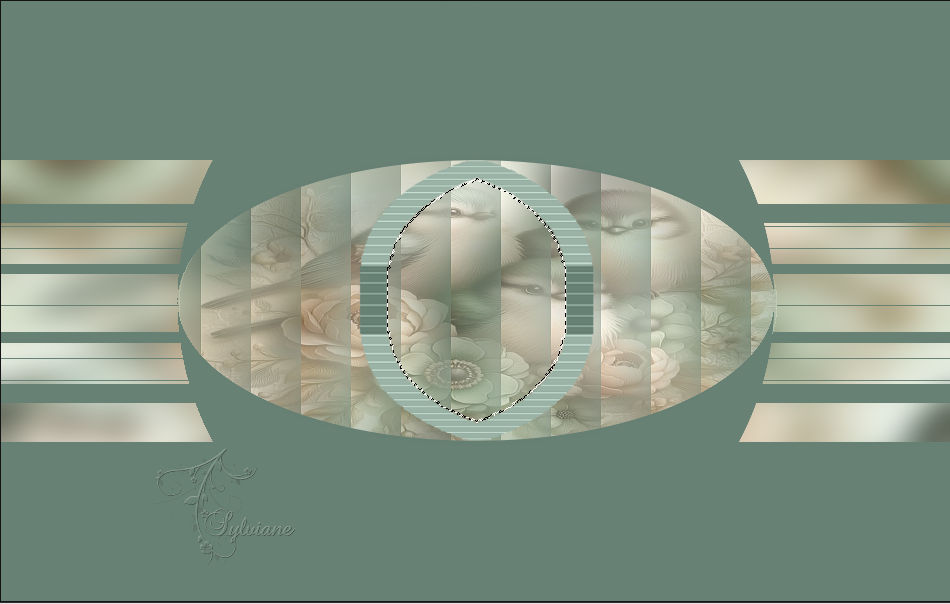
9.
At the moment it doesn't look like much (smile):
We're on Raster 3
Activate Promoted Selection 1
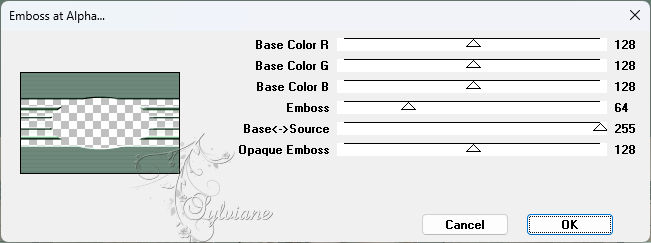
Effects – plugin - MuRa's Seamless - Emboss At Alpha - default :
Layers – merge – merge down
Layers - duplicate
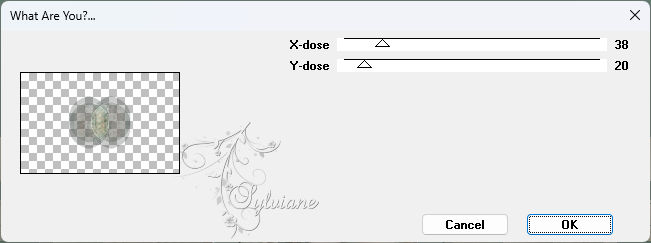
Effects – plugin - Toadies - What Are You
Layers – arrange – move down
Adjust – scharpness – scharpen
==================================================
10.
Activate Group - Raster 2
Effects – plugin - Carolaine And Sensibility - CS Texture:
Effects – plugin - MuRa's Seamless - Emboss At Alpha - default :
Effects – reflection effects – rotating mirror
==================================================
11.
Activate Promoted Selection
Selections - Load / Save - Load selection from disk - SELECTION 5 219.PspSelection

Selection - modify - contract -5 px
Prepare a Radial gradient:
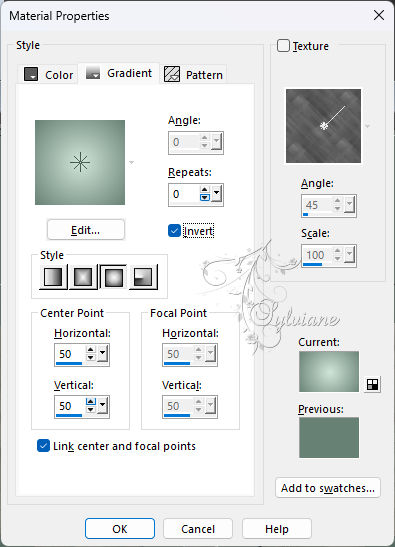
Fill the selection with this gradient ...
Effects – plugin - AP1 (Innovations) - Lines SilverLining - Breaks In Fence:
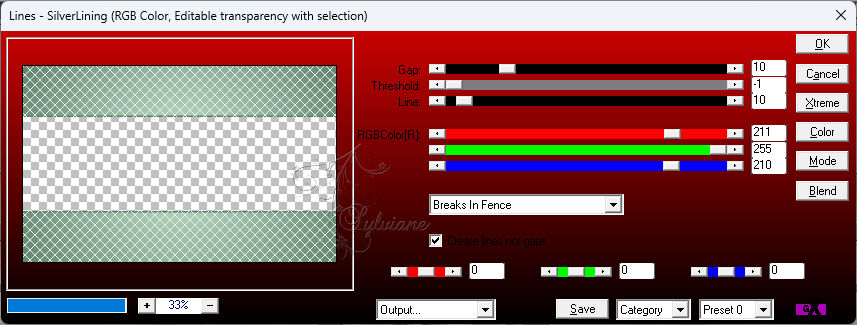
Blendmode: Luminance (H) or other as required
NOTE: FOR MY 2nd VERSION I HAVE NOT CHANGED THE LayR MODE
Layers - New Raster Layer
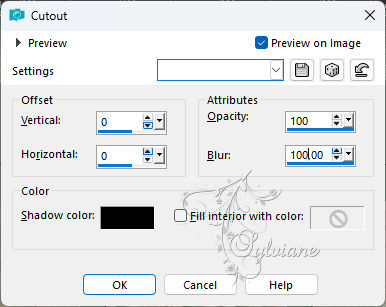
Effects - 3D effects – Cutout
Layers – merge – merge down
Selection - Select None
==================================================
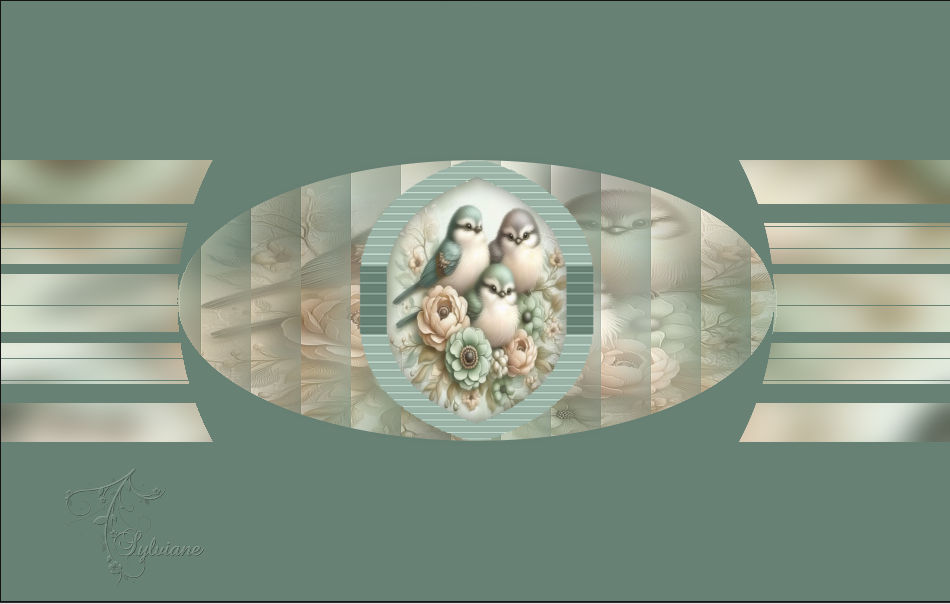
12.
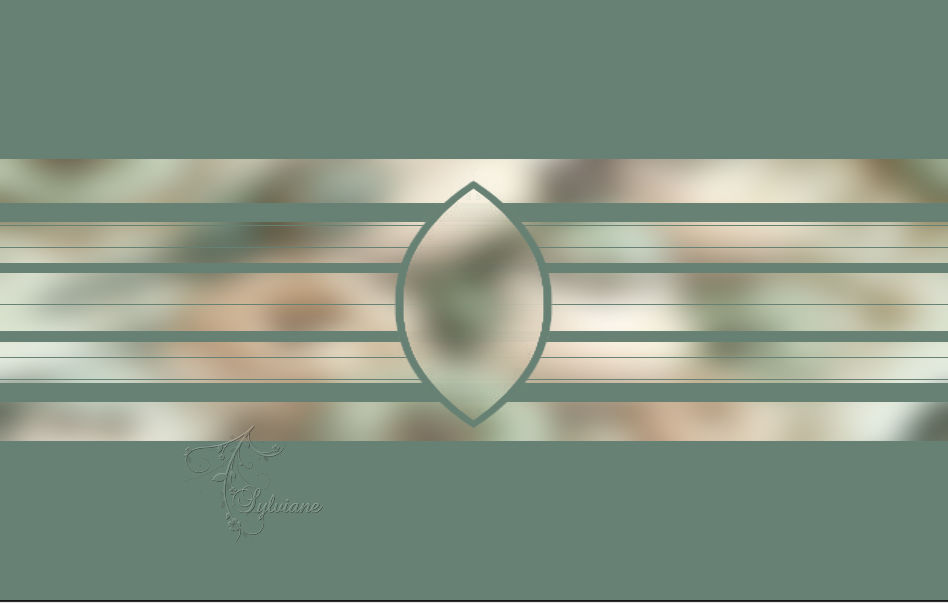
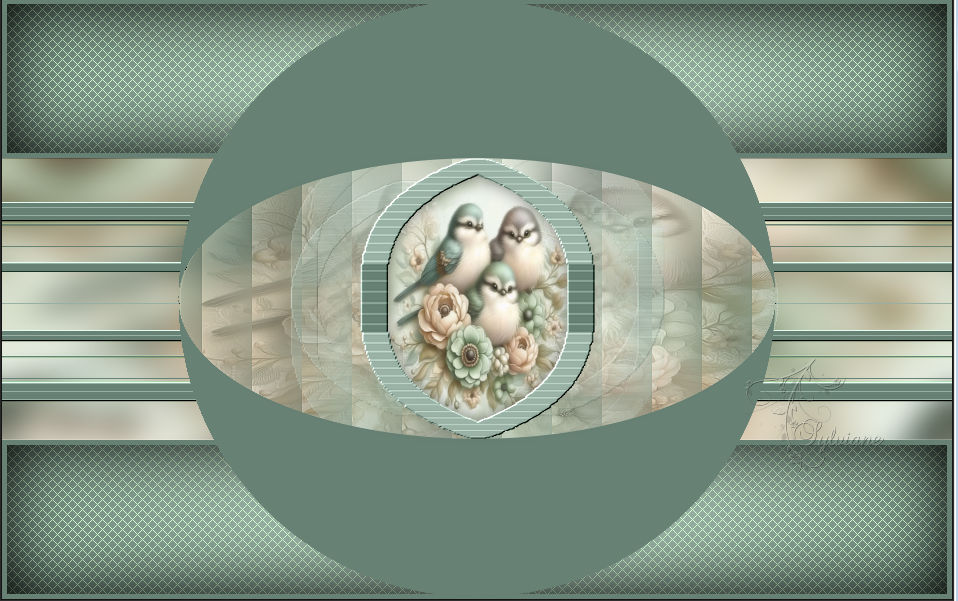
If you have followed me correctly, you should have this:
Activate Copy of Promoted Selection
Selections – select All
Selections – float
Selections – defloat
Fill the selection with the gradient.
Fill the selection with the Radial gradient (still in memory)
NOTE: FOR MY 2nd VERSION I DID NOT APPLY THE RADIAL GRADING
Effects – plugin - Carolaine And Sensibility - CS Texture - as step 7
Effects – reflection effects – rotating mirror
Selection - Select None
Effects - 3 D effects - Drop shadow
0 / 0 / 50 / 25 - #000000
==================================================
13.
Layers - New Raster Layer
Selections - Load / Save - Load selection from disk - SELECTION 6 219.PspSelection

Fill selection with colour AVP
Selection - Select None
Layers – arrange – move down (2x)
Image - Add Borders – Symmetric – 2px - color: ARP
==================================================
14.
Selections – select All
Image - Add Borders – Symmetric – 20px - (any colour)
Effects - Image Effects - Seamless Tiling
Selections - Invert
Adjust - blur - gaussian blur
Radius :10
Selection - Select None
Image - Add Borders – Symmetric – 2px – color: AVP
Image - Add Borders – Symmetric – 2px – color:ARP
==================================================
15.
Open JANVIER 2025 ANNELAURE 20 01 25 SWEETY
Edit – Copy
Edit - Paste as new layer
Image - Resize - 60%
No check mark on resize all layers
place as in the example
open JANVIER 2025 DOUCEUR 22 01 25 SWEETY
Edit – Copy
Edit - Paste as new layer
Image - Resize - 50%
No check mark on resize all layers
Image - Mirror – mirror Horizontal
place as in the example
Apply a drop shadow to each element as desired
==================================================
16.
Layers - New Raster Layer
Selections - Load / Save - Load selection from disk - SELECTION 7 219.PspSelection
OR the Pretty month of May selection -
Fill in the AVP or ARP colour selection as required.
You may need more than one
Selection - Select None
Place wherever you like...
For my 2 versions I did : Layers - duplicate
Blendmode : Screen
Layers – arrange – move down
Back to the original JUST ABOVE .
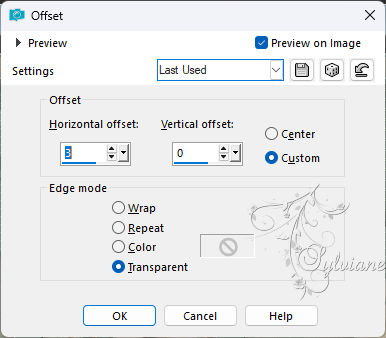
Effects - Image Effects - Offset
==================================================
17.
Add your signature and mine if you wish
Resize to 950 pixels
Save as JPEG
Back
Copyright Translation 2024 by SvC-Design
------------------------------------------------------------------------------
Thanks to all who created