
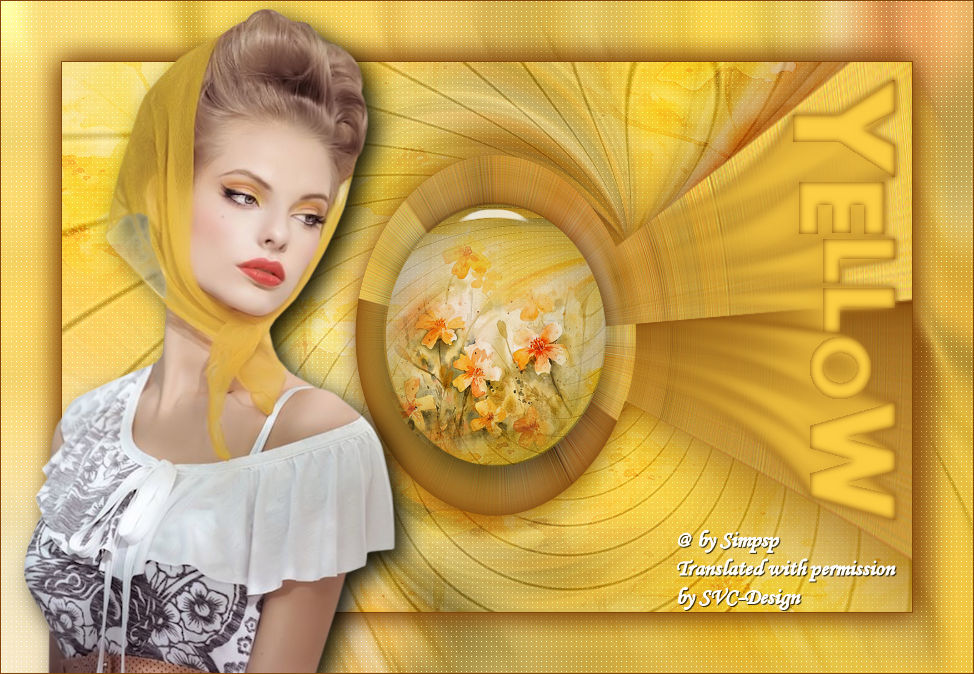
This lesson is made with PSPX9
But is good with other versions.
© by SvC-Design

Materialen Download :
Here
******************************************************************
Materials:
K@rine_dreams_Lady_Retro_3350_Mars_2016.png
MotionYellowSoxiki.f1s
nicole-mist-fleur2-2015.png
Yellow1Soxiki.PspSelection
yellowBySoxiki.f1s
yellowBySoxiki.q2q
******************************************************************
Plugin:
Plugins - UnPlugged Tools - Interlace
Plugins - Flaming Pear - Flexify 2
Plugins - Penta.com - color dot
Plugins - Mehdi - Weaver
Plugins - Alien Skin Eye Candy 5 - Impact - Glass
Plugins - Alien Skin Eye Candy 5 - Impact - Motion Trail
******************************************************************
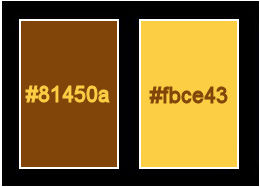
color palette
:
******************************************************************
methode
When using other tubes and colors, the mixing mode and / or layer coverage may differ
******************************************************************
General Preparations:
First install your filters for your PSP!
Masks: Save to your mask folder in PSP, unless noted otherwise
Texture & Pattern: Save to your Texture Folder in PSP
Selections: Save to your folder Selections in PSP
Open your tubes in PSP
******************************************************************
We will start - Have fun!
Remember to save your work on a regular basis
******************************************************************
1.
Open the material on the PSP, duplicate and close the originals.
Choose two colors to work with.
Foreground: #81450a
Background: #fbce43
2.
Open a new transparent image of 850x550 px
Paint with the color of the background.
Selections - Select All.
3.
Open nicole-mist-fleur2-2015.png
Edit - Copy
Edit - Paste Into Selection.
Selections - Select None.
4.
Effects - Image Effects - Seamless Tiling: Default.
5.
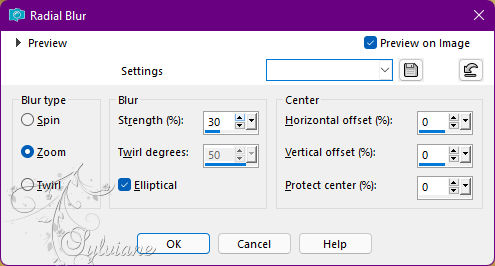
Adjust - Blur - Radial Blur:
Effects - Edge Effects - Enhance.
6.
Layers - Duplicate.
Close the visibility of Layer Copy of Raster 1.
Activate the Raster layer 1.
7.
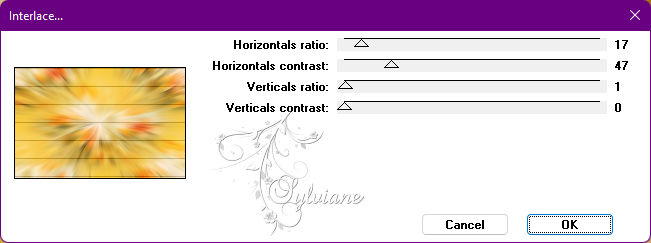
Plugins - UnPlugged Tools - Interlace
Adjust - Sharpness - Sharpen.
8.
Plugins - Flaming Pear - Flexify 2
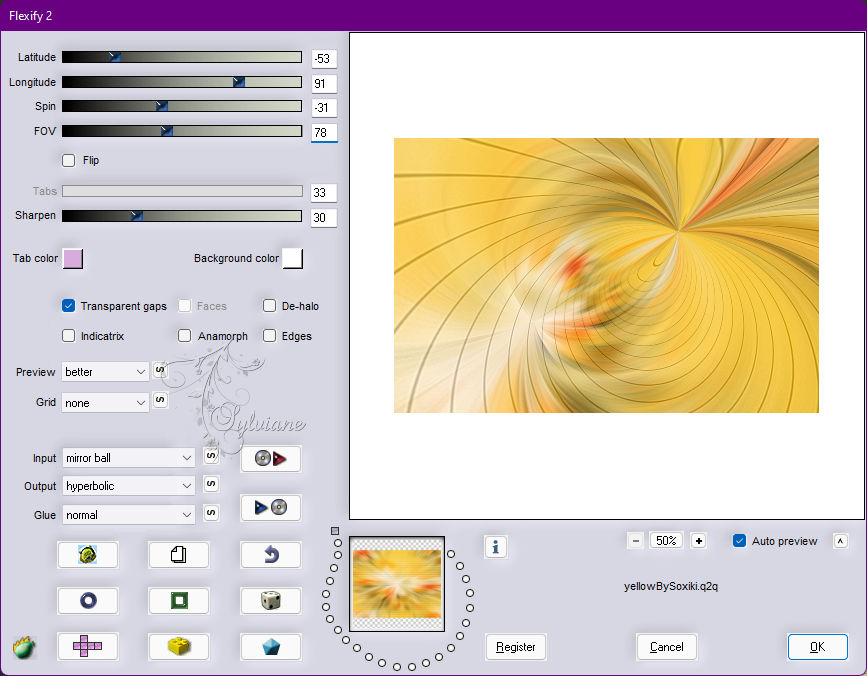
9.
Plugins - Penta.com - color dot
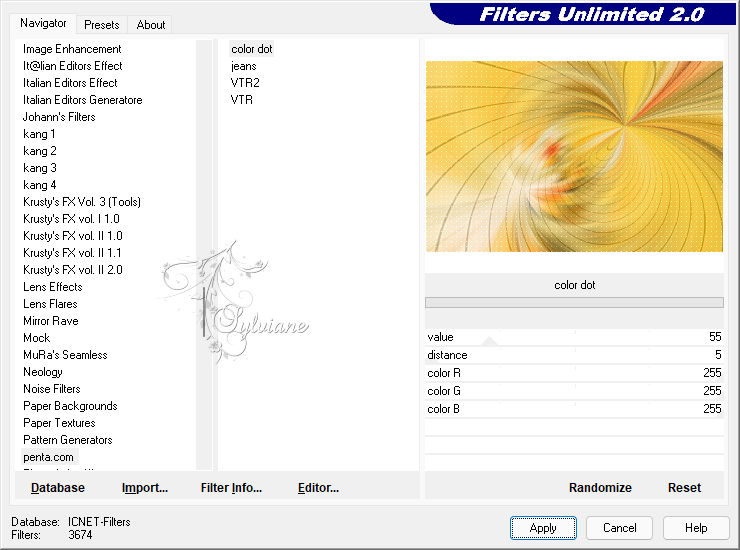
10.
Layers - New Raster Layer.
Selections - Select All
Open nicole-mist-fleur2-2015.png
Edit - Copy
Edit - Paste Into Selection.
Selections - Select None.
Effects - Image Effects - Seamless Tiling: Default.
Blend Mode: Soft Light.
Adjust - Sharpness - Sharpen.
11.
Enable and open layer copy of raster 1 visibility.
Effects - Image Effects - Seamless Tiling
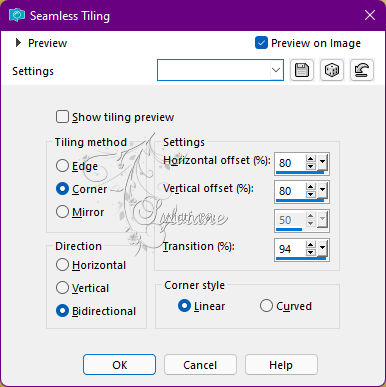
12.
Plugins - Mehdi - Weaver
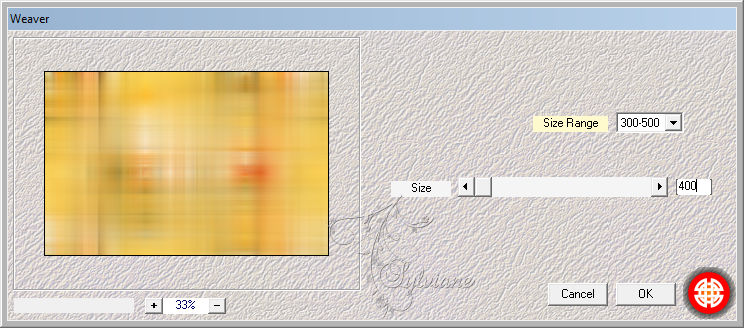
Effects - Edge Effects - Enhance.
Edit - Repeat Enhance Edges.
13.
Selections - Select All.
Selections - Modify - Contract: 75.
Press the Delete key on the keyboard.
Selections - Select None.
14.
Effects - Texture Effects - Weave
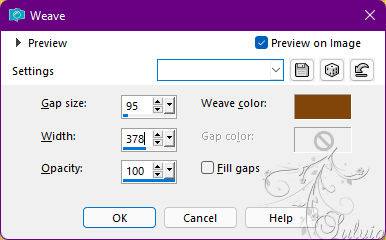
Weave Color: Foreground color.
Effects - 3D Effects - Drop Shadow:
0/ 0/ 100/ 60 - Color: foreground color.
15.
Plugin - Flaming Pear - Flexify 2
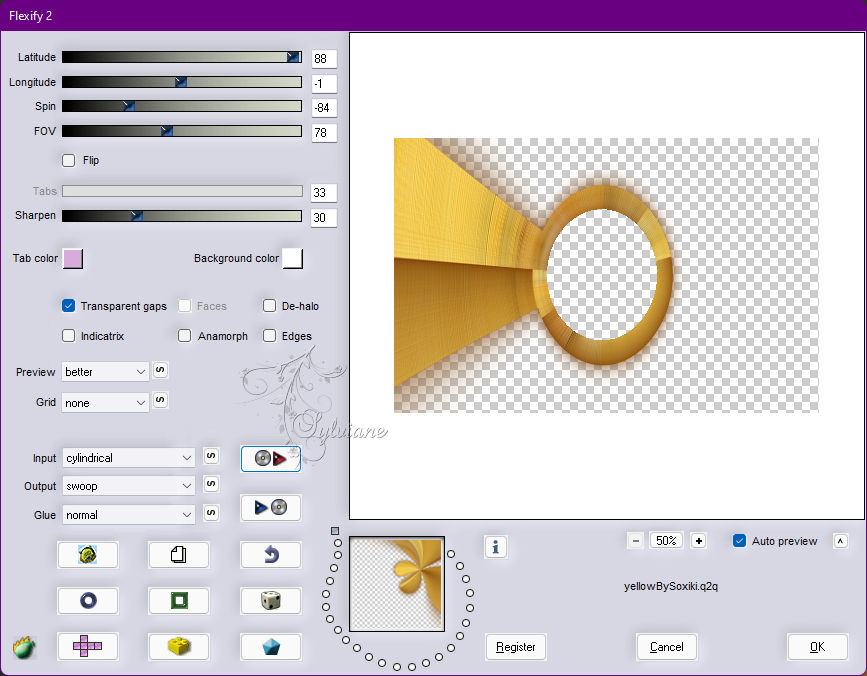
17.
Image - Mirror – mirror Horizontal
With Magic Wand: Tolerance and Feather: 0, select inside the circle.
Layers - New Raster Layer.
18.
Open nicole-mist-fleur2-2015.png
Edit - Copy
Edit - Paste Into Selection.
Adjust - Sharpens > Sharpen.
19.
Layers - New Raster Layer.
Selections - Modify - Expand Selection: 1.
Plugins - Alien Skin Eye Candy 5 - Impact - Glass
Settings: yellowBySoxiki
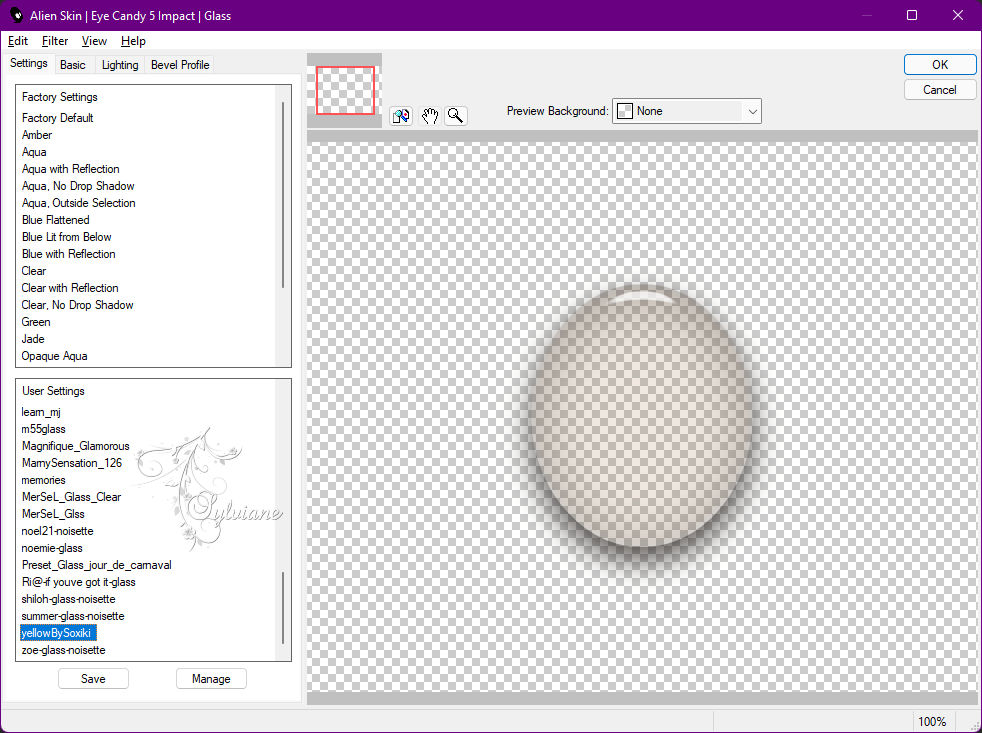
Selections - Select None.
20.
Layers - New Raster Layer.
Selections > Load/Save Selection > Load Selection From Disk: Yellow1Soxiki
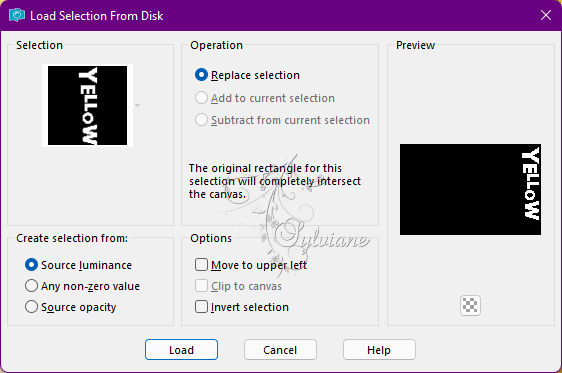
Effects - 3D Effects - Cutout.
Shadow color: Foreground color,
Fill interior with color: Background color.
Selections - Select None.
21.
Plugins - Alien Skin Eye Candy 5 - Impact - Motion Trail
Settings: MotionYellowSoxiki
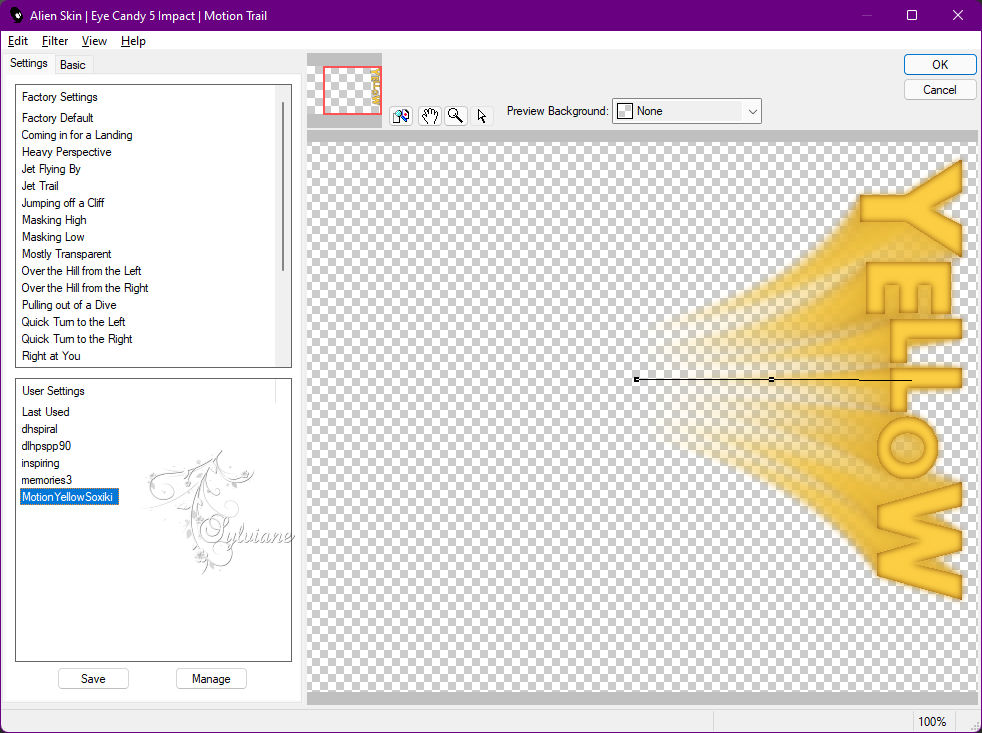
Effects - 3D Effects - Drop shadow:
0/ 0/100/ 5 - Color: Foreground color.
22.
Activate the Raster1 layer.
Edit - Copy.
Image - Add Borders - Symmetric: 1px - Color: Foreground color.
23.
Selections - Select All.
Image - Add Borders - Symmetric: 60px with any color.
Selections - Invert.
Edit - Paste Into Selection.
24.
Adjust - Blur - Motion Blur
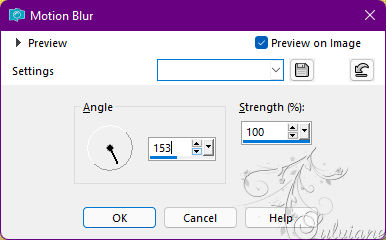
Edit - Repeat Motion Blur.
25.
Plugins - Penta.com - color dot
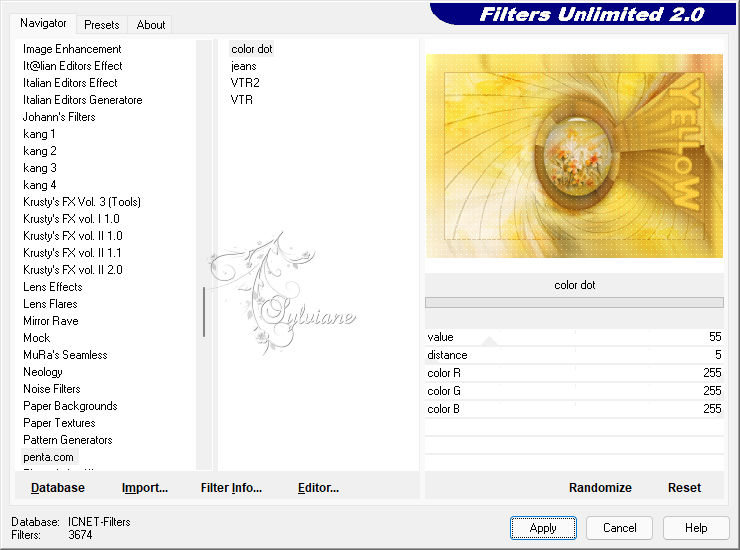
Edit - Repeat color dot.
26.
Selections - invert.
Effects - 3D Effects - Drop Shadow:
0/ 0/ 100/ 40 - Color: Foreground color.
Edit - Repeat Drop Shadow.
Selections - Select None.
27.
open K@rine_dreams_Lady_Retro_3350_Mars_2016.png
Edit - Copy
Edit - Paste As New Layer.
Position to the left.
Effects - 3D Effects - Drop Shadow of your choice.
28.
Image - Add Borders - Symmetric: 1px - Color: Foreground color.
29.
Apply your watermark or signature
Layer – merge – merge all (flatten)
Save as JPEG
Back
Copyright Translation © 2022 by SvC-Design