
This lesson is made with PSPX9
But is good with other versions.
© by SvC-Design
Materialen Download :
Here
******************************************************************
Materials:
DecorTHMansionByXiki.pspimage
TituloTHM_BySoxikibem.pspimage
072PaisagemByPqnaAlice.png
605MulherByPqnaAlice.png
******************************************************************
Plugin:
Plugins - Graphic Plus - Emboss
Plugins - Psychosis - Streaker
******************************************************************
color palette
:

******************************************************************
methode
When using other tubes and colors, the mixing mode and / or layer coverage may differ
******************************************************************
General Preparations:
First install your filters for your PSP!
Masks: Save to your mask folder in PSP, unless noted otherwise
Texture & Pattern: Save to your Texture Folder in PSP
Selections: Save to your folder Selections in PSP
Open your tubes in PSP
******************************************************************
We will start - Have fun!
Remember to save your work on a regular basis
******************************************************************
1.
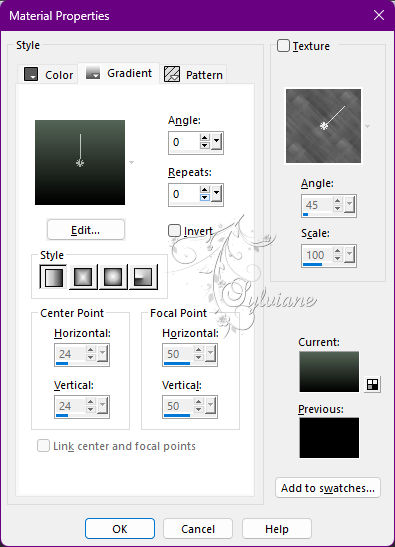
Choice 2 colors for work.
Foreground: #000000
Background: #546455
2.
Open a new transparent image of 900 x 450px
Paint with a Linear gradient formed by the colors of the Foreground and Background:
3.
Layers - New Raster Layer.
Selections - Select All.
Open 072PaisagemByPqnaAlice.png
Edit - Copy
Edit - Paste Into Selections.
Selections - Select None.
4.
Adjust - Blur - Motion Blur:
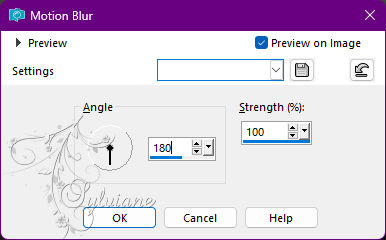
Edit - Repeat Motion Blur.
5.
Plugins - Graphic Plus - Emboss.
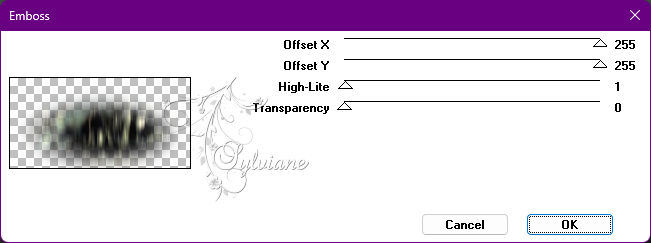
Blend Mode: Dissolve.
6.
Activate Layer Raster 1.
Layers - Duplicate.
Layers - Arrange - Bring to Top.
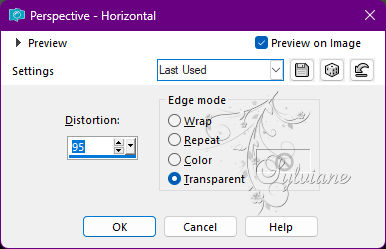
Effects - Geometric Effects - Perspective - Horizontal: 95, transparent.
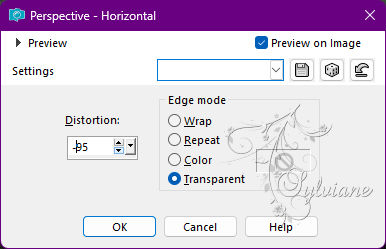
Repeat Perspective - Horizontal by changing the value to -95.
Adjust - Blur - Gaussian Blur: 5.
7.
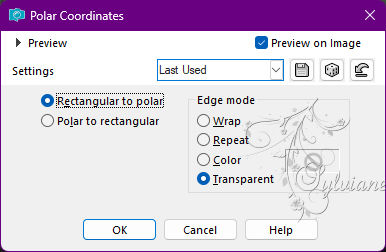
Effects - Distortion Effects - Polar Coordinates: Rectangular to polar, Transparent.
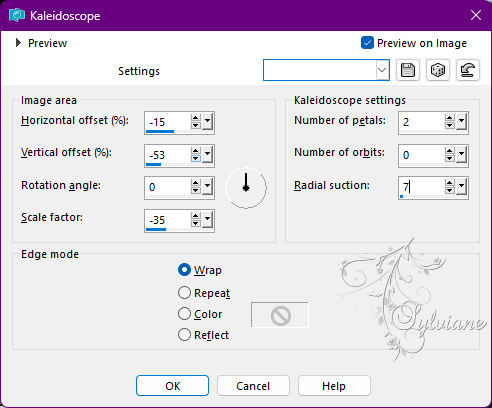
Effects - Reflection Effects - Kaleidoscope:
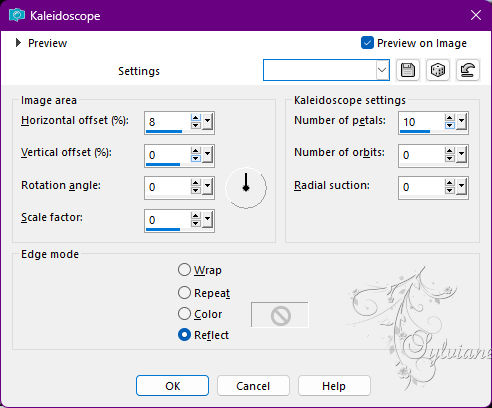
8.
With the Magic Wand: Tolerance and Feather 0 tool, select the center of this effect:
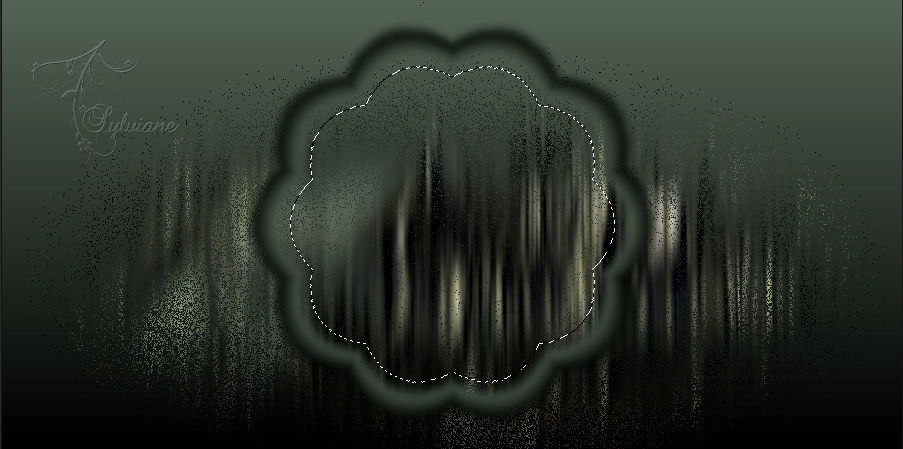
9.
Layers - New Raster Layer.
Paint with gradient in use.
Open 072PaisagemByPqnaAlice.png
Edit - Copy
Edit - Paste Into Selection.
Adjust - Sharpness - Sharpen.
10.
Effects - 3D Effects - Drop Shadow:
0/ 0/ 100/ 40 - Color: #000000 (black).
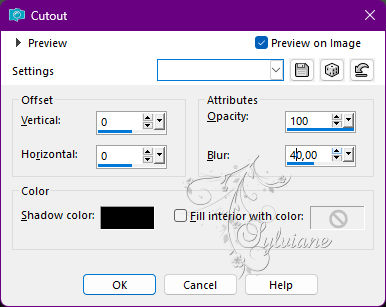
Layers - New Raster Layer.
Effects - 3D Effects - Cutout:
Shadow color: Color: #000000 (black)
Selections - Select None.
Layers - Merge - Merge Down, twice.
Close the visibility of this layer.
11.
Activate Layer Raster 1.
Layers - New Raster Layer.
Selections - SelectAll.
Open 072PaisagemByPqnaAlice.png
Edit - Copy
Edit - Paste Into Selection.
Selections - Select None.
Effects - Image Effects - Seamless Tiling: Default.
12.
Adjust - Blur - Gaussian Blur: 5.
Plugins - Psychosis - Streaker:
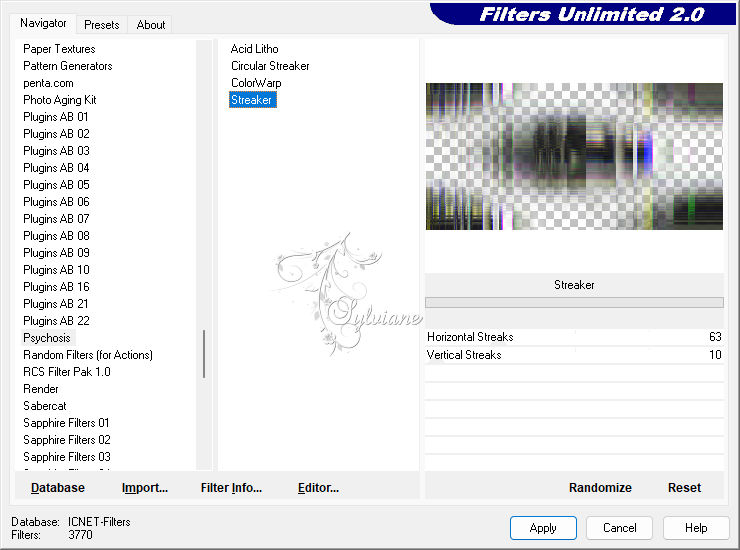
Edit - Repeat Streaker.
Blend Mode: Luminance.
Adjust - Sharpness - Sharpen.
13.
Activate Layer Raster 2.
Selections - Select All.
Selections - Modify - Contract : 70.
Selections - Invert.
14.
Layers - New Raster Layer.
Edit - Copy special - Copy merged
Edit - Paste Into Selection.
Slections - Select None.
15.
Effects - Reflection Effects - Kaleidoscope:
16.
Effects - Image Effects - Seamless Tiling:
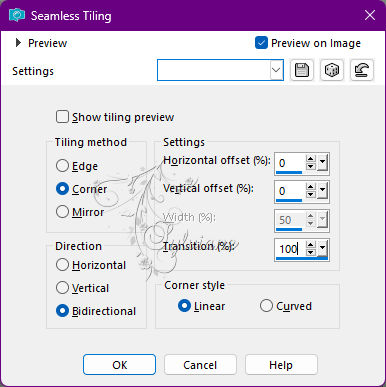
Blend Mode: Screen.
Layers - Duplicate.
17.
Layers - New Raster Layer.
Selections - Select All.
Selections - Modify - Contract: 70.
Open 072PaisagemByPqnaAlice.png
Edit - Copy
Edit - Paste Into Selection.
Adjust - Sharpens - Sharpen.
Effects - 3D Effects - Drop Shadow:
0/ 0/ 100/ 40 - Color: #000000 (black).
Edit - Repeat Drop Shadow.
18.
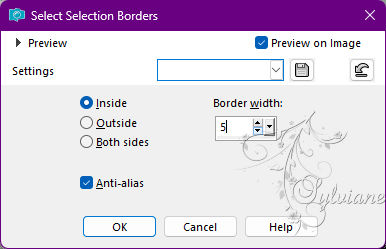
Selections - Modify - Select Selection Borders:
Paint with a Linear gradient in the following settings:
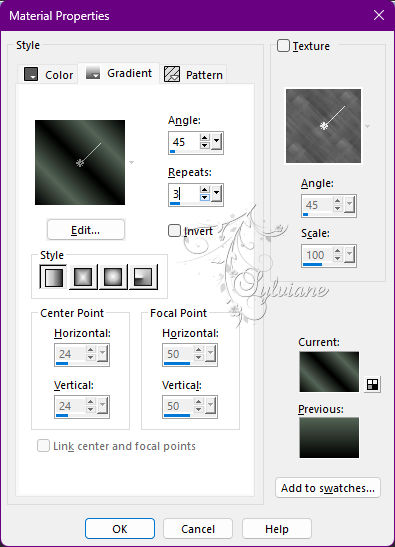
Selections - Select None.
19.
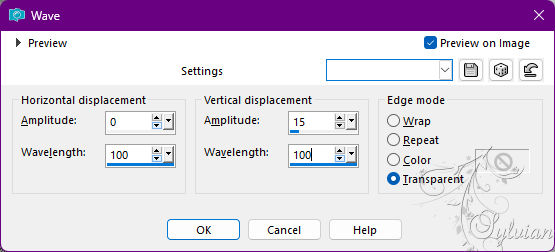
Effects - Distortion Effects - Wave:
20.
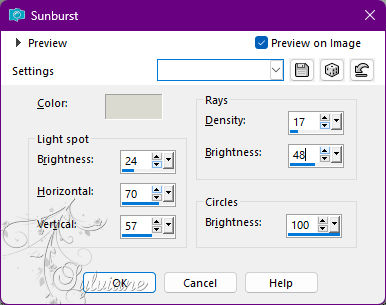
Effects - Illumination Effects - Sunburst:
Color: with color #dbdad0.
Note: Modify the Horizontal and Vertical values if you are necessary, depends on the
where you want to put the Light in your work.
21.
Enable and open copy of raster layer visibility 1.
Image - Resize: 30%, all layers cleared.
Activate selection tool (Press K on your keyboard)
And enter the following parameters:
Pos X : 28 – Pos Y : 263
Press M.
22.
Layers - Duplicate.
Activate selection tool (Press K on your keyboard)
And enter the following parameters:
Pos X : 744 – Pos Y : 65
Press M.
Layers - Merge - Merge Down.
23.
Open 605MulherByPqnaAlice.png or another of your preference
Edit - Copy
Edit - Paste aw New Layer.
Image > Resize 60%, all layers cleared (if using the tube of the material).
Activate selection tool (Press K on your keyboard)
And enter the following parameters:
Pos X : 70 – Pos Y : -95
Press M.
Blend Mode: Overlay.
Layers - Arrange - Move Down.
24.
Open DecorTHMansionByXiki.pspimage
Edit - Copy
Edit - Paste as New Layer.
Blend Mode: Overlay.
25.
Edit - Copy special - Copy merged
26.
Image – Add Borders –symmetric - 2px - color foreground
Image – Add Borders –symmetric - 2px - background color
Image – Add Borders –symmetric - 2px - color foreground
27.
Selections - Select All.
Image – Add Borders –symmetric - 20px with any color.
Selections - Invert.
Edit - Paste Into Selection.
Adjust - Blur - Gaussian Blur: 10.
28.
Effects - Texture Effects - Blinds:
Color: with the color of the Foreground.

Effects - Edge Effects - Enhance.
Selections - Select None.
29.
Image – Add Borders –symmetric - 2px - Color: Foreground color
Image – Add Borders –symmetric - 2px - Color: Background Color
Image – Add Borders –symmetric - 2px - Color: Foreground color
30.
Selections - Select All.
Image – Add Borders –symmetric - 40px with any color.
Selections - Invert.
Edit - Paste Into Selection.
Adjust - Blur - Gaussian Blur: 20.
31.
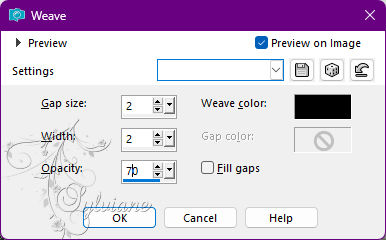
Effects - Texture Effects - Weave, with the color of the Foreground.
32.
Selections - Invert.
Effects - 3D Effects - Drop Shadow:
-15/ -15/ 30/ 10 - Color: #000000 (black).
Effects - 3D Effects - Drop Shadow:
15/ 15/ 30/ 10 - Color: #000000 (black).
Selections - Select None.
33.
Open TituloTHM_BySoxikibem.pspimage
Edit - Copy
Edit - Paste as New Layer.
Activate selection tool (Press K on your keyboard)
And enter the following parameters:
Pos X : 538 – Pos Y : 444
Press M.
34.
Image – Add Borders –symmetric - 2px - Color: Foreground color
35.
Apply your watermark or signature
Layer – merge – merge all (flatten)
Save as JPEG
Back
Copyright Translation 2022 by SvC-Design