
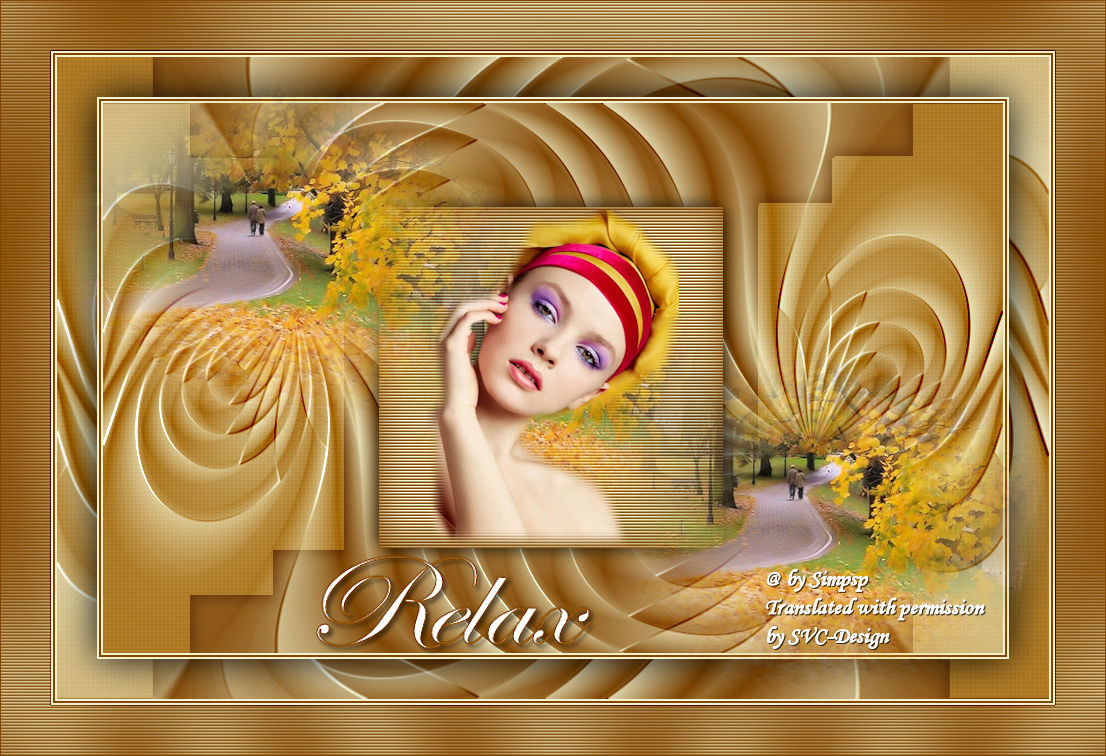
This lesson is made with PSPX9
But is good with other versions.
© by SvC-Design

Materialen Download :
Here
******************************************************************
Materials:
FV0071.png
relax_1_byAnaMariaC.PspSelection
relax_2_byAnaMariaC.PspSelection
titulo_byAnaMariaC.pspimage
vvs-paisagem0137.png
******************************************************************
Plugin:
Plugins - AP 1 [Inovation] - Mirror Reflection
Plugins - Flaming Pear - Flexify 2
******************************************************************
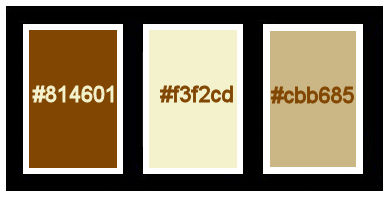
color palette
:
******************************************************************
methode
When using other tubes and colors, the mixing mode and / or layer coverage may differ
******************************************************************
General Preparations:
First install your filters for your PSP!
Masks: Save to your mask folder in PSP, unless noted otherwise
Texture & Pattern: Save to your Texture Folder in PSP
Selections: Save to your folder Selections in PSP
Open your tubes in PSP
******************************************************************
We will start - Have fun!
Remember to save your work on a regular basis
******************************************************************
1.
Choose colors to work with.
Foreground: #814601
Background: #f3f2cd
Extra Color: #cbb685
2.
Open a new transparent image of 900X550 px
3.
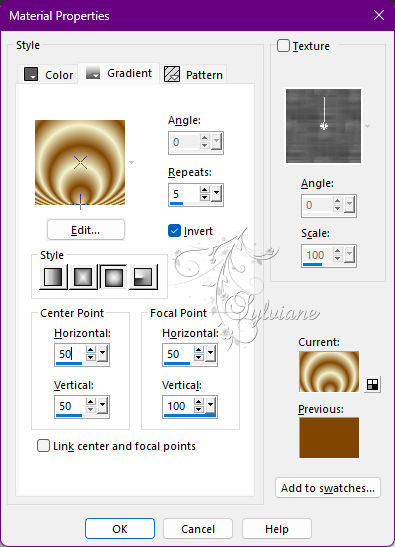
Fill with Sunburst gradient, formed by the colors of Foreground and Background:
Repeats: 5 - Invert marked Center Point: H-V: 50 - Focal Point: (H 50 and V 100).
4.
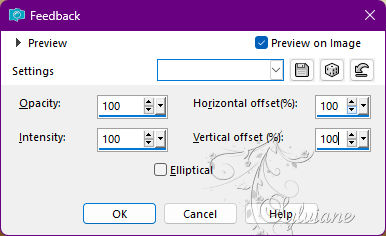
Effects - Reflections Effects - Feedback:
Eliptical: Unchecked
5.
Effects - Reflections Effects - Rotating Mirror:
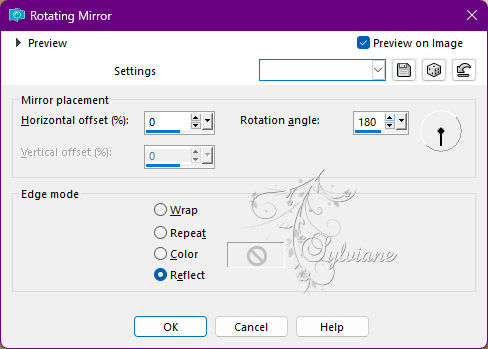
6.
Layers - Duplicate.
Image - Mirror - Mirror Vertical.
7.
Blend Mode: Normal
Opacity: 50%
8.
Layers - Merge - Merge Down.
9.
Layers - Duplicate.
10.
Plugins - AP 1 [Inovation] - Mirror Reflection:
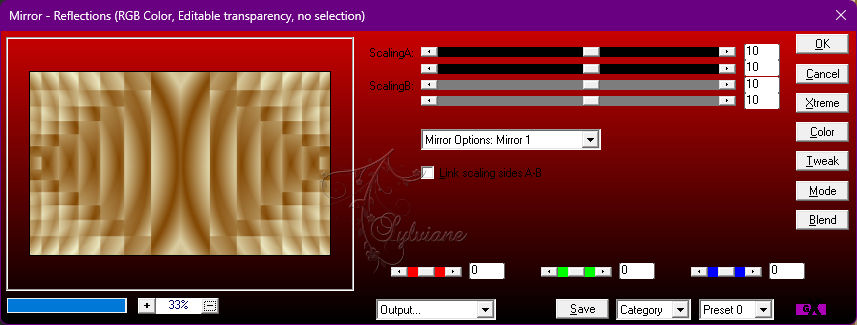
11.
Selections - Load/Save Selections - Load Selection From Disk: Relax_1_byAnaMariaC.
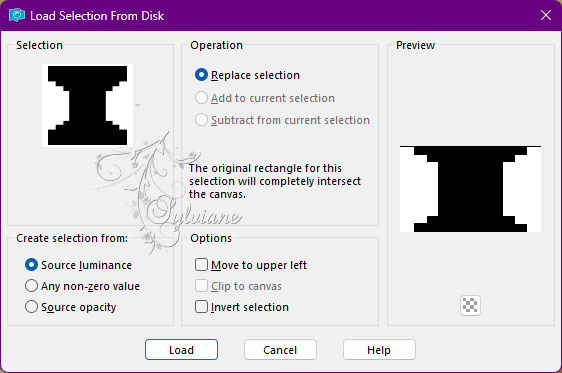
12.
Selections - Promote Selection to Layer.
Layer - New Raster Layer.
Paint with extra color: #cbb685
13.
Effects - Texture Effects - Weave:
Weave color: #ffffff
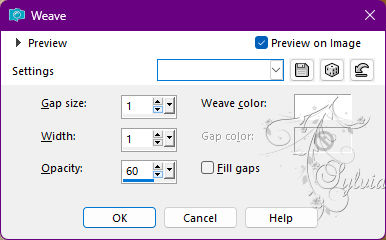
14.
Effects - 3D Effects - Drop Shadow:
5/ 5 / 50 /20 - Color: #000000
Repeat > (H -5 / V -5)
15.
Blend Mode: Soft Light
Opacity: 100%
Selections - Select None.
16.
Activate Copy of Raster 1
Selections - Load/Save Selections - Load Selection From Disk: Relax_2_byAnaMariaC.
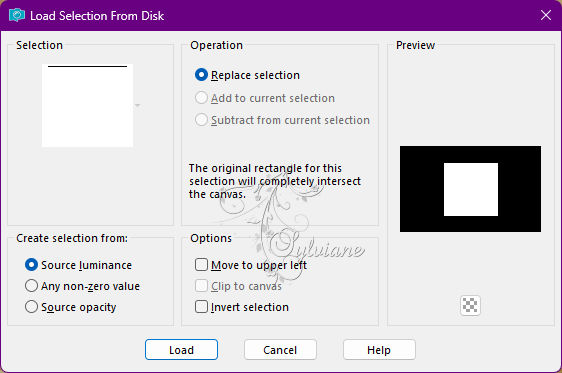
Selections - Promote Selection to Layer.
17.
Paint with extra color: #cbb685.
18.
Effects - Texture Effects - Blinds > color: #814601(Foreground).
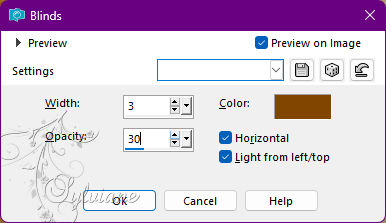
Effects - Edge Effects - Enhance.
19.
Layers - New Raster Layer.
20.
Effects - 3D Effects - Cutout > color: #814601(Foreground).
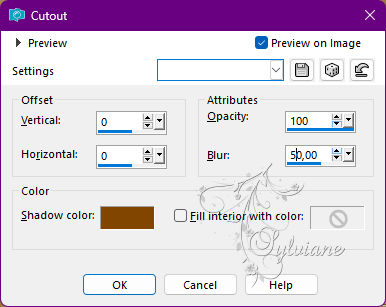
Edit - Repeat cutout.
Layers - Merge - Merge Down.
21.
Open vvs-paisagem0137.png
Edit - Copy
Edit - Paste Into Selection.
Adjust - Sharpness - Sharpen.
22.
Effects - 3D Effects - Drop Shadow:
5/ 5 / 50 /2 0 > Color: #000000
Repeat - negative: (H -5 /V -5).
23.
Selections - Select None.
Layers – arrange – bring to top
24.
Activate - Layer Copy of Raster 1.
25.
Plugins - Flaming Pear - Flexify 2:
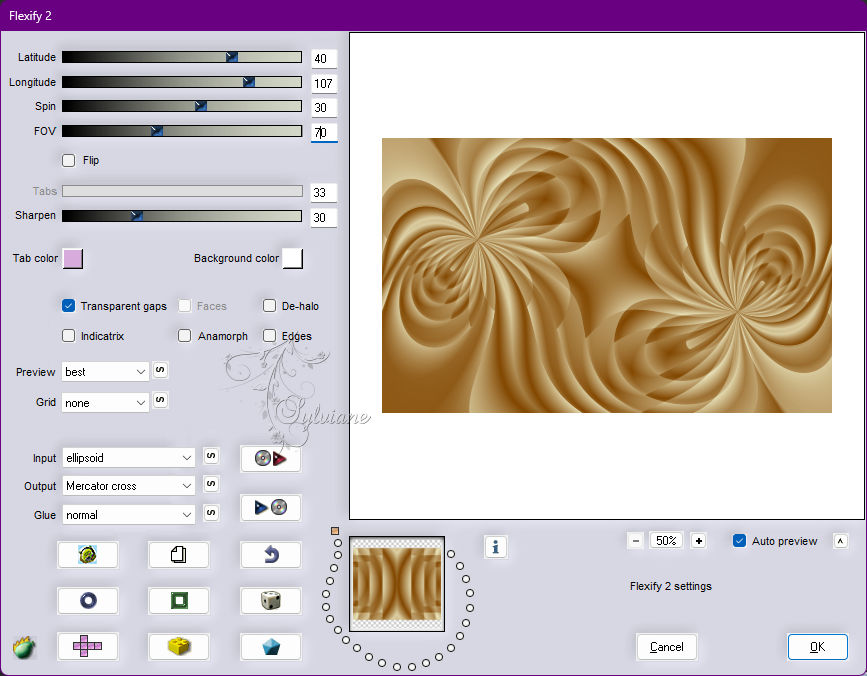
26.
Effects - User Defined Filter: Emboss_3
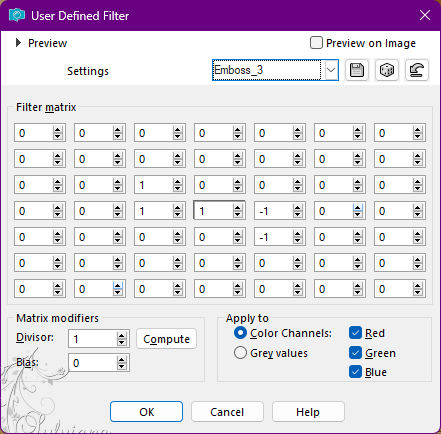
27.
Layers - Arrange - Move Up.
Activate - Layer Raster 1.
Edit - Copy special - Copy merged
28.
Image – Add Borders –symmetric - 2 px - color: #f3f2cd (Background).
Image – Add Borders –symmetric - 2 px - color: #814601 (Foreground).
Image – Add Borders –symmetric - 2 px - color: #f3f2cd (Background).
29.
Selections - Select All.
30.
Image – Add Borders –symmetric - 40 px > any Color
Selections - Invert.
31.
Edit - Paste Into Selection.
32.
Image - Mirror - Mirror Vertical.
Selections - Invert.
33.
Effects - 3D Effects - Drop Shadow:
0/0/100/60 – color:#000000
34.
Image – Add Borders –symmetric - 2 px > color: #f3f2cd (Background).
Image – Add Borders –symmetric - 2 px > color: #814601 (Foreground).
Image – Add Borders –symmetric - 2 px > color: #f3f2cd (Background).
35.
Selections - Select All.
36.
Image – Add Borders –symmetric - 50 px - any color.
37.
Selections - Invert.
38.
Paint with Sunburst gradient in use:

39.
Adjust - Blur - Gaussian Bur:
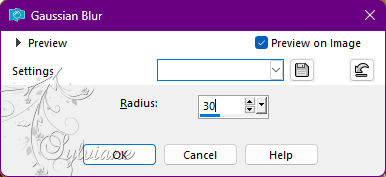
40.
Effects - Texture Effects - Blinds:
Color: #814601 (Foreground).

Effects - Edge Effects - Enhance.
41-
Selections - Selects None.
42.
Open vvs-paisagem0137.png
Edit - Copy
Edit - Paste as New Layer.
Image > Resize if necessary, in misted material the resize is 50%
Adjust - Sharpness - Sharpen.
Position in the upper left corner:
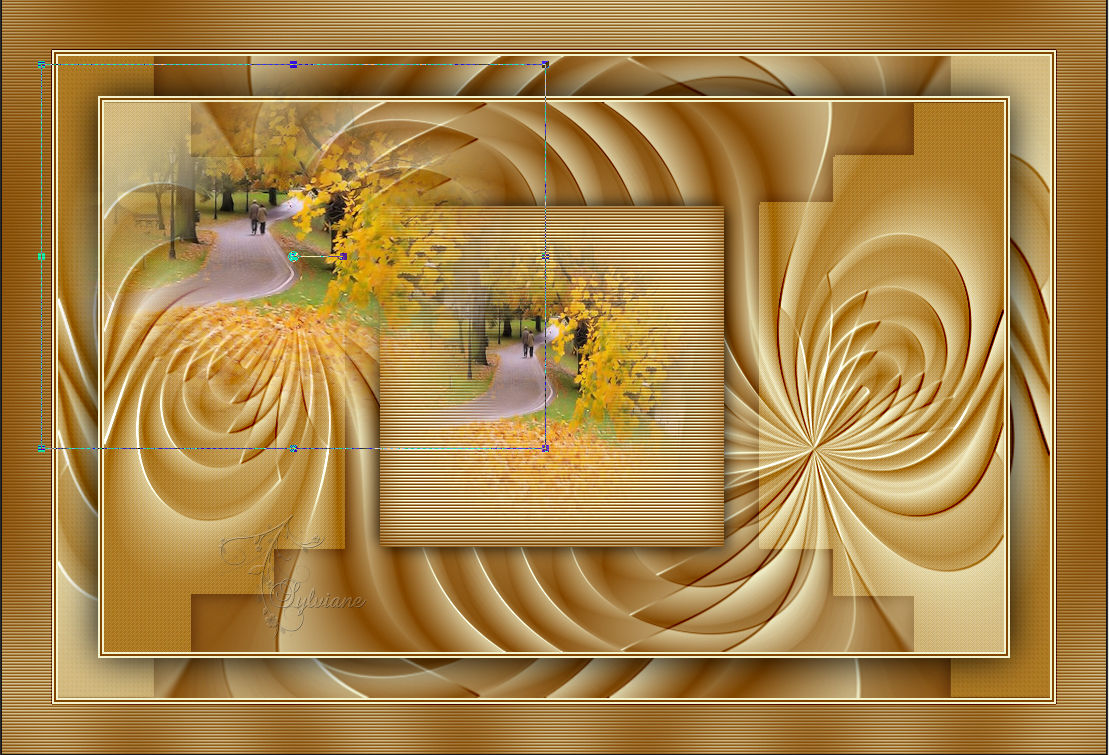
43.
Layers - Duplicate.
Position in the lower right corner:
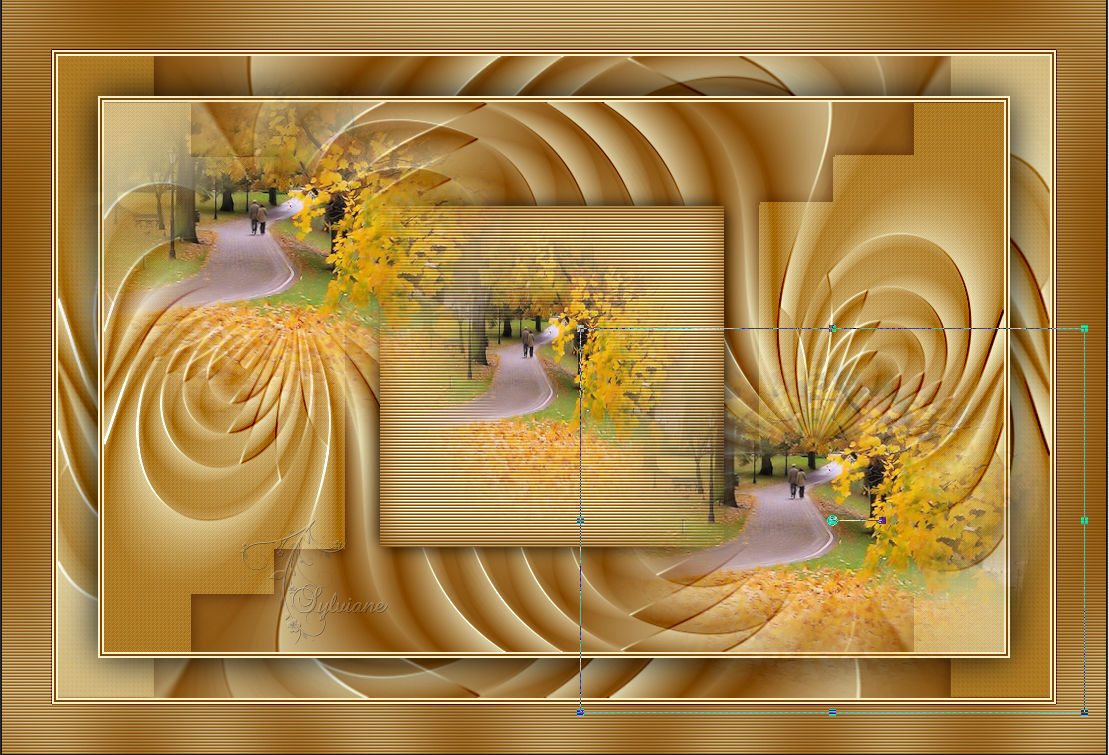
44.
Open misted woman.
Edit - Copy
Edit - Paste as New Layer.
Image > Resize if necessary, in the misted woman of the material the resize is 50%
Adjust - Sharpness - Sharpen.
Position in the center of the square:
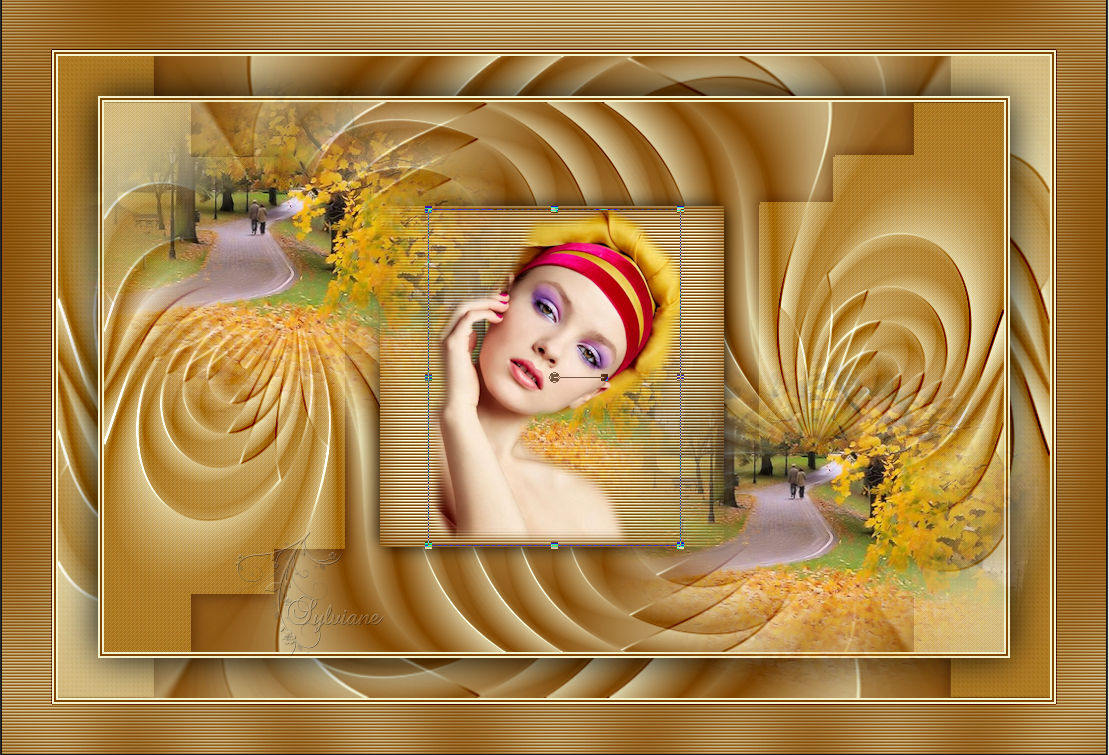
45.
Open titulo_byAnaMariaC.pspimage
Edit - Copy
Edit - Paste as New Layer.
Position at your choice.
46.
Image – Add Borders –symmetric - 1 px > color: #814601 (Foreground).
47.
Apply your watermark or signature
Layer – merge – merge all (flatten)
Save as JPEG
Back
Copyright Translation 2022 by SvC-Design