
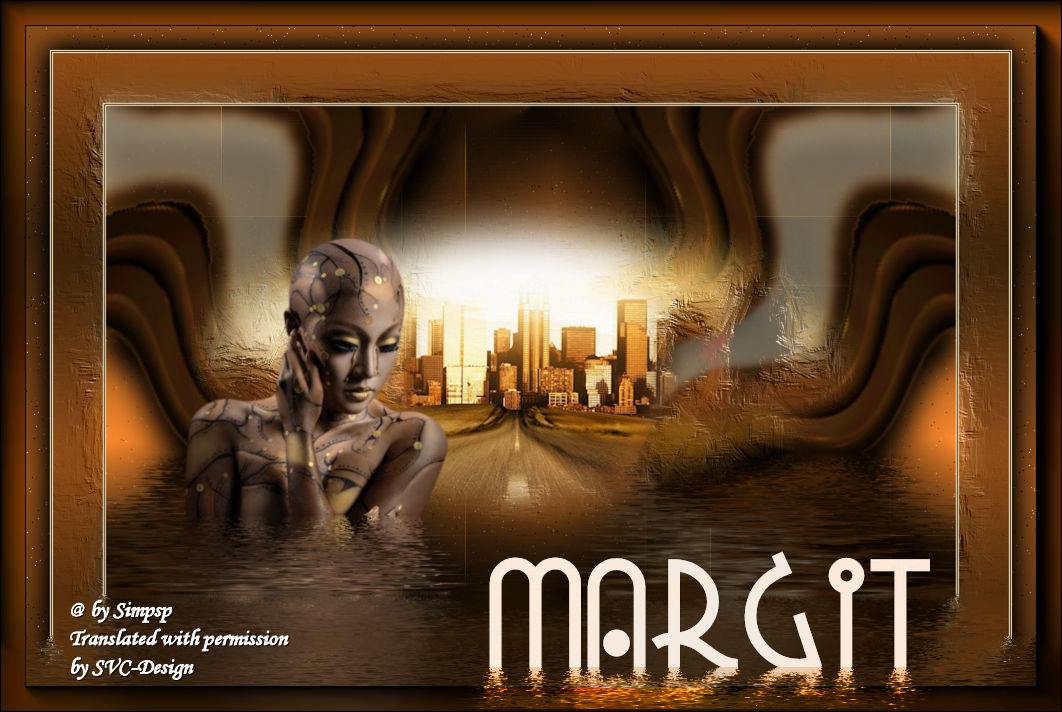
This lesson is made with PSPX9
But is good with other versions.
© by SvC-Design

Materialen Download :
Here
******************************************************************
Materials:
AlphaChannel_Margit_BySoxikibem.pspimage
TituloMargitBySoxikibem.pspimage
052PaisagemByPqnaAlice.png
445MulherByPqnaAlice.png
******************************************************************
Plugin:
Plugins - Graphics Plus - Spot Lite
Plugins - Graphics Plus - Weaver
Plugins - Mura's Meister - Pole Transform
Plugins - Flaming Pear - Flood
Plugins - AAA Frames - Foto Frame
******************************************************************
color palette
:

******************************************************************
methode
When using other tubes and colors, the mixing mode and / or layer coverage may differ
******************************************************************
General Preparations:
First install your filters for your PSP!
Masks: Save to your mask folder in PSP, unless noted otherwise
Texture & Pattern: Save to your Texture Folder in PSP
Selections: Save to your folder Selections in PSP
Open your tubes in PSP
******************************************************************
We will start - Have fun!
Remember to save your work on a regular basis
******************************************************************
1.
Choice four colors for work.
Foreground: #3c240b
Background: #fdf8d7
Color 3: #92501b
Color 4: #ffffff
2.
Open AlphaChannel_Margit_BySoxikibem.pspimage
Window – Duplicate
Minimize the original – we work on the copy
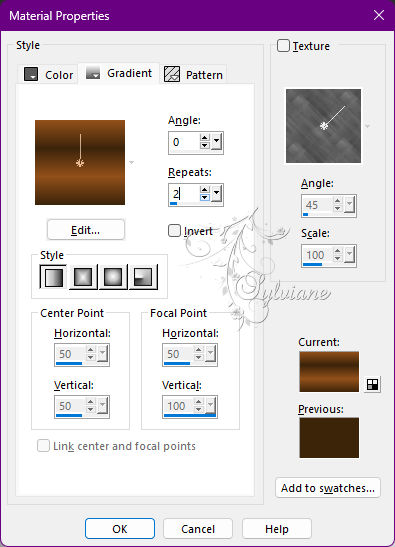
Paint transparency with a Linear Gradient formed by the
Foreground colors and 3 color:
3.
Layers - Duplicate.
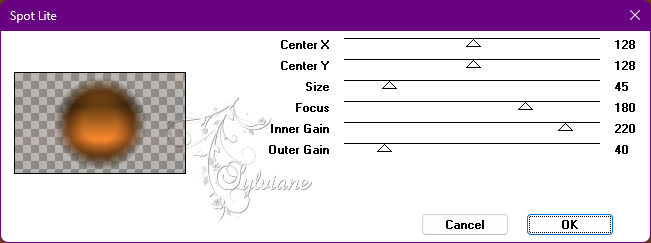
Plugins - Graphics Plus - Spot Lite:
4.
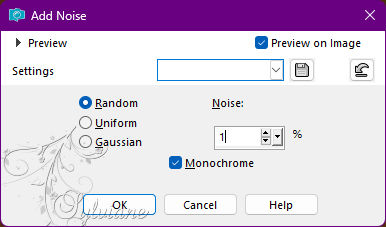
Adjust - Add/Remove Noise - Add Noise:
5.
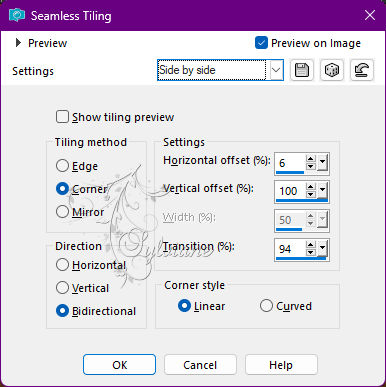
Effects - Image Effects - Seamless Tiling: Side by Side.
6.
Activate Layer Raster 1.
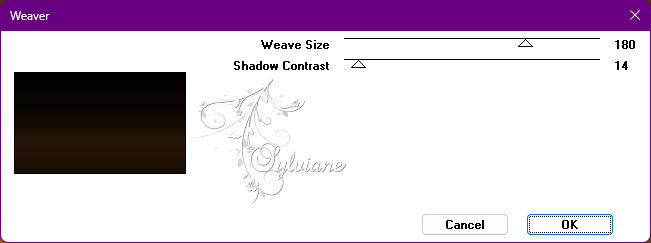
Plugins - Graphics Plus - Weaver
7.
Effects - Edge Effects - Enhance.
Edit - Repeat Enhance Edges.
Effects - Image Effects - Seamless Tiling: Default.
8.
Layers - Duplicate.
Effects - Geometric Effects - Perspective - Vertical: 95, It's transparent.
Image - Mirror - Mirror Vertical.
Effects - Geometric Effects - Perspective - Vertical: 95, It's transparent.
9.
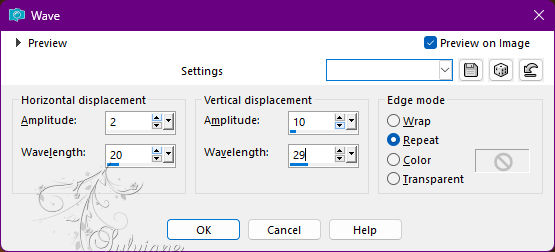
Effects - Distortion Effects - Wave:
10.
Layers - Duplicate.
Activate selection tool (Press K on your keyboard)
And enter the following parameters:
Pos X : 468 – Pos Y : 0
Press M.
Layers - Merge - Merge Down.
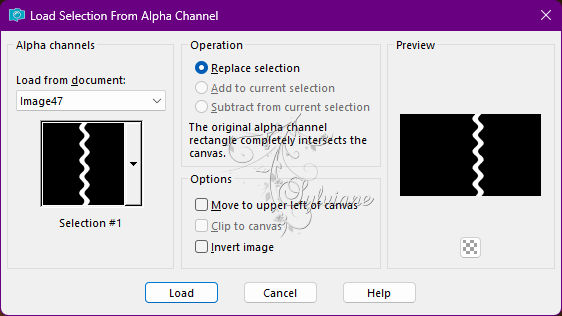
Selections - Load/Save Selections - Load Selection From Alpha Channel: Selection #1.
Layers - New Raster Layer.
Activate the Flood Fill tool, Opacity 50%.
Paint with the color of the Background.
Return in Opacity for 100%.
Layers - Arrange - Move Down.
11.
Activate Layer Copy of Raster 1.
Effects - 3D Effects - Cutout:
Shadow color: with color 3
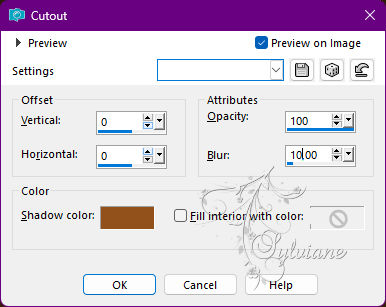
Select None - Seletions.
Layers - Merge - Merge Down.
Layers - Arrange - Move Up.
12.
Plugins - Mura's Meister - Pole Transform:
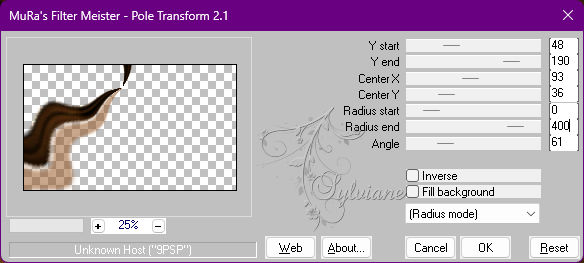
Image - Mirror - Mirror Vertical.
Layers - Duplicate.
Image - Mirror - Mirror Horizontal.
Layers - Merge - Merge Down.
13.
Selections - Load/Save Selections - Load Selections From Alpha Channel: Selection #2.
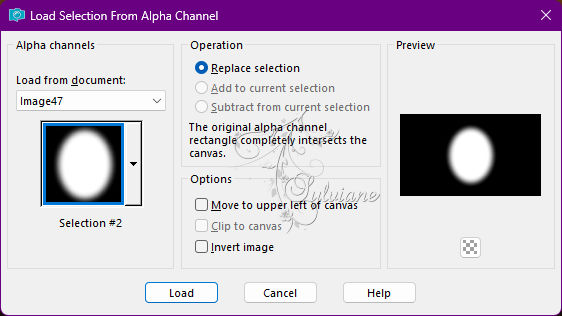
Press the Delete key on the keyboard twice.
Open 052PaisagemByPqnaAlice.png
Edit - Copy
Edit - Paste as New Layer.
*Resize if necessary, the material I gave a resize of 80%.
Adjust - Sharpness - Sharpen.
Use the Move Tool to position as you prefer within the Circle.
14.
Layers - Duplicate.
Selections - Invert.
Press the Delete key on the keyboard once.
Selections - Select None.
15.
Activate Layer Raster 3.
Effects - Art Media Effects - Brush Strokes:
in lower versions than PSP 2022 the Length goes up to numbering 20
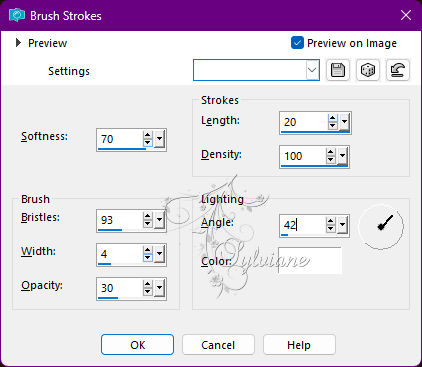
Belend Mode: Lighten or any other you prefer,
in the second example I used Blend Screen.
16.
Activate Layer Raster 2.
Effects - 3D Effects - Drop Shadow:
30/ 0/ 100/ 40 - Color: #000000 (black).
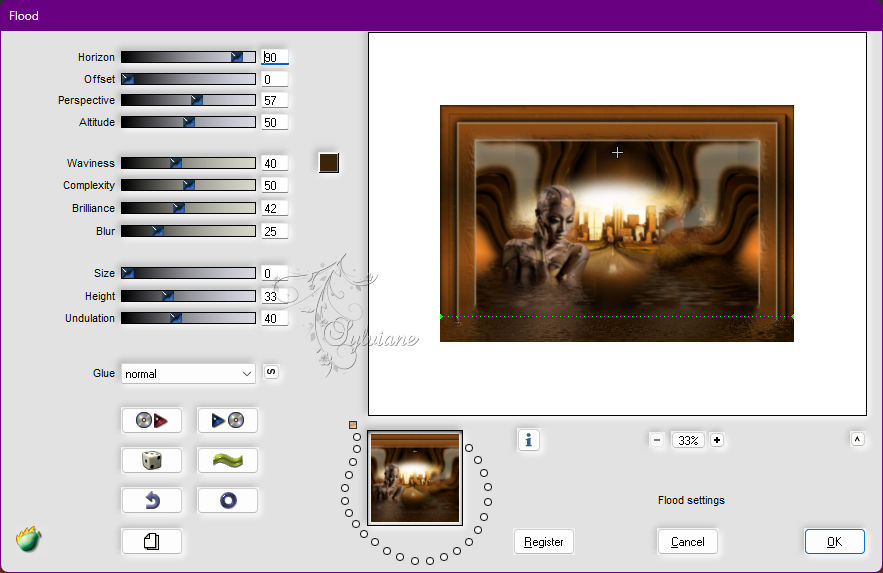
Plugins - Flaming Pear - Flood, with the color of the foreground:
17.
Activate the Layer from the top.
Open The Character Tube.
Edit - Copy
Edit - Paste as New Layer.
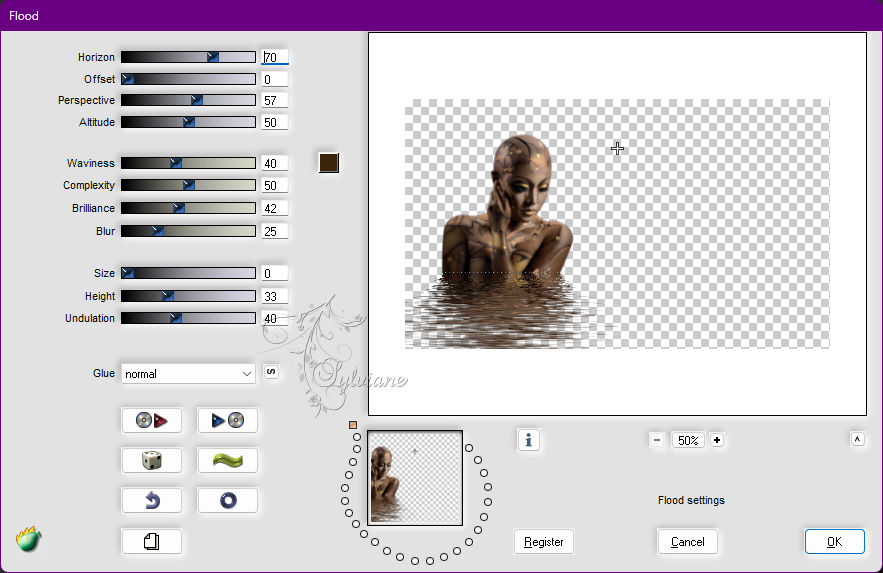
If using the material, resize by 70%.
Without moving or moving the tube apply the
Plugins - Flaming Pear - Flood, with the color of the foreground:
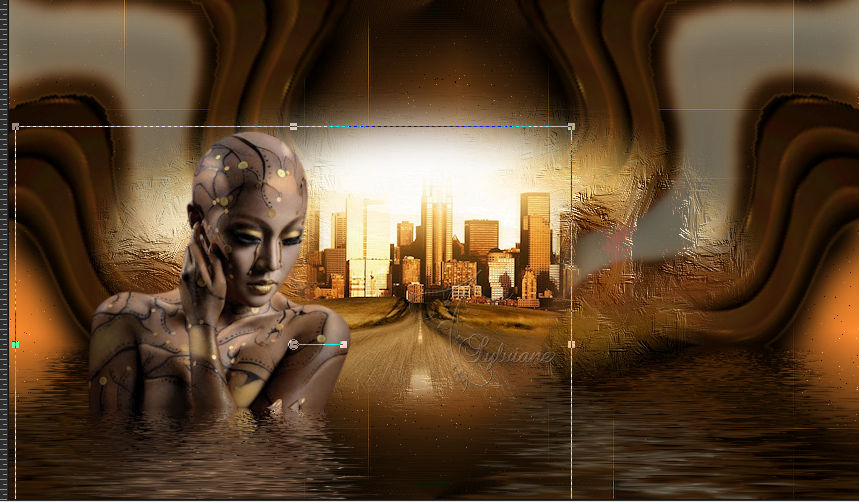
After applying the Flood effect move and position to the left:
18.
Image – Add Borders –symmetric - 1px - Color: Background Color
Image – Add Borders –symmetric - 1px - Color: Foreground color
Image – Add Borders –symmetric - 1px - Color: Background Color
Selections - Select All.
Image – Add Borders –symmetric - 50px with any color.
Selections - Invert.
Paint with Linear Gradient:

19.
Effects - Art Media Effects - Brush Strokes:

20.
Selections - Select None.
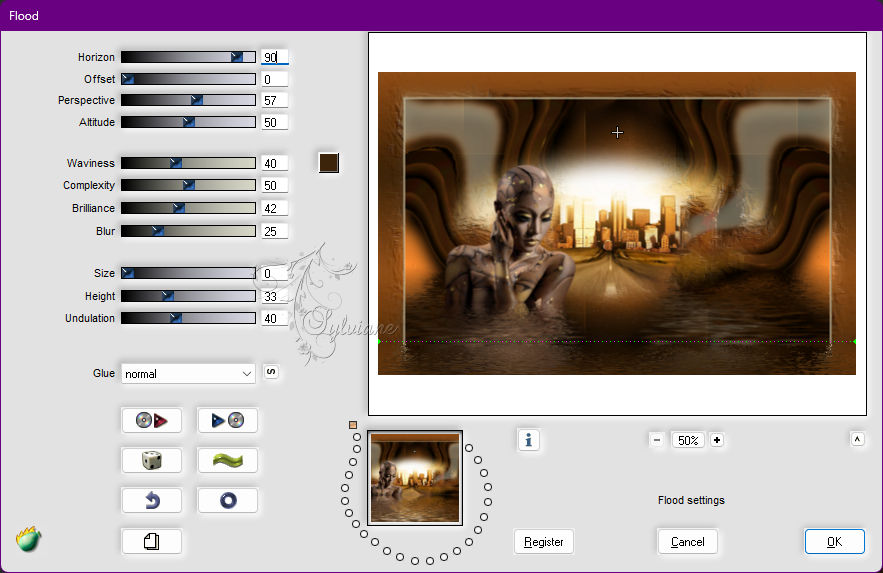
Plugins - Flaming Pear - Flood:
Horizon: 90 - Color: Color of the Foreground
21.
Image – Add Borders –symmetric - 1px - Color: Background Color
Image – Add Borders –symmetric - 1px - Color: Foreground color
Image – Add Borders –symmetric - 1px - Color: Background Color
Selections - Select All.
Image – Add Borders –symmetric - 50px with any color.
Selections - Invert.
Paint with linear gradient in use:

22.
Adjust - Add/Remove Noise - Add Noise:

Edit - Repeat Add Noise.
Selections - Invert.
Effects - 3D Effects - Drop Shadow:
0/ 0 / 100 / 35 - Color: #000000 (black).
Edit - Repeat Drop Shadow.
Selections - Select None.
23.
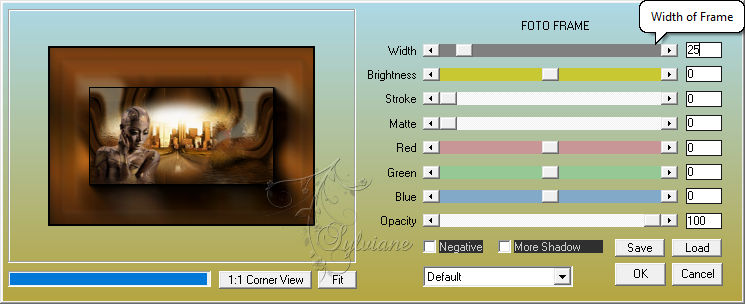
Plugins - AAA Frames - Foto Frame:
24.
Plugins - Flaming Pear - Flood:
Horizon: 90 - Color: Color of the Foreground

25.
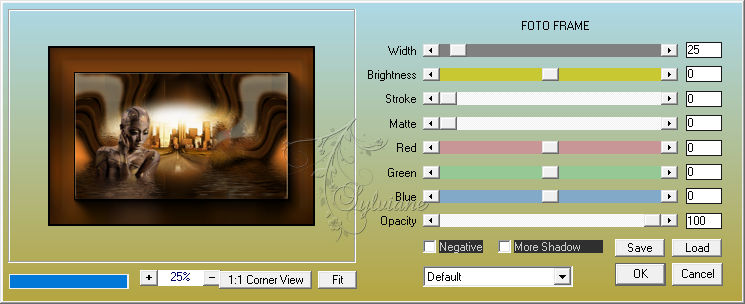
Plugins - AAA Frames - Foto Frame:
26.
Open TituloMargitBySoxikibem.pspimage
Edit - Copy
Edit - Paste as New Layer.
Activate selection tool (Press K on your keyboard)
And enter the following parameters:
Pos X : 293 – Pos Y : 551
Press M.
Blend Mode: Luminance
27.
Apply your watermark or signature
Layer – merge – merge all (flatten)
Save as JPEG
Back
Copyright Translation 2022 by SvC-Design