
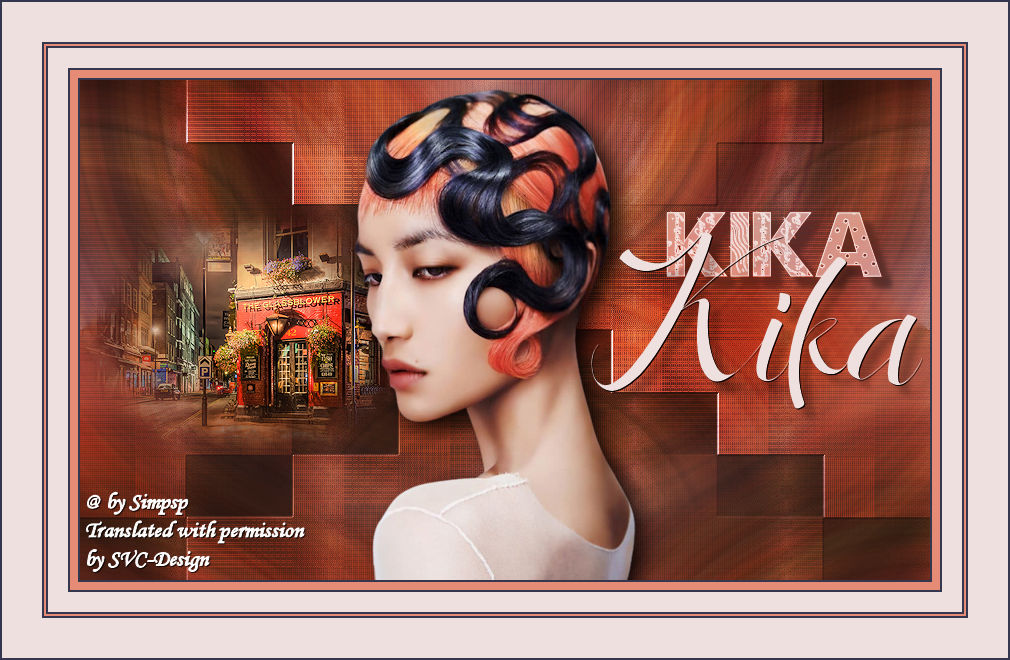
This lesson is made with PSPX9
But is good with other versions.
© by SvC-Design

Materialen Download :
Here
******************************************************************
Materials:
Titulo1ByXiki.png
Titulo2ByXiki.png
031PaisagemByPqnaAlice.png
293MulherByPqnaAlice.png
******************************************************************
Plugin:
Plugins - Filters Unlimited 2.0 - AFS IMPORT - win_078
Plugins - Funhouse - Loom
Plugins - Mura's Seamless - Emboss at Alpha
******************************************************************
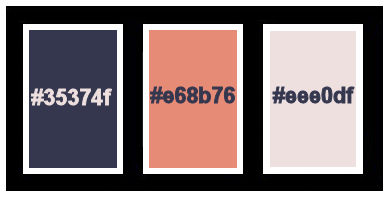
color palette
:
******************************************************************
methode
When using other tubes and colors, the mixing mode and / or layer coverage may differ
******************************************************************
General Preparations:
First install your filters for your PSP!
Masks: Save to your mask folder in PSP, unless noted otherwise
Texture & Pattern: Save to your Texture Folder in PSP
Selections: Save to your folder Selections in PSP
Open your tubes in PSP
******************************************************************
We will start - Have fun!
Remember to save your work on a regular basis
******************************************************************
1.
Choose two colors to work with.
Foreground: #35374f
Background: #e68b76
Color 3: #eee0df
2.
Open a new transparent image of 850x500px
Paint with the color of the Foreground.
Layers - Duplicate.
3.
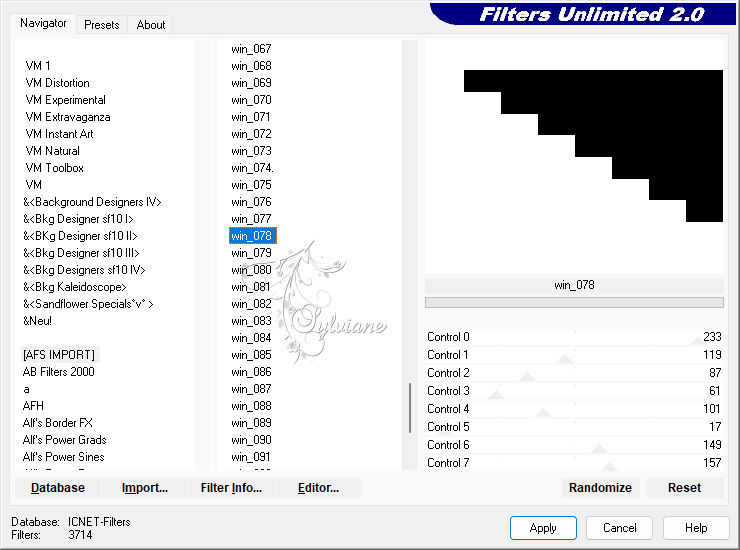
Plugins - Filters Unlimited 2.0 - AFS IMPORT - win_078
4.
With the Magic Wand: Tolerance and feather 0 tool, select the black part of the effect.
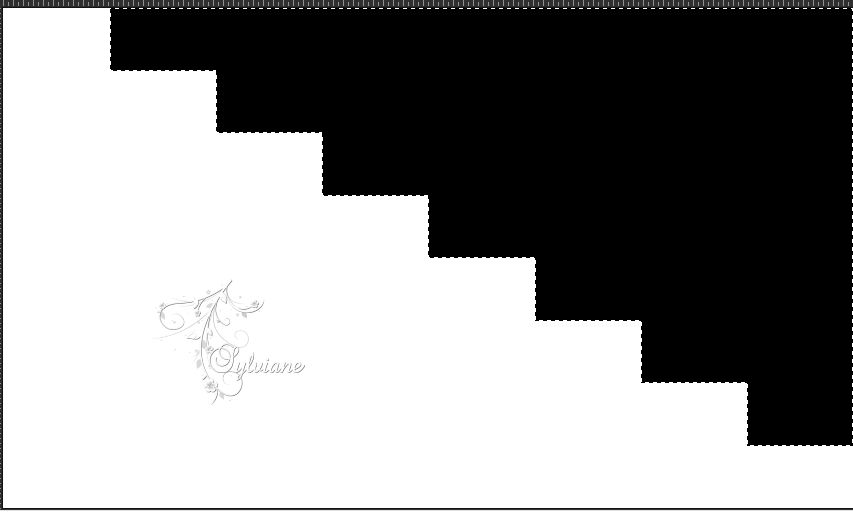
Press the Delete key on the keyboard.
Layers - New Raster Layer.
Paint with a Radial gradient, formed by the colors of Foreground and Background
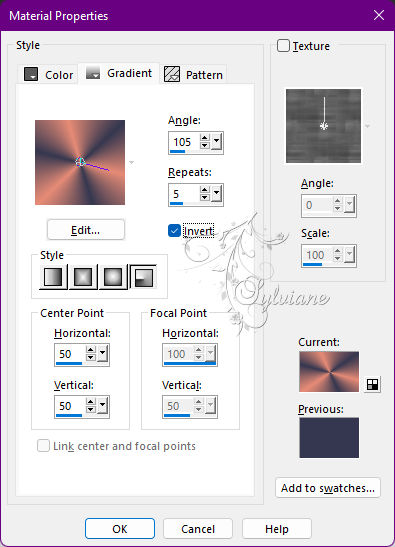
5.
Plugins - Funhouse - Loom
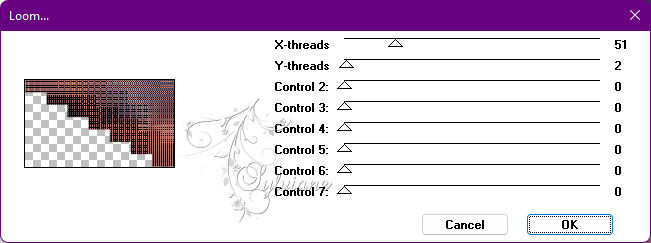
Selections - Select None.
6.
Activate Layer Copy of Raster 1.
With the Magic Wand: Tolerance and feather: 0 tool, select the white part of the effect
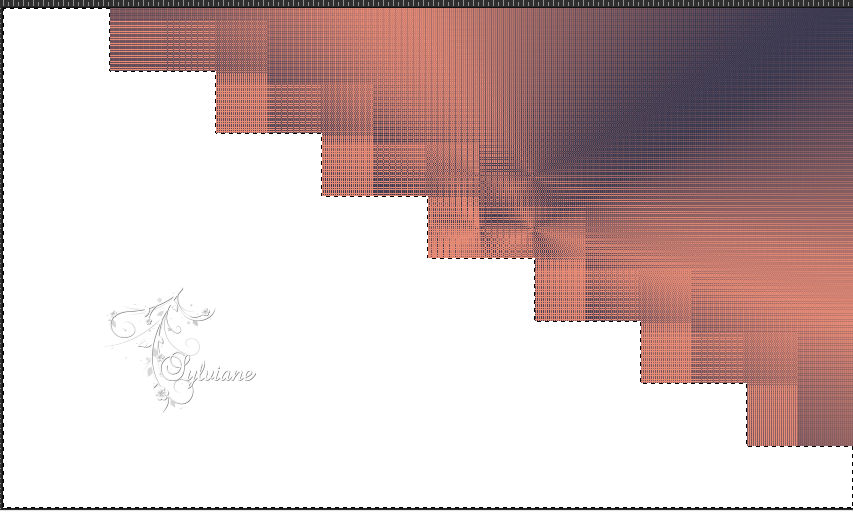
Press the Delete key on the keyboard.
7.
Selections - modify - inside / outside feather
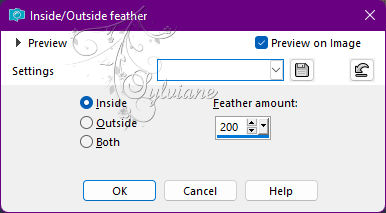
Paint this selection with color 3.
8.
Adjust - Add/Remove Noise - Add Noise
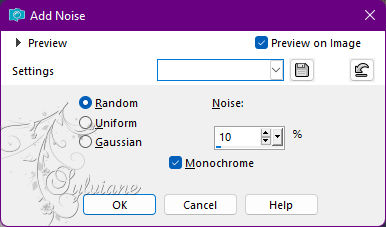
Selections - Select None.
9.
Effects - Reflection Effects - Pattern
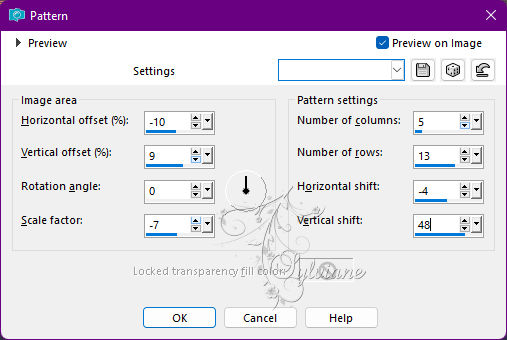
Effects - Edge Effects - Enhance.
Blend Mode: Hard Light.
10.
Activate Layer Raster 2.
Effects - Image Effects - Seamless Tiling
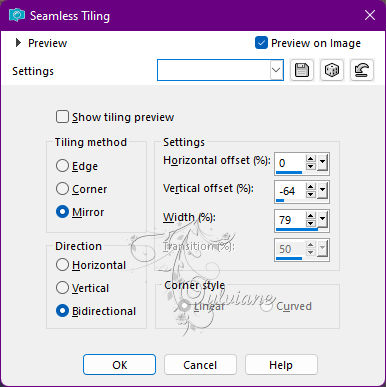
Blend Mode: Screen.
11.
Plugins - Mura's Seamless - Emboss at Alpha: Default.
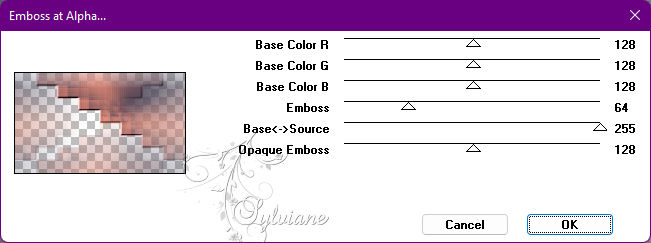
Edit - Repeat Emboss at Alpha.
12.
Layers - New Raster Layer.
Selections - Select All.
Open 031PaisagemByPqnaAlice.png
Edit - Copy
Edit - Paste Into Slection.
Selections - Select None.
Effects - Image Effects - Seamless Tiling: Default.
15.
Adjust - Blur - Radial Blur
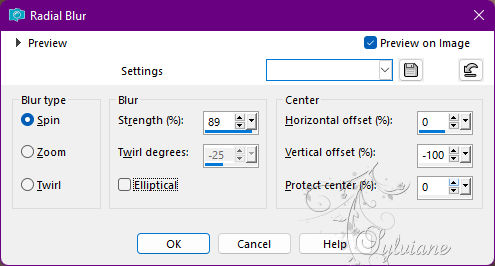
Blend Mode: Overlay.
Layers - Duplicate.
Image - Mirror - Mirror Vertical.
Effects - Image Effects - Seamless Tiling: Default.
14.
Open 031PaisagemByPqnaAlice.png
Edit - Copy
Edit - Paste As New Layer.
Resize if necessary, if using the tutorial, resize at 50%.
Adjust - Sharpness - Sharpen.
Position to the left.
15.
Open The Main Tube.
Edit - Copy
Edit - paste As New Layer.
Position in the center of the job.
Apply Drop Shadow or effect you want.
16.
Open Titulo1ByXiki.png
Edit - Copy
Edit - Paste As New Layer.
Activate selection tool (Press K on your keyboard)
And enter the following parameters:
Pos X : 586 – Pos Y : 131
Press M
Blend Mode: Luminance (L).
17.
Open Titulo2ByXiki.png
Edit - Copy
Edit - Paste As New Layer.
Activate selection tool (Press K on your keyboard)
And enter the following parameters:
Pos X :511 – Pos Y : 152
Press M
18.
Image – Add Borders –symmetric - 2px - Color: Foreground color
Image – Add Borders –symmetric - 8px - Color: Background Color
Image – Add Borders –symmetric - 2px - Color: Foreground color
Image – Add Borders –symmetric - 20px - Color: with color 3
Image – Add Borders –symmetric - 2px - Color: Foreground color
Image – Add Borders –symmetric - 2px - Color: Background Color
Image – Add Borders –symmetric - 2px - Color: Foreground color
Image – Add Borders –symmetric - 40px - Color: with color 3
Image – Add Borders –symmetric - 2px - Color: Foreground color
19.
Apply your watermark or signature
Layer – merge – merge all (flatten)
Save as JPE²G
Back
Copyright Translation © 2022 by SvC-Design