
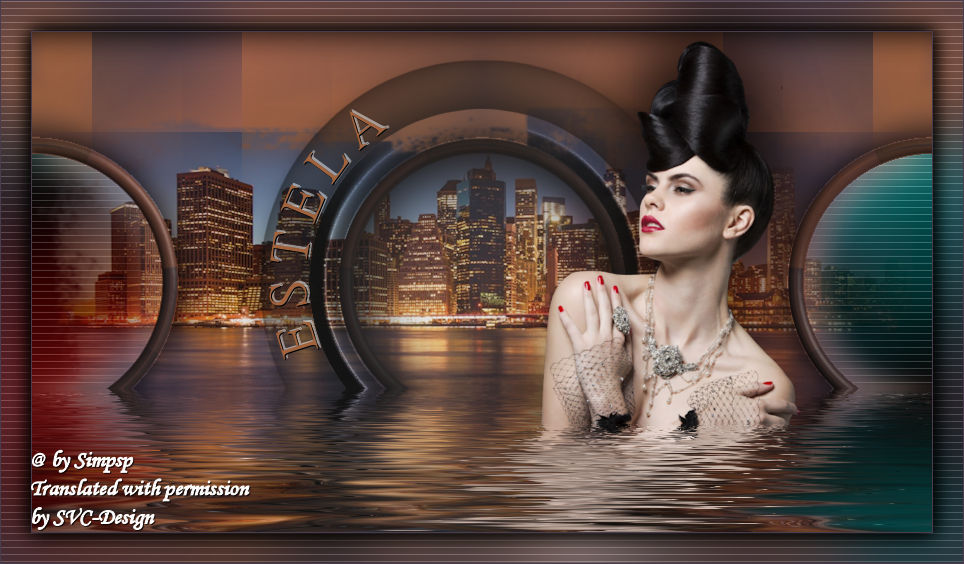
This lesson is made with PSPX9
But is good with other versions.
© by SvC-Design
Materialen Download :
Here
******************************************************************
Materials:
glassEstela2Xiki.f1s
glassEstelaXiki.f1s
SelectionEstela1Xiki.PspSelection
SelectionEstela2Xiki.PspSelection
SelectionEstela3Xiki.PspSelection
SelectionEstela4Xiki.PspSelection
SelectionEstela5Xiki.PspSelection
SelectionEstela6Xiki.PspSelection
TituloEstelaByXiki.png
013PaisagemByPqnaAlice.png
194MulherByPqnaAlice.png
******************************************************************
Plugin:
Plugins - Mehdi - Sorting Tiles
Plugins - Filters Unlimite 2.0 - Bkg Designers sf10 IV - Easy Corner UpperLeft
Plugins - Mura's Meister - Pole Transform
Plugins - Mehdi - Vibrations
Plugins - Penta.com - VTR2
Plugins - Alien Skin Eye Candy 5 - Imapct - Glass
Plugins - Flaming Pear - Flood
******************************************************************
color palette
:
******************************************************************
methode
When using other tubes and colors, the mixing mode and / or layer coverage may differ
******************************************************************
General Preparations:
First install your filters for your PSP!
Masks: Save to your mask folder in PSP, unless noted otherwise
Texture & Pattern: Save to your Texture Folder in PSP
Selections: Save to your folder Selections in PSP
Open your tubes in PSP
******************************************************************
We will start - Have fun!
Remember to save your work on a regular basis
******************************************************************
1.
Open the material in the PSP, duplicate and close the originals.
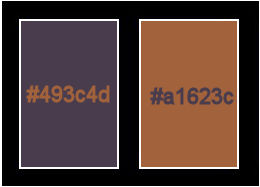
Choose two colors to work with.
Foreground: #493c4d
Background: #a1623c
2.
Open a new transparent image of 900x500px
Paint with a Sunburst gradient, formed by the Foreground and Background colors

Fill with the gradient
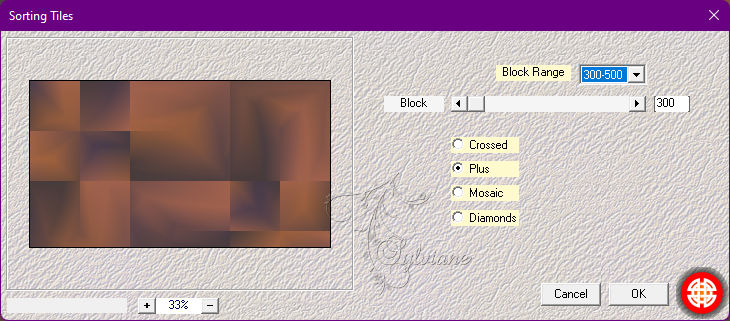
3.
Plugins - Mehdi - Sorting Tiles
4.
Effects - Image Effects - Seamless Tiling
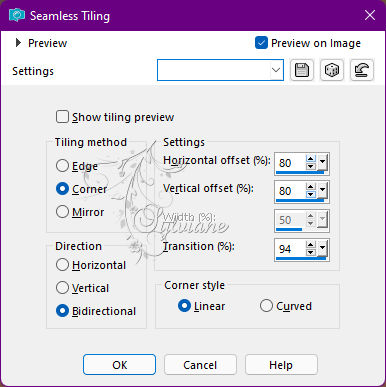
5.
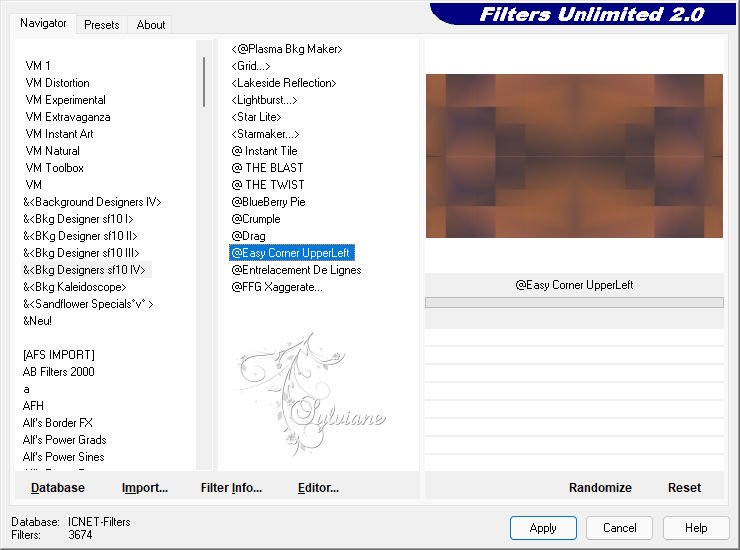
Plugins - Filters Unlimite 2.0 - Bkg Designers sf10 IV - Easy Corner UpperLeft
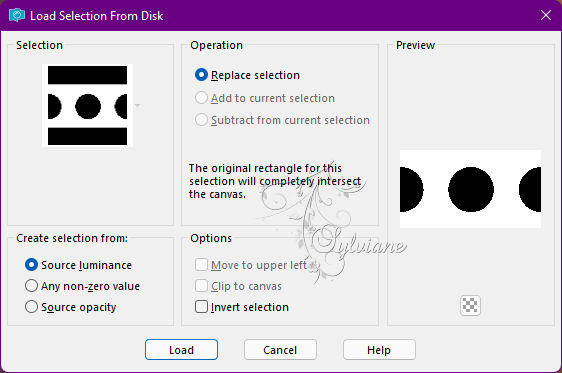
6.
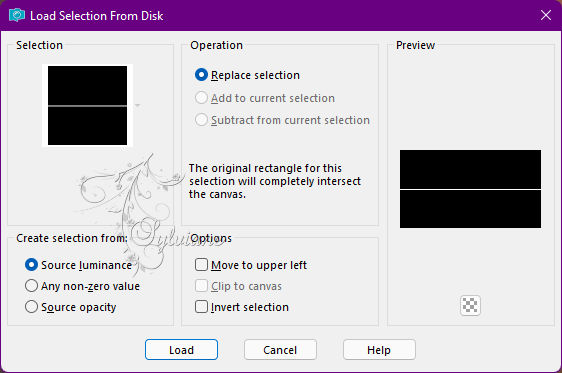
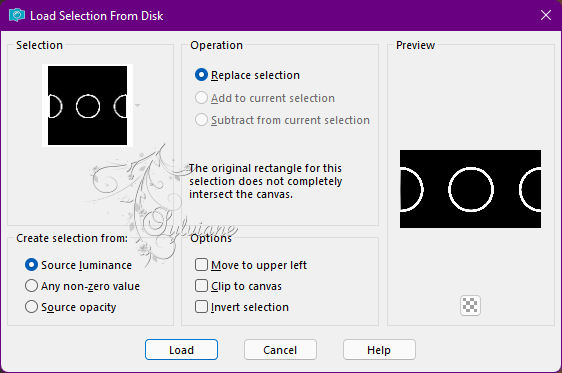
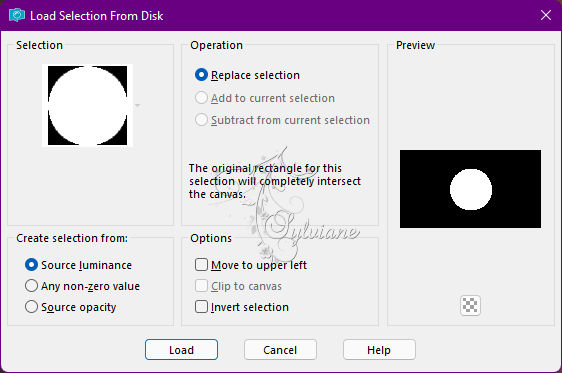
Selections - Load / Save - Load selection from disk Selection Estela 1 Xiki
Selections - Promote Selection to Layer.
Selections - Select None.
7.
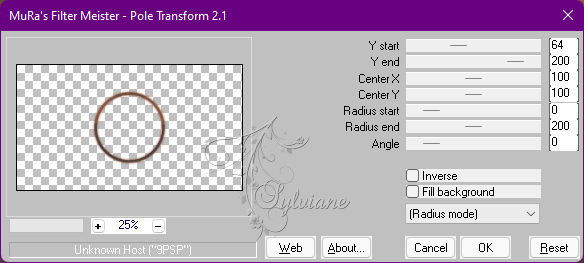
Plugins - Mura's Meister - Pole Transform
8.
Effects - Image Effects - Seamless Tiling
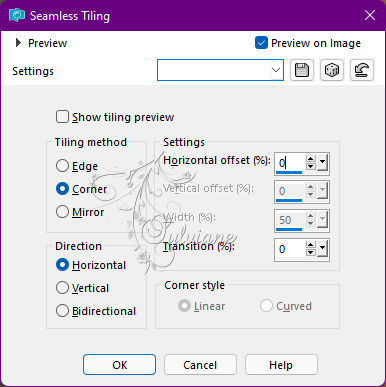
9.
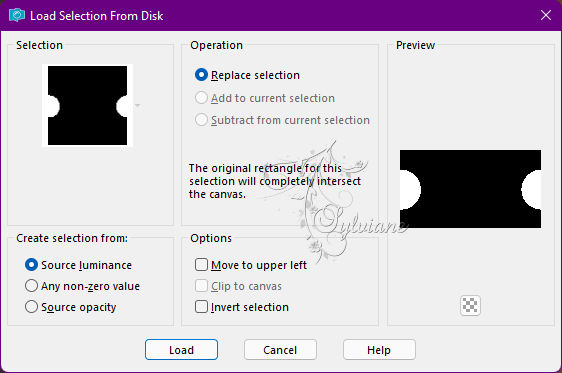
Layers - New Raster Layer.
Selections - Load / Save - Load selection from disk SelectionEstela 3 Xiki
Effects - 3D Effects - Cutout.
Selections - Select None.
10.
Effects - Image Effects - Seamless Tiling
11.
Activate Layer Raster 1.
Selections - Load / Save - Load selection from disk - SelectionEstela 4 Xiki
Selections - Promote Selection to Layer.
Adjust - Blur - Gaussian Blur: 20.
Selections - Select None.
12.
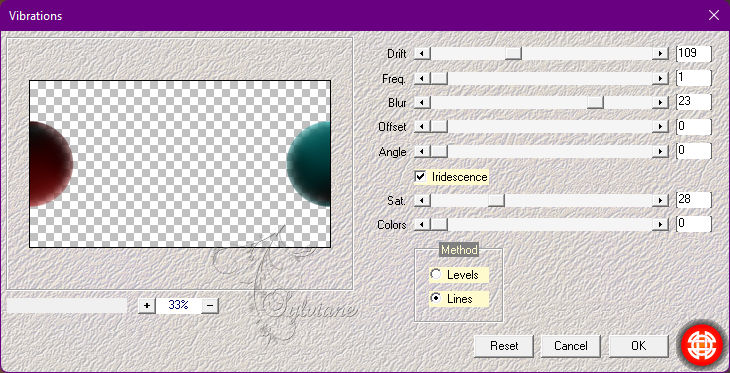
Plugins - Mehdi - Vibrations
Note: Click Iridescence and Lines first
13.
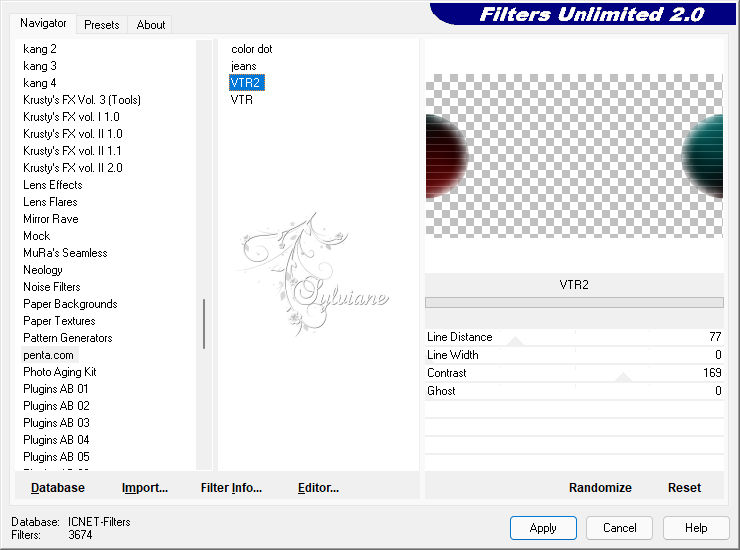
Plugins - Penta.com - VTR2
Adjust - Sharpness - Sharpen.
14.
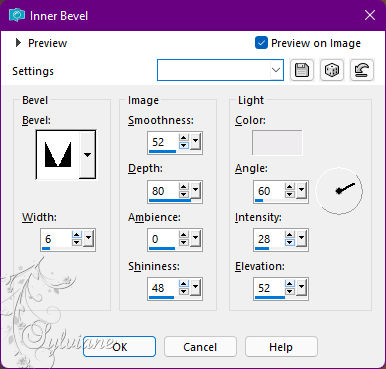
Activate the Layer Promoted Selection.
Selections - Load / Save - Load selection from disk - SelectionEstela 5 Xiki
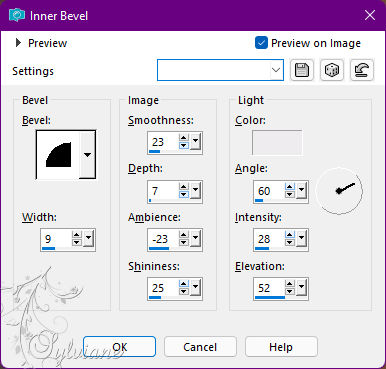
Effects - 3D Effects - Inner Bevel:
Color: #eeeced
Selections - Select None.
15.
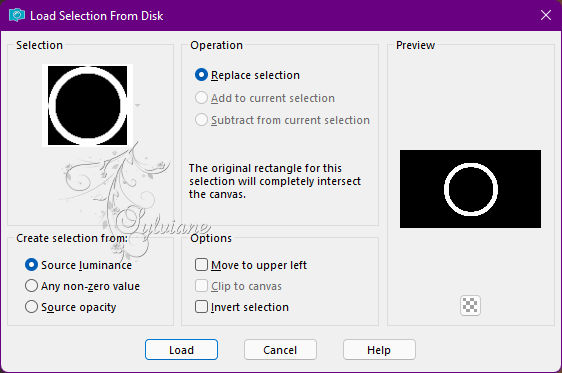
Selections - Load / Save - Load selection from disk - SelectionEstela 6 Xiki
Open Misted Landscape.
Edit - Copy
Edit - Paste as New Layer.
Layers - Arrange - Move Down.
16.
Selections > Promote Selection to Layer.
Layers - Arrange - Move Up.
Without deselecting > Check Layer Order
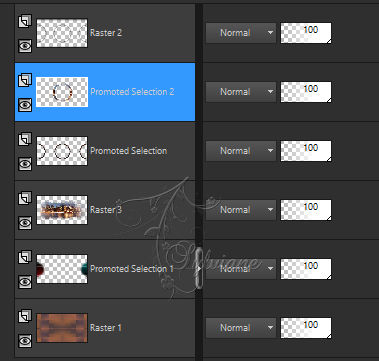
17
Effect - 3D Effects - Inner Bevel:
Color: #eeeced
Effects - 3D Effects - Drop Shadow:
0/0/ 100/ 80 - Color: #000000.
Edit - Repeat Drop Shadow.
Selections - Select None.
18.
Activate the top layer ( Raster 2).
Layers - New Raster Layer.
Selections - Load / Save - Load selection from disk - SelectionEstela 2 Xiki
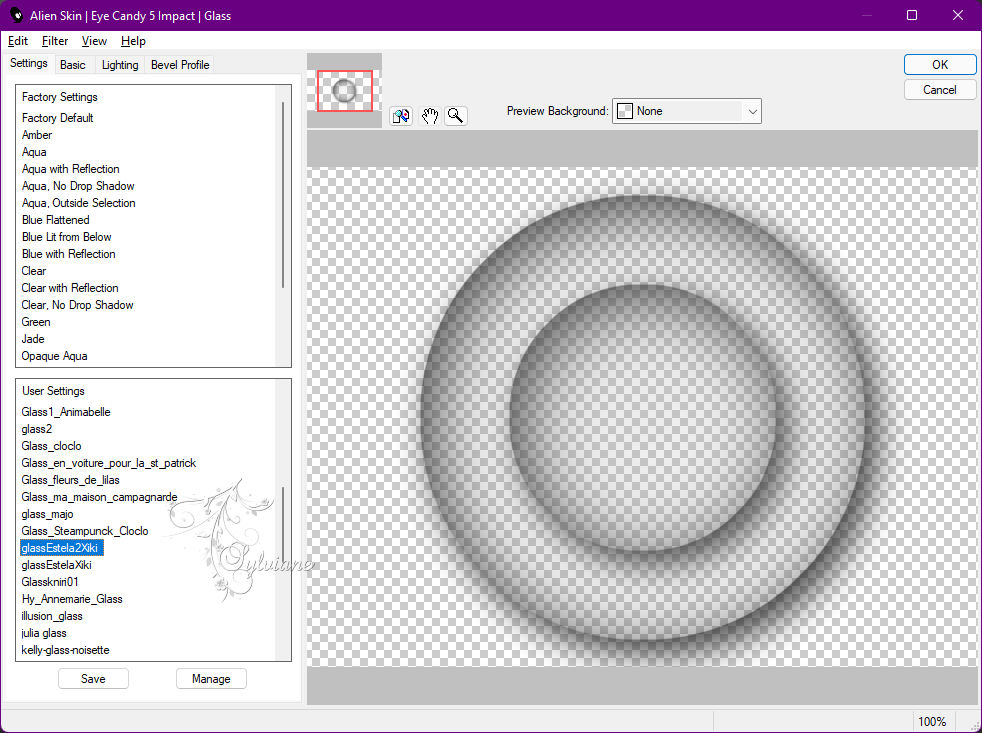
Plugins - Alien Skin Eye Candy 5 - Imapct - Glass
User Settings: glassEstelaXiki
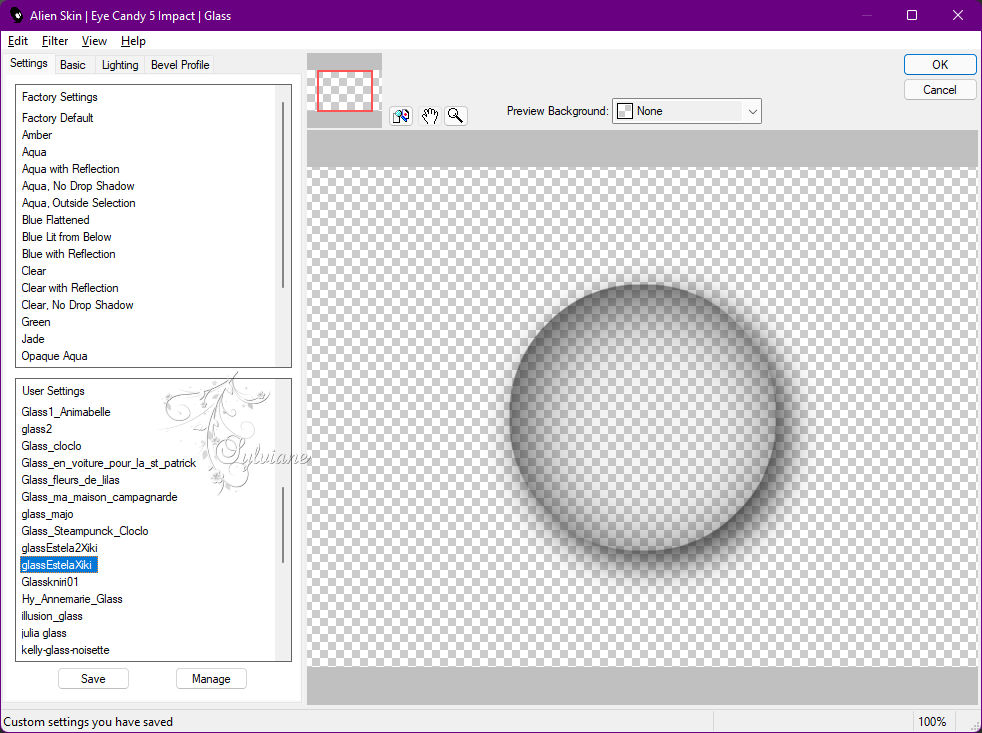
or use the following settings:
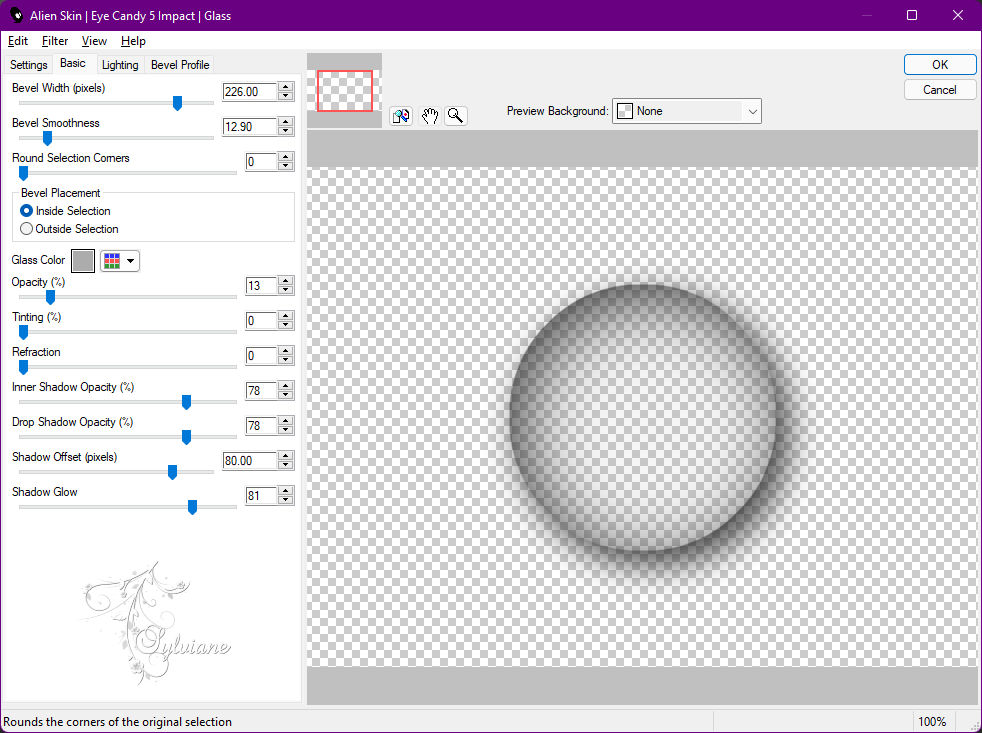
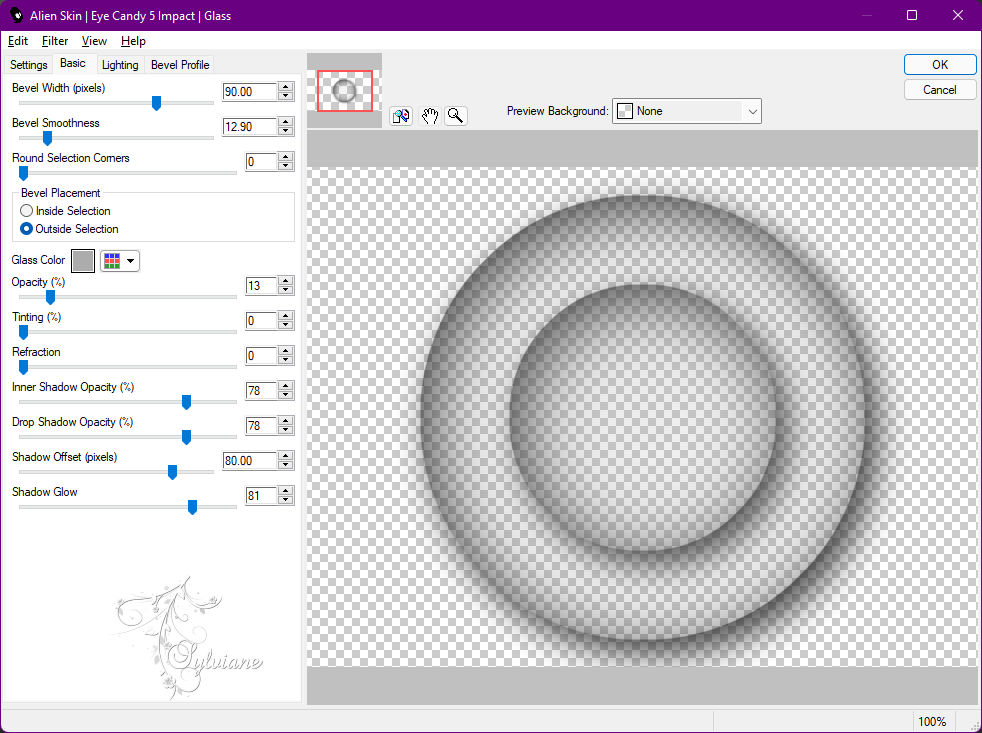
19.
Plugins - Alien Skin Eye Candy 5 - Imapct - Glass:
User Settings: glassEstela2Xiki
or use the following settings:
Selections - Select None.
20.
Close the visibility of Layer Raster 1.
Layers - Merge - Merge Visible.
Open Layer Raster visibility 1.
Activate Layer Merged.
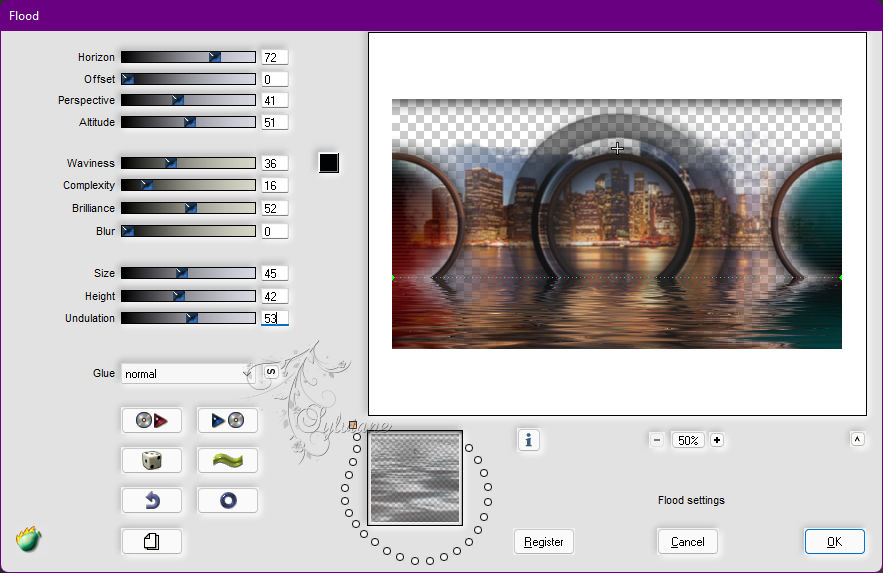
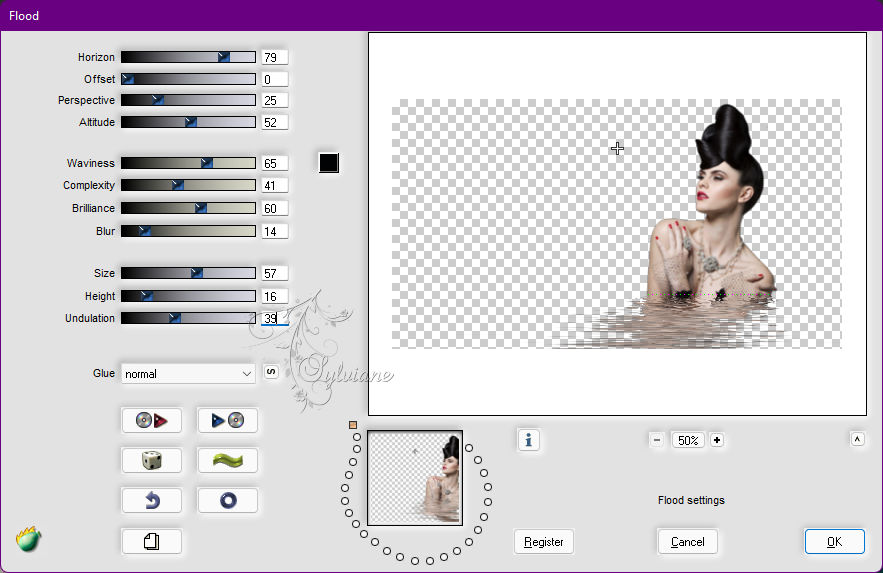
Plugins - Flaming Pear - Flood
21.
Open the main tube.
Edit - Copy
Edit - Paste as New Layer.
Resize if necessary *
(in the material tube the Resize was 70%)
Position to the right of the work.
Plugins - Flaming Pear - Flood
22.
Layers - Duplicate.
Adjust - Blur - Gaussian Blur: 40.
Layers - Arrange - Move Down.
Blend Mode: Multiply.
Note: If you want to move the Blur layer a little to the right orleft,
depending on the tube light you are using. On this one I moved to the right.
23.
Open TitleEstelaByXiki.
Edit - Copy
Edit - Paste as New Layer.
Activate selection tool (Press K on your keyboard)
And enter the following parameters:
Pos X :236 – Pos Y : 77
Press M.
Colorize or use Blend Mode > Luminance to match the colors you are using.
24.
Image - Add Borders – Symmetric - 1px - Color: foreground color.
Edit - Copy.
Selections - Select All.
Image - Add Borders – Symmetric - 30px with any color.
Selections - Invert.
Edit - Paste Into Selections.
Adjust - Blur - Gaussian Blur: 30.
25.
Plugins - Penta.com - VTR2
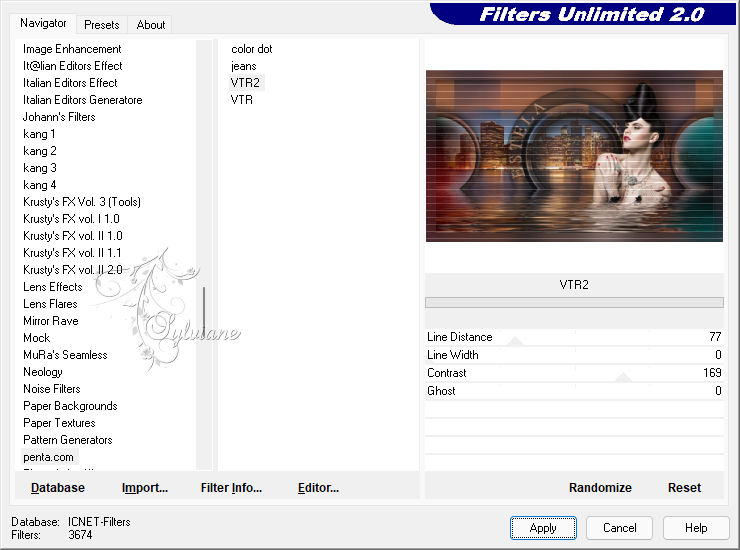
Selections - Invert.
Effects - 3D Effects - Drop Shadow:
0/ 0/ 100/ 30 - Color: #000000.
Edit - Repeat Drop Shadow.
Selections - Select None.
26.
Image - Add Borders – Symmetric - 1px - Color: foreground color.
27.
Apply your watermark or signature
Layer – merge – merge all (flatten)
Save as JPEG
Back
Copyright Translation © 2022 by SvC-Design