
This lesson is made with PSPX9
But is good with other versions.
© by SvC-Design
Materialen Download :
Here
******************************************************************
Materials:
alfa
barbed wire
bat
cross
kleuren
NarahsMasks_1778
rose
tekst-838 - Classy Witch - Ri@
witch-tubed by - Ri@
******************************************************************
Plugin:
Effects - Plugins - Mehdi - Sorting Tiles.
Effects - Plugins - Screenworks - Hollow Dot
Effects - Plugins - Simple - Centre Tile
Effects - Plugins - Graphic Plus - cross shadow
Effects - Plugins - Unlimited -Toadies - What are you?
Effects - Plugins - Screenworks - Net Pattern
******************************************************************
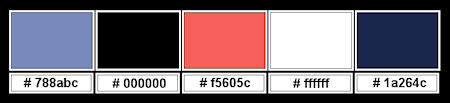
color palette
:
******************************************************************
methode
When using other tubes and colors, the mixing mode and / or layer coverage may differ
******************************************************************
General Preparations:
First install your filters for your PSP!
Masks: Save to your mask folder in PSP, unless noted otherwise
Texture & Pattern: Save to your Texture Folder in PSP
Selections: Save to your folder Selections in PSP
Open your tubes in PSP
******************************************************************
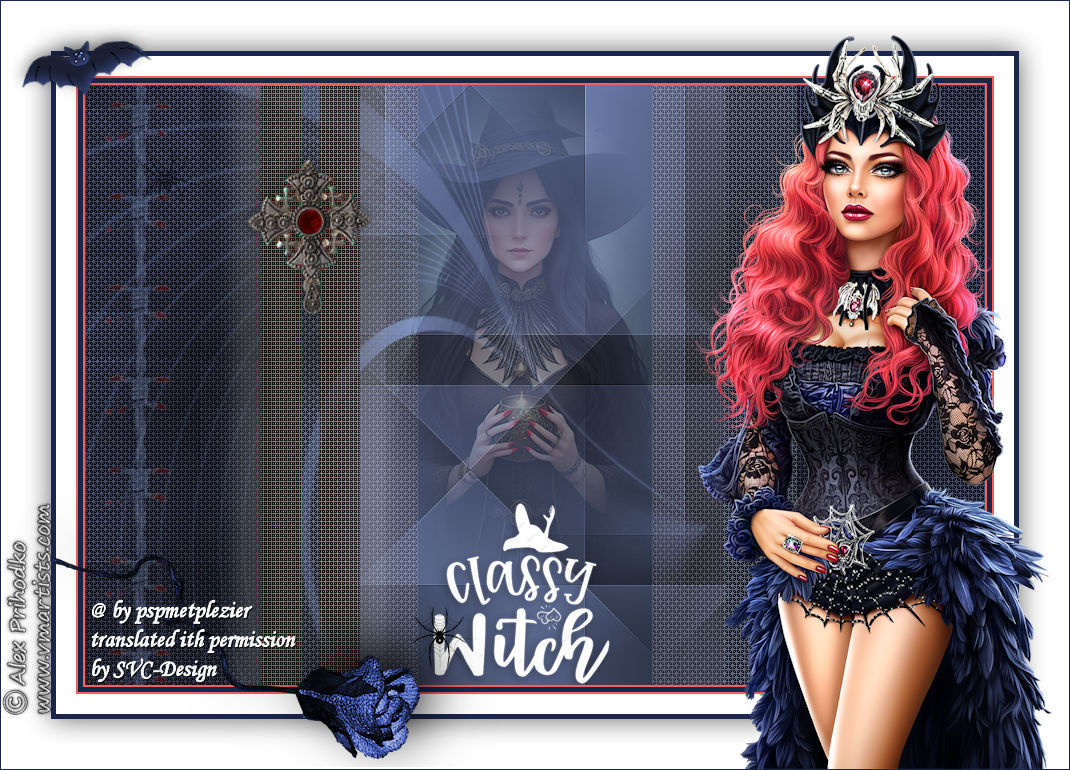
We will start - Have fun!
Remember to save your work on a regular basis
******************************************************************
foreground:#788abc
Background color :#000000
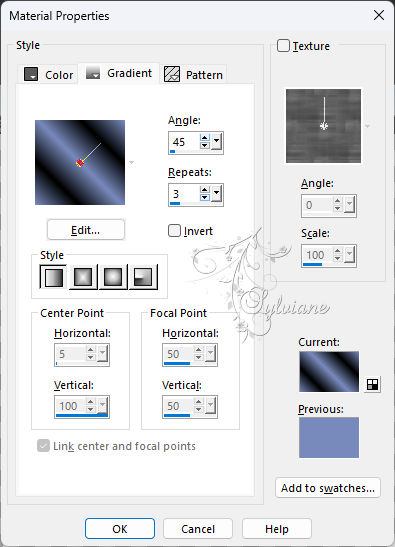
create a linear gradient
1.
Open the alpha sheet in PSP.
Duplicate window.
Close the original.
We are working on the duplicate.
Fill the image with the gradient.
2.
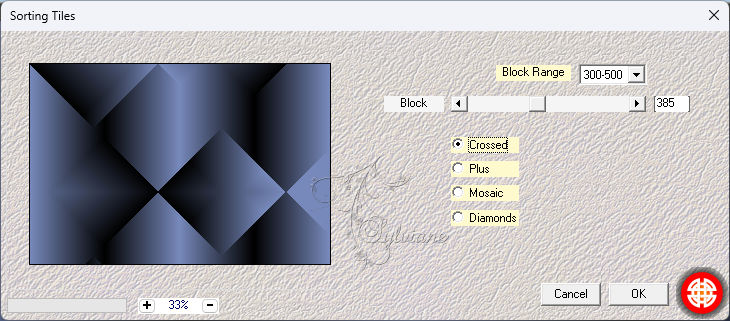
Effects - Plugins - Mehdi - Sorting Tiles
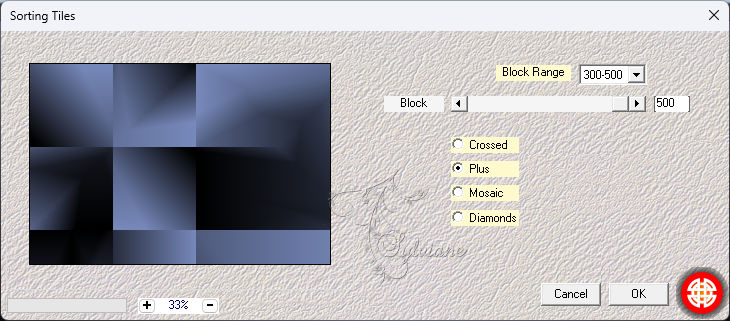
3.
Effects - Edge Effects - Enhance
4.
Layers - new raster layer.
Change the gradient - angle 130 - the rest is fine.
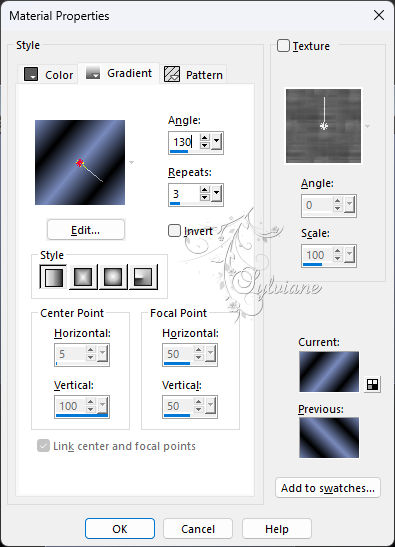
Fill the image with the gradient.
5.
Effects - Plugins - Mehdi - Sorting Tiles
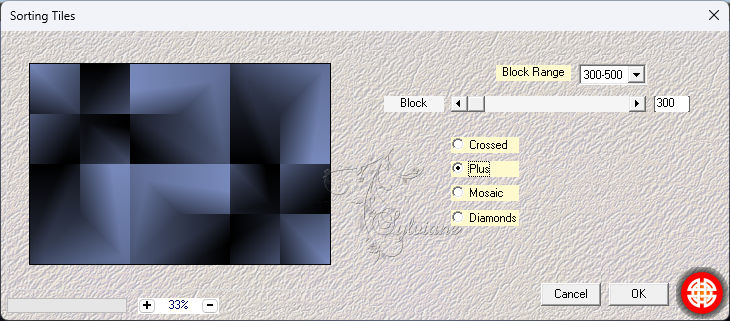
Layer opacity 50.
Effects - Edge Effects - Enhance
Layers - merge - merge down.
6.
Layers - new raster layer.
Change the gradient - angle 90 - the rest is fine.
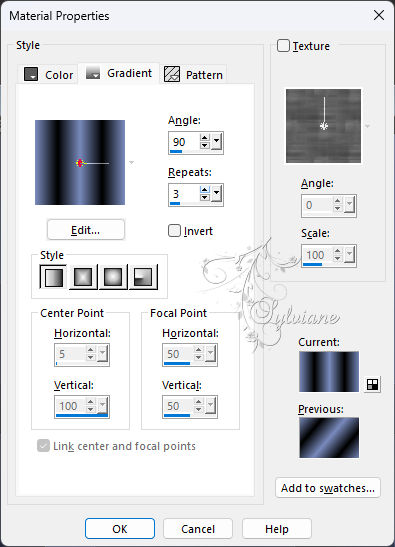
Fill the image with the gradient.
7.
Effects - Plugins - Mehdi - Sorting Tiles
Layer opacity 30.
Effects - Edge Effects - Enhance
Layers - merge - merge down.
8.
Layers - new raster layer.
Selections - load/save - load selection from alpha channel - open selection 1

Set the background color to color # f5605c.
Flood fill the selection with the background color.
9.
Selection - modify - contract - 40 pixels.
Hit the delete button on your keyboard.
Selection - Select None
10.
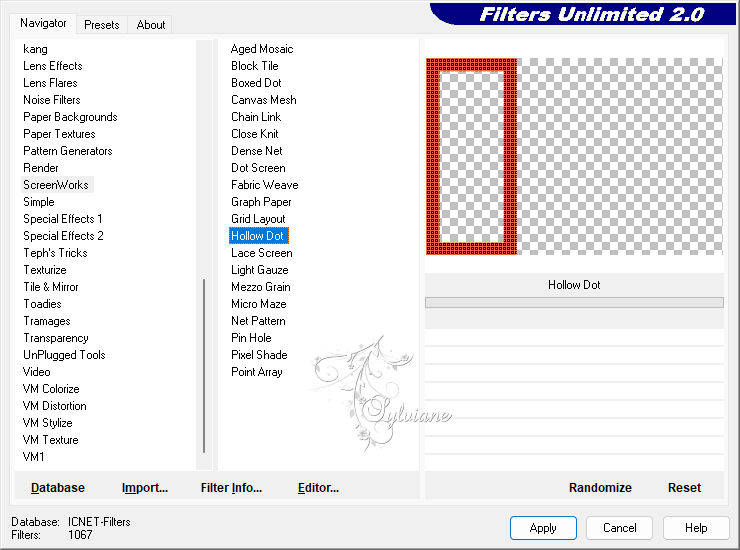
Effects - Plugins - Screenworks - Hollow Dot - default
Effects - 3D Effects - drop shadow.
20/20/50/40 – color:#000000
Layer opacity 70.
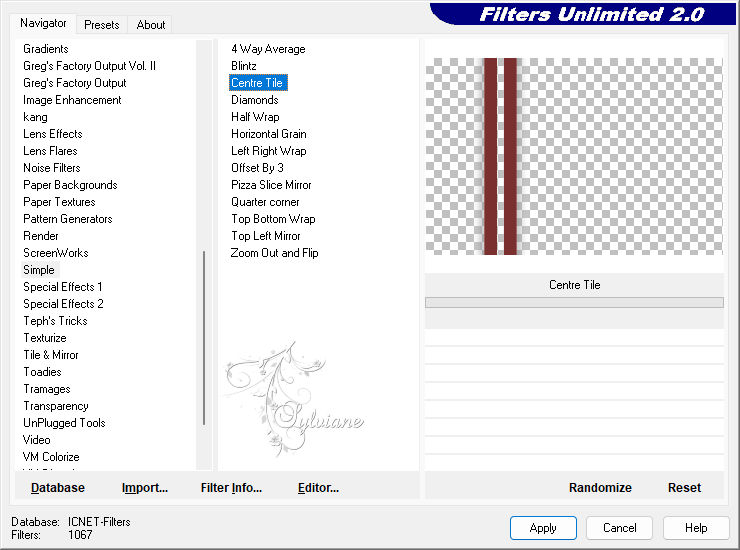
Effects - Plugins - Simple - Centre Tile - default
11.
Activate the bottom layer.
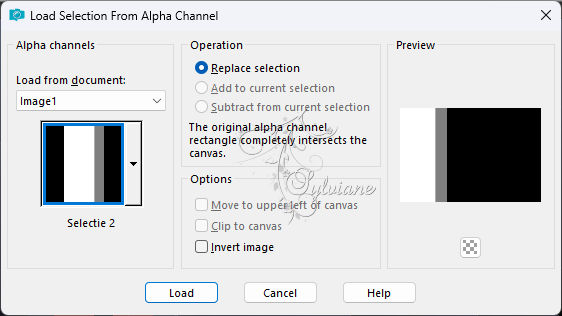
Selections - load/save - Load selection from alpha channel - open selection 2
Selections - make layer from selection.
Selection - Select None
12.
Effects - Plugins - Graphic Plus - cross shadow

13.
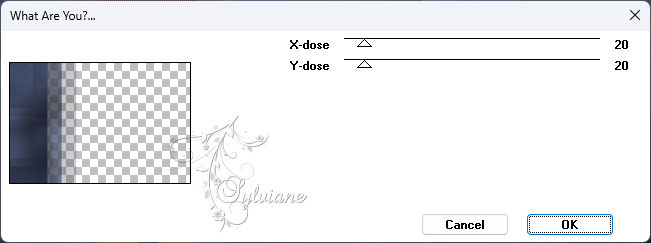
Effects - Plugins - Unlimited -Toadies - What are you? - Default.
14.
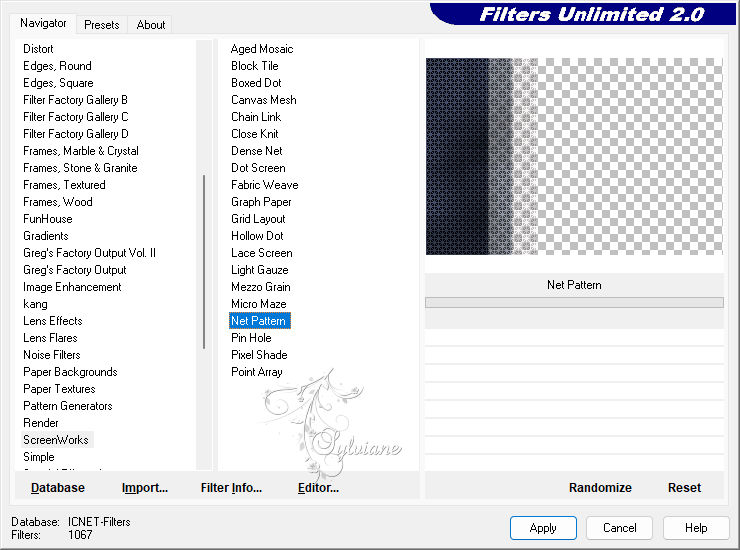
Effects - Plugins - Screenworks - Net Pattern - default
15.
Layers - duplicate.
Image - mirror.
Layers - merge - merge down.
We stay on this layer for a while!
16.
Layers - new raster layer.
Fill the image with the foreground color.
Layers - new mask layer - From image - mask Narahs_Masks_1778

Layers - Merge - Merge group.
17.
Activate the top layer.
18.
Open the tube witch-tubed by - Ri@
Edit - copy.
Back to your image.
Edit - paste as a new layer.
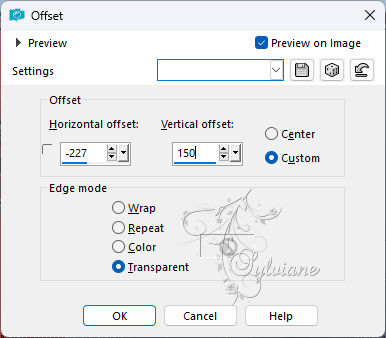
Effects - image effects - offset
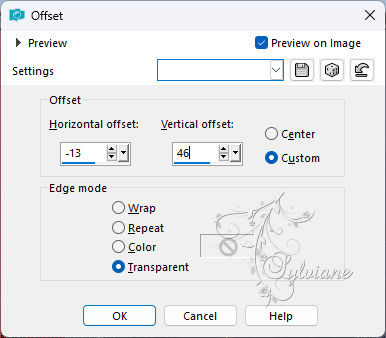
Layer opacity 35.
19.
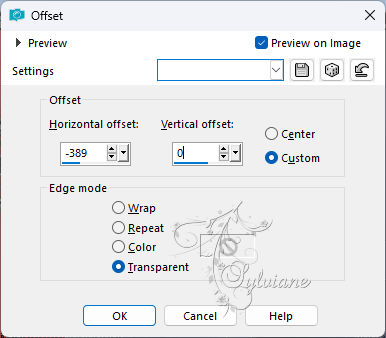
Open the tube text-838 - Classy Witch - Ri@.
Edit - copy.
Back to your image.
Edit - paste as a new layer.
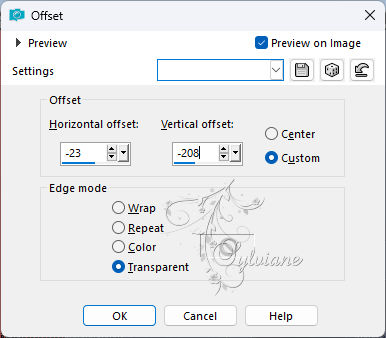
Effects - image effects - offset
20.
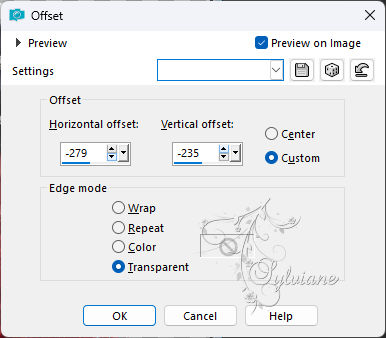
Open the tube cross.
Edit - copy.
Back to your image.
Edit - paste as a new layer.
Effects - image effects - offset
21.
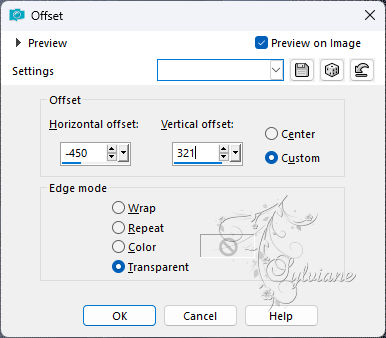
Open the tube barbed wire.
Edit - copy.
Back to your image.
Edit - paste as a new layer.
Effects - image effects - offset
Layer opacity 65
Layers - merge - merge all layers.
22.
Image - add borders - 2 pixels color # f5605c.
Image - add borders - 5 pixels color # 1a264c.
Image - add borders - 2 pixels color # f5605c.
Image - add borders - 20 pixels color white.
Image - add borders - 5 pixels color # 1a264c.
Select all.
Image - add borders - 50 pixels color white.
Effects - 3D Effects - drop shadow.
0/0/60/40 – foreground color
Selection - Select None
23.
Open the tube Rose.
Edit - copy.
Back to your image.
Edit - paste as a new layer.
Effects - image effects - offset
24.
Open the tube Bat.
Edit - copy.
Back to your image.
Edit - paste as a new layer.
Effects - image effects - offset
25.
Open your chosen tube.
Place the tube on the bottom right.
Give the tube a nice drop shadow.
26.
Place your name or watermark.
Layers - merge - merge all layers.
Image - add borders - 1 pixel color #1a264c
Image - resize - 900 pixels - longest sides.
Save as JPEG
Back
Copyright Translation 2024 by SvC-Design
------------------------------------------------------------------------------
Thanks to all who created