
This lesson is made with PSPX9
But is good with other versions.
© by SvC-Design
Materialen Download :
Here
******************************************************************
Materials:
20-20.jpg
alfa-change.pspimage
bottle.png
butterfly.png
change.jpg
kleurenchange226.jpg
NarahsMasks_1521.jpg
tekst-770 - change doesn't come from comfort - Ri@.pspimage
tekst-change-Ri@.png
tube-ship.png
******************************************************************
Plugin:
Plugins – Unlimited - &Bkg Kaleidoscope> - Kaleidoscope 1
Plugins – Toadies – What are you?
******************************************************************
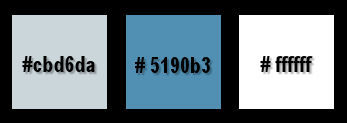
color palette
:
******************************************************************
methode
When using other tubes and colors, the mixing mode and / or layer coverage may differ
******************************************************************
General Preparations:
First install your filters for your PSP!
Masks: Save to your mask folder in PSP, unless noted otherwise
Texture & Pattern: Save to your Texture Folder in PSP
Selections: Save to your folder Selections in PSP
Open your tubes in PSP
******************************************************************
We will start - Have fun!
Remember to save your work on a regular basis
******************************************************************
Foreground color # cbd6da
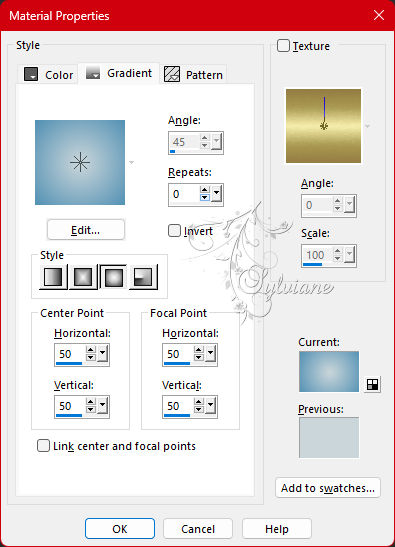
Gradient - Sunbeam - repeats 0 - uncheck invert - 50/50.
Background color #590b3
1.
Open alfa-change.pspimage
Window – duplicate
Minimize the original - we work on the copy
2.
Fill the image with the gradient.
3.
Layers – new raster layer.
4.
Fill the layer with the foreground color.
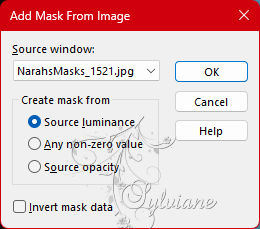
5.
Layers – New Mask Layer – From Image - NarahsMasks_1521.jpg
6.
Layers – Merge – Merge Group.
7.
Layers – new raster layer.
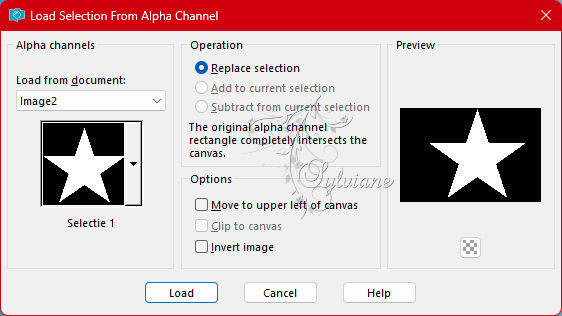
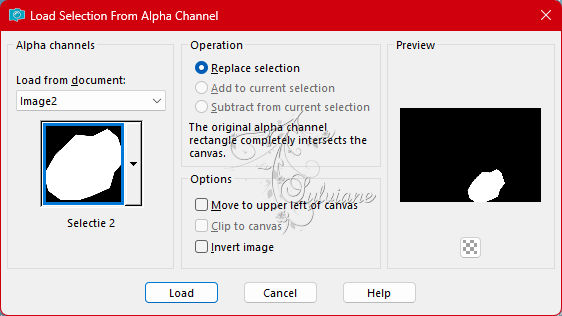
8.
Selection – Load/Save Selection – Load Selection from Alpha Channel - selection 1.
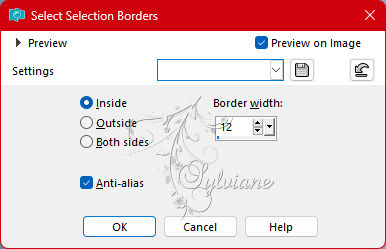
9.
Selections - modify - select selection borders
10.
Fill the selection with the color white.
11
Selections – select none.
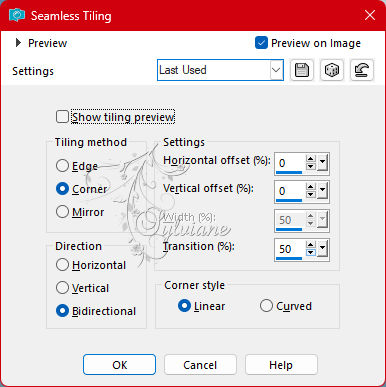
12.
Effects - Image Effects - Seamless Tiling
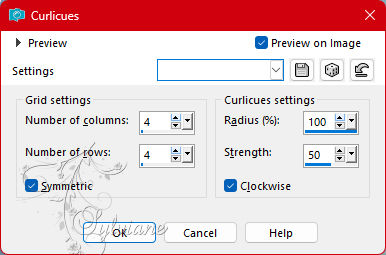
13.
Effects – distortion effects - Curlicues
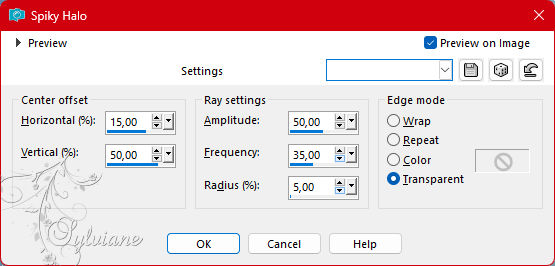
14.
Effects – Distortion Effects – spiky Halo.
15.
Blend Mode – Hard Light.
16.
Selection – Load/Save Selection – Load Selection from Alpha Channel - selection 2.
17.
Press the delete button on your keyboard.
18.
Selections – select none.
19.
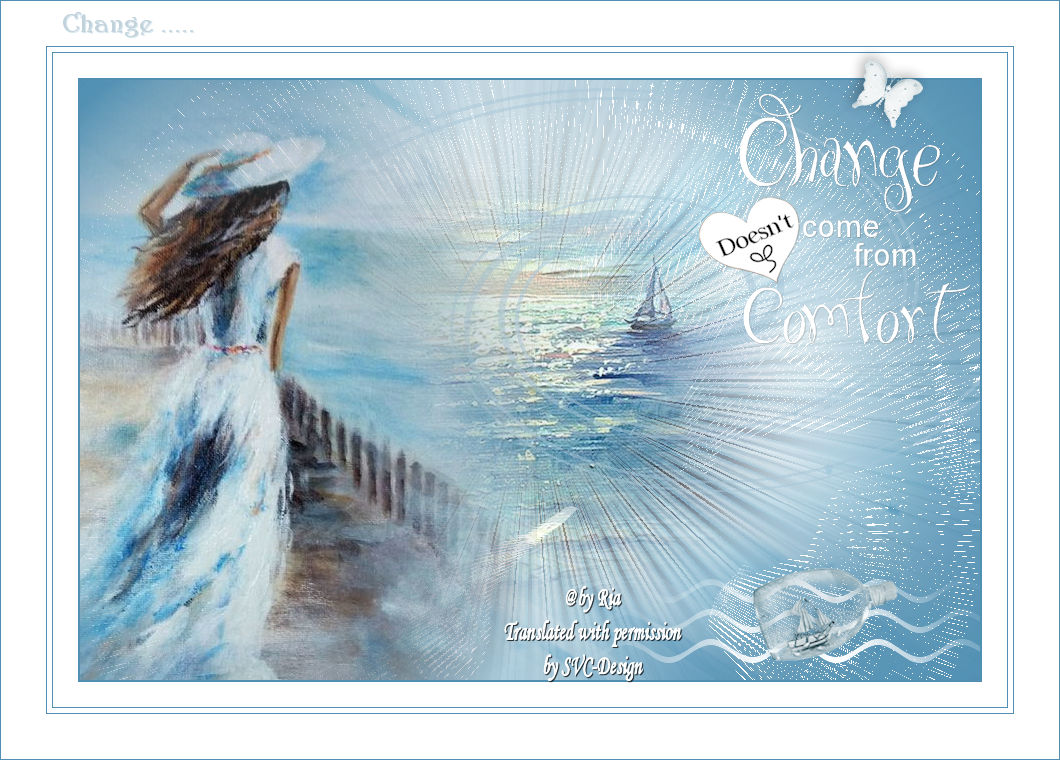
Open the picture change.
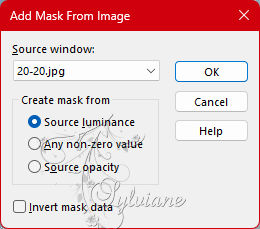
20.
Layers – New Mask Layer – From Image.
Open the mask 20-20
21.
Layers – Merge – Merge Group.
22.
Layers – duplicate.
23.
Layers - merge - merge down.
24.
Edit – copy.
(Keep the tube, you will need it later)
25.
Back to your image.
Edit - paste as new layer.
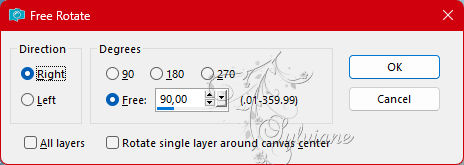
26.
Image – Free Rotate – Right – 90 degrees.
27.
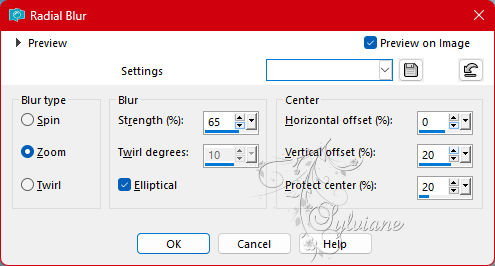
Adjust – Blur – Radial Blur.
28.
Layers – arrange – move down.
29.
Stay on this layer!
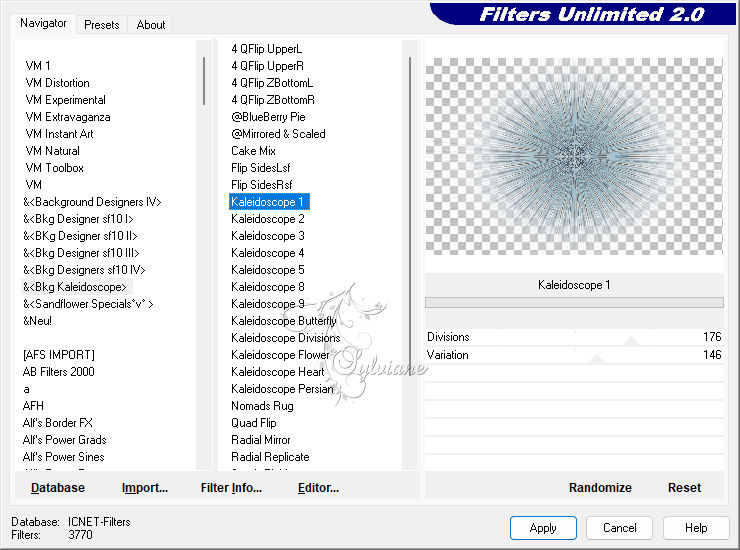
Plugins – Unlimited - &Bkg Kaleidoscope> - Kaleidoscope 1.
30.
Edit – paste as new layer – (the tube is still in the memory of the mouse)
31.
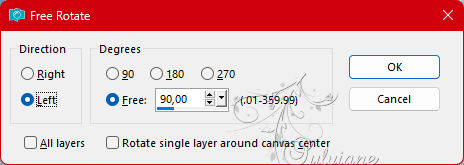
Image – Free Rotate – Left – 90 degrees.
32.
Adjust – Blur – Radial Blur.
33.
Blend Mode – Overlay.
34.
Activate the top layer.
35.
Open tube ship.
Edit – copy.
36.
Back to your image.
Edit - Paste as new layer.
Fits right away.
37.
Layer Opacity 90.
38.
Layers – new raster layer.
39.
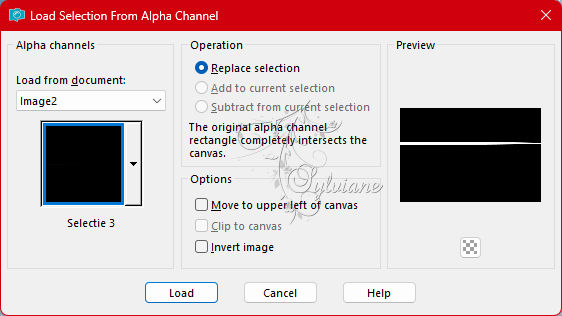
Selection – Load/Save Selection – Load Selection from Alpha Channel - selection 3.
40.
Fill the selection with the color white.
41.
Selections – select none.
42.
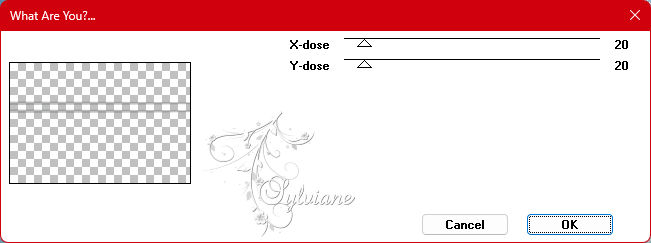
Plugins – Toadies – What are you? - standard.
43.
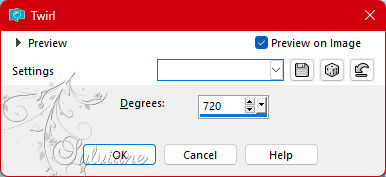
Effects – Distortion Effects –twirl
44.
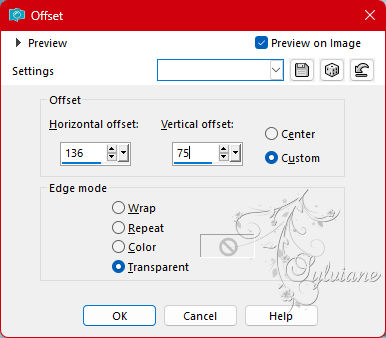
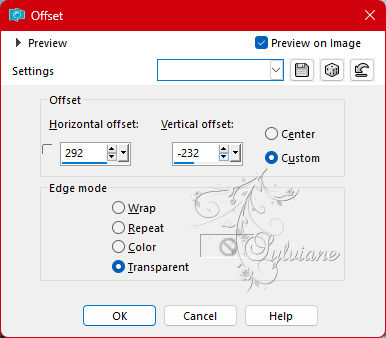
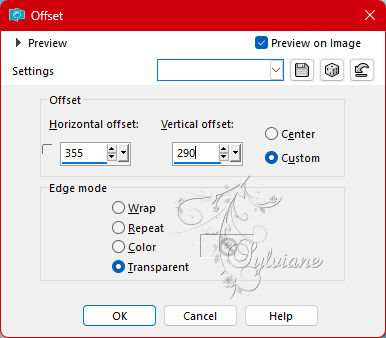
Effects – image effects – offset.
45.
Activate the saved tube again! (which you made in the beginning)
46.
Image - Mirror – mirror Horizontal
Edit – copy.
47.
Back to your image.
Edit - Paste as new layer.
48.
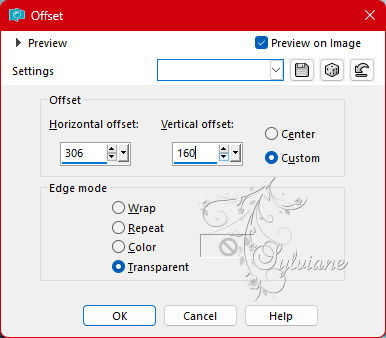
Effects – image effects – offset.

49.
Layers – new raster layer.
50.
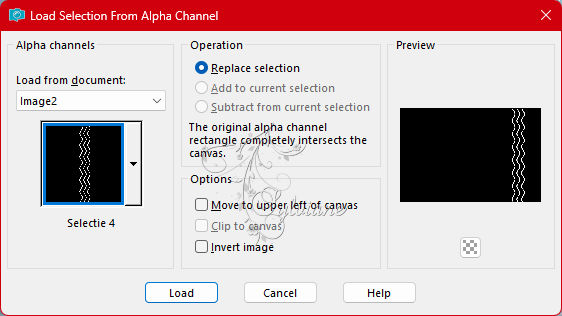
Selection – Load/Save Selection – Load Selection from Alpha Channel - selection 4.
(Note! that it is selection 4)
51.
Fill the selection with the color white.
52.
Selections – select none.
53.
Effects - Image Effects - Seamless Tiling – Still good.
54.
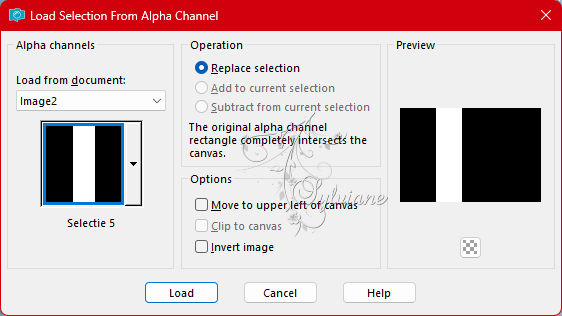
Selection – Load/Save Selection – Load Selection from Alpha Channel - selection 5.
55.
Press the delete button on your keyboard.
56.
Selections – select none.
57.
Image – Free Rotate – Left – 90 degrees.
58.
Effects – image effects – offset.

59.
Open bottle.png
Edit – copy.
60.
Back to your image.
Edit - Paste as new layer.
61.
Effects – image effects – offset.
62.
Open the tube text-770 - change doesn't come from comfort - Ri@.
Edit – copy.
64.
Back to your image.
Edit - Paste as new layer.
65.
Image - resize - 80% - all layers unchecked.
66.
Effects – image effects – offset.
67.
Layers – merge – merge all layers.
68.
Image – Add Borders –symmetric - 2 pixels - background color.
69.
Image – Add Borders –symmetric - 25 pixels - color white.
70.
Image – Add Borders –symmetric - 1 pixels - background color.
71.
Image – Add Borders –symmetric - 5 pixels - color white.
72.
Image – Add Borders –symmetric - 1 pixel - background color.
73.
Image – Add Borders –symmetric - 45 pixels - color white.
74.
Image – Add Borders –symmetric - 1 pixel - background color.
75.
Open butterfly.png
Edit – copy.
76.
Back to your image.
Edit - paste as new layer.
77.
Effects – image effects – offset.
78.
Open tekst-change-Ri@.png
Edit – copy.
79.
Back to your image.
Edit - paste as new layer.
80.
Place the tube at the top left in the wide edge.
81.
Place your name or watermark.
82.
Layers – merge – merge all layers.
83.
Image – resize – 600 pixels – longest sides.
Save as JPEG
Back
Copyright Translation 2023 by SvC-Design