

This lesson is made with PSPX9
But is good with other versions.
© by SvC-Design

Materialen Download :
Here
******************************************************************
Materials:
bouquet_nkt.png
coeur_nkt.png
dentelle-nkt.png
feuArt_nkt.png
fond-nkt.jpg
Maman_nkt.png
mom_nkt.png
******************************************************************
Plugin:
Plugin – Unlimited 2.0 – Transparency - eliminate white
Plugin – Xero – Mistifier
Plugin – AAA Frame – Foto Frame
******************************************************************
color palette
:
******************************************************************
methode
When using other tubes and colors, the mixing mode and / or layer coverage may differ
******************************************************************
General Preparations:
First install your filters for your PSP!
Masks: Save to your mask folder in PSP, unless noted otherwise
Texture & Pattern: Save to your Texture Folder in PSP
Selections: Save to your folder Selections in PSP
Open your tubes in PSP
******************************************************************
We will start - Have fun!
Remember to save your work on a regular basis
******************************************************************
1.
Open the tubes provided in your PSP and the DUPLICATE, erase the buffers.
2.
Open the image background-NKT in your PSP.
Put in before plan the color bd41c5 and back- map The color Cdc3ec.
Layer, New Raster layer.
Made a gradient rectangular with these 2 colors, angle 0, repeat 4, Center H V 50, Source H v.
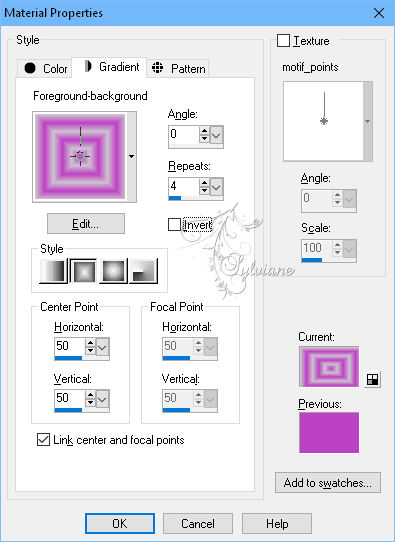
Fill with the gardient
3.
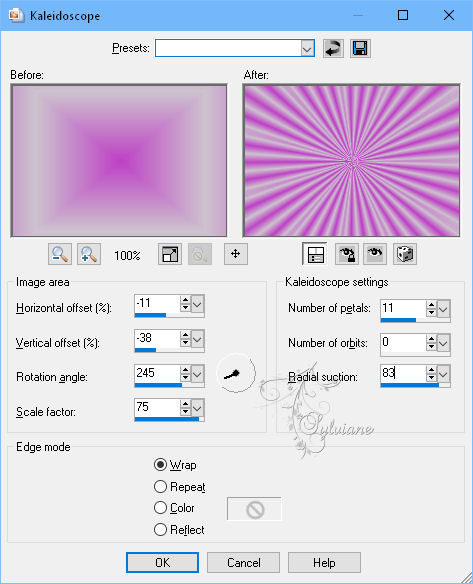
Effect - effect of reflection - Kaleidoscope
4.
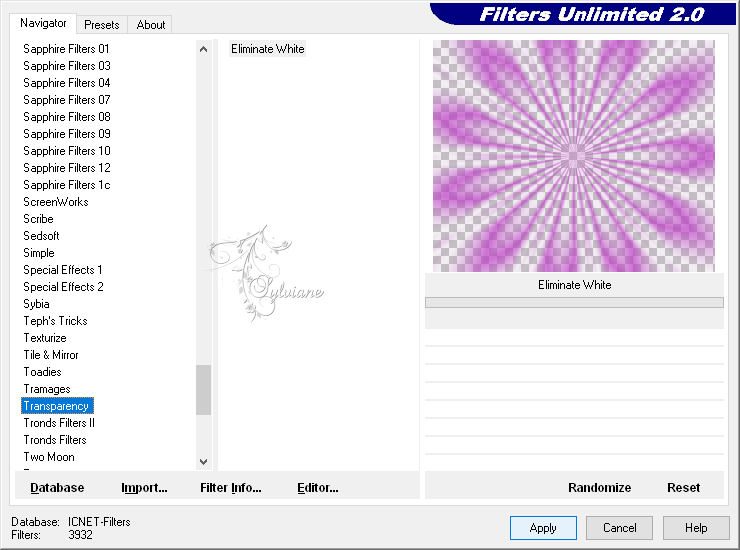
Plugin – Unlimited 2.0 – Transparency - eliminate white.
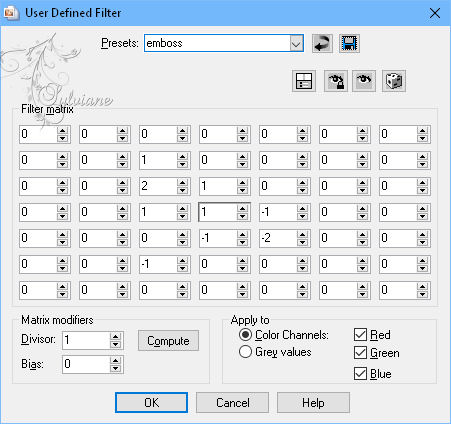
Effects – User defined filter - emboss
5.
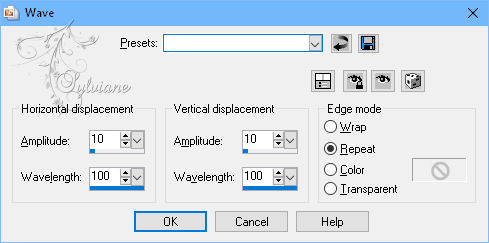
Effects - distortion effects - wave
6.
Open dentelle-nkt.png
Edit – Copy
Edit - Paste as new layer
Place it in the lower right corner.
Blend Mode luminance inherited.
7.
Open coeur_nkt.png
Edit – Copy
Edit - Paste as new layer
Resize to 90%.
Effects - 3D effects - Drop shadow
0/-15/60/65 color:#000000
8.
Open Maman_nkt.png
Edit – Copy
Edit - Paste as new layer
Resize to 80%
and place it on the center of the heart. You must have this:

9.
Open bouquet_nkt.png
Edit – Copy
Edit - Paste as new layer
the place at the bottom on the left.
10.
Open mom_nkt.png
Edit – Copy
Edit - Paste as new layer
resize it to 80%
and place it at your convenience.
Effects - 3D effects - Drop shadow
-1/-1/50/10 color:#000000
11.
copy-paste the feuArtt tube-NKT
resize it to 80%,
down below the heart.
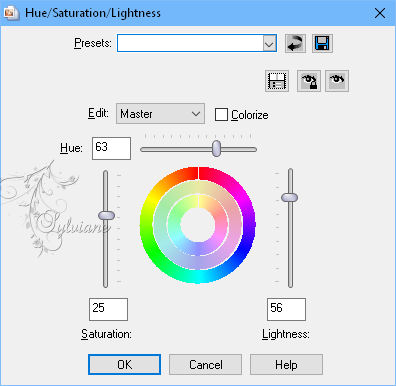
Adjustment, Hue/Saturation/brightness configured as below:
layer - arange - down under the hart
12.
Layers - merge – merge all ( Flatten)
13.
Plugin – Xero – Mistifier - default

14.
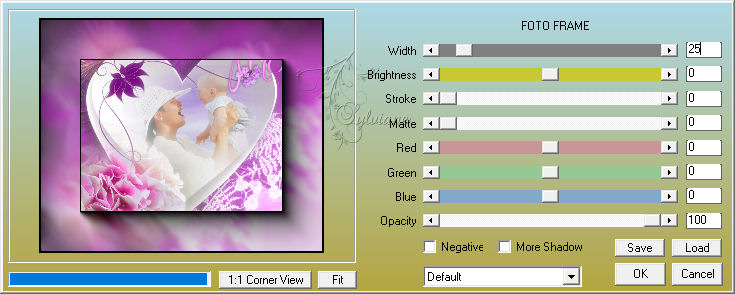
Plugin – AAA Frame – Foto Frame - put 25.
Sign your work.
15.
Image - add borders - 5 pixels – color:FFFFFF
16.
Save as JPEG
Back
Copyright Translation © 2018 by SvC-Design
