
This lesson is made with PSPX9
But is good with other versions.
© by SvC-Design
Materialen Download :
Here
******************************************************************
Materials:
0_17e30d_3aaee29b9_xxl.png
alenza_tube_513.png
NarahsMasks_1666.jpg
wanted.pspimage
******************************************************************
Plugin:
plugin - Mura's Meister - Pole Transform
plugin - Mur'as Meister - Perspective Tiling
plugin - Color Efex Pro 3.0 - Glamour Glow
******************************************************************
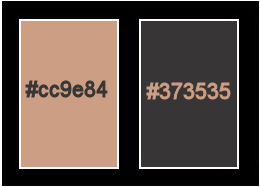
color palette
:
******************************************************************
methode
When using other tubes and colors, the mixing mode and / or layer coverage may differ
******************************************************************
General Preparations:
First install your filters for your PSP!
Masks: Save to your mask folder in PSP, unless noted otherwise
Texture & Pattern: Save to your Texture Folder in PSP
Selections: Save to your folder Selections in PSP
Open your tubes in PSP
******************************************************************
We will start - Have fun!
Remember to save your work on a regular basis
******************************************************************
1.
Open a new transparent image of 900 x 700 pixels
foreground color #cc9e84, background color #373535, make a linear gradient
2.
Layers - new raster layer
fill with color #373535
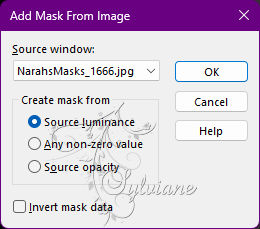
open NarahsMasks_1666.jpg
Layers – new mask layer - from image - NarahsMasks_1666.jpg
3.
Layers - Merge - Merge Group
Adjust – scharpness – scharpen
Effects - 3 D effects - Drop shadow
4/0/100/7 - color #000000
Lagen – samevoegen – omlaag samevoegen
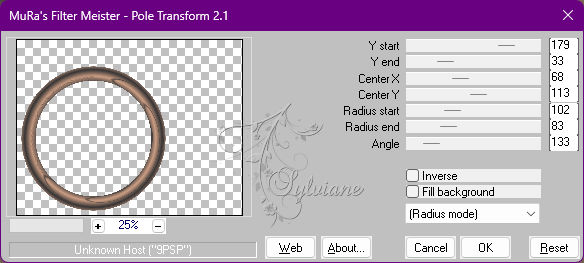
layers - duplicate
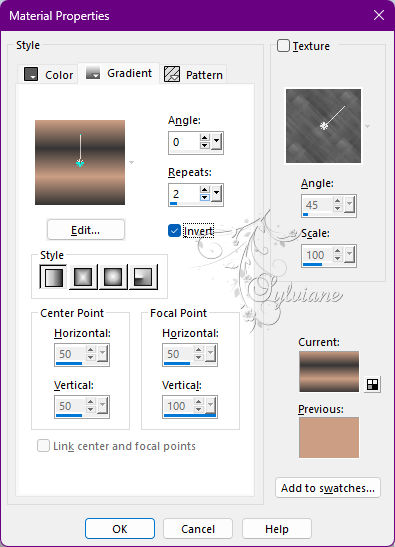
plugin - Mura's Meister - Pole Transform
4.
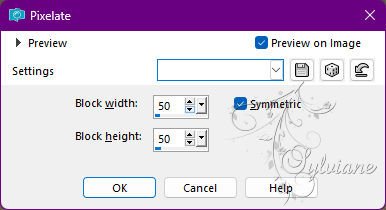
Effects - distortion effects - pixelate
5.
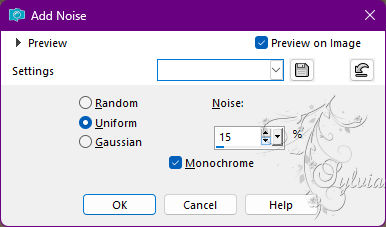
Adjust - Add / Remove Noise - Add Noise
6.
Effects - 3 D effects - Drop shadow
2/0/70/7 - color #000000.
Activate the bottom layer
Layers - Duplicate
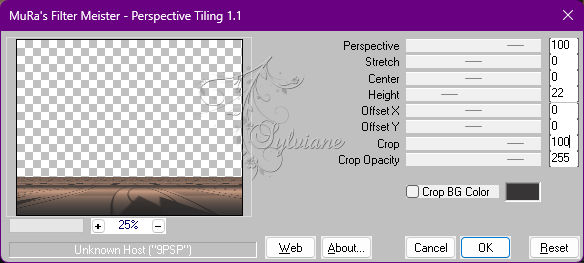
plugin - Mur'as Meister - Perspective Tiling
7.
Effects - 3 D effects - Drop shadow
0/ O /100 /100 - color #cc9e84
return to the top layer
open alenza_tube_513.png
Edit – Copy
Edit - Paste as new layer
Image - Resize - 70%
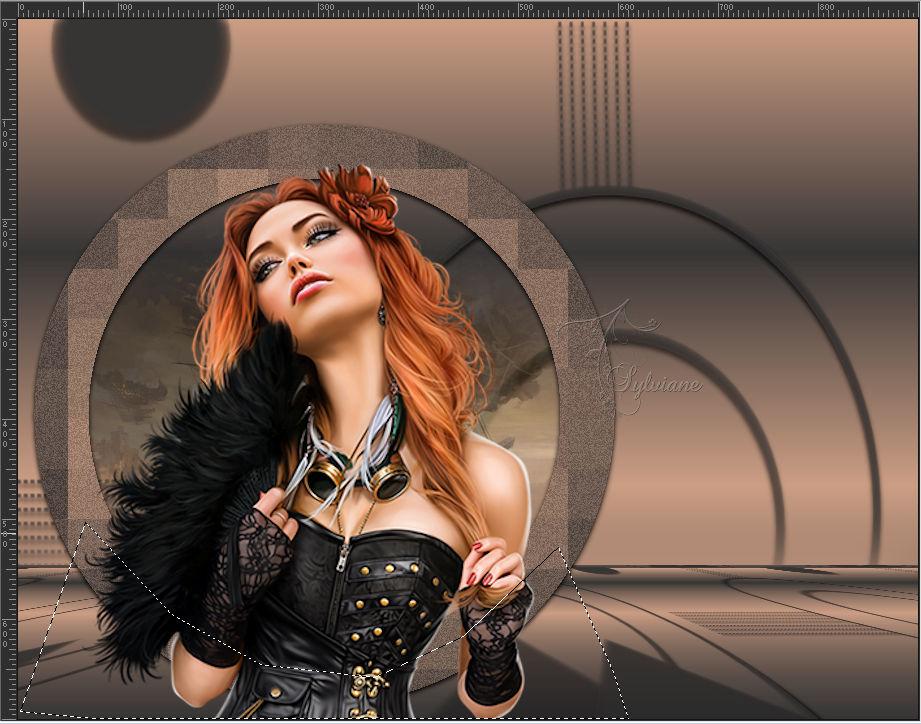
we accommodate it in the circle as seen in the image
lower the opacity to 60
layers organize down,
with the eraser tool size 20 and blur we delete what protrudes from the circle,
open 0_17e30d_3aaee29b9_xxl.png
Edit – Copy
Edit - Paste as new layer
Image - Resize - 130 %,
Image - Mirror – mirror Horizontal
accommodate in the circle as seen in the image, with the tool loop selection freehand select
8.
Press on Delete
Layers – arrange – move down
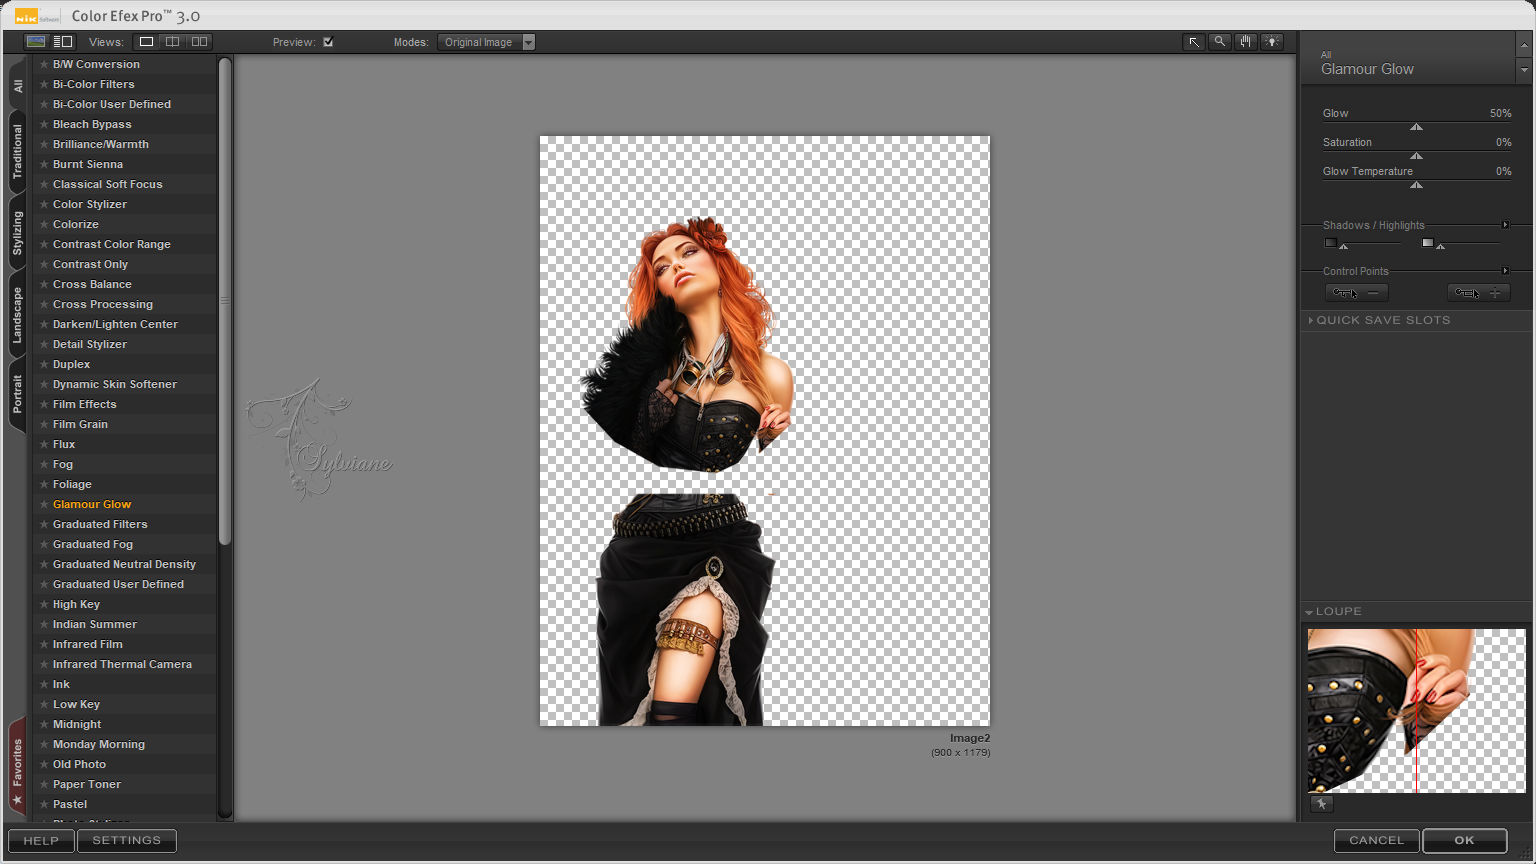
plugin - Color Efex Pro 3.0 - Glamour Glow
9.
Effects - 3 D effects - Drop shadow
0/ O /100 /100 - color #cc9e84
open 0_17e30d_3aaee29b9_xxl.png
Edit – Copy
Edit - Paste as new layer
image change size 90%,
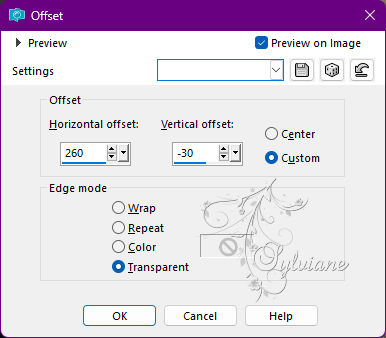
Effects - Image Effects - Offset
10.
Effects - 3 D effects - Drop shadow
0/ O /100 /100 - color #cc9e84
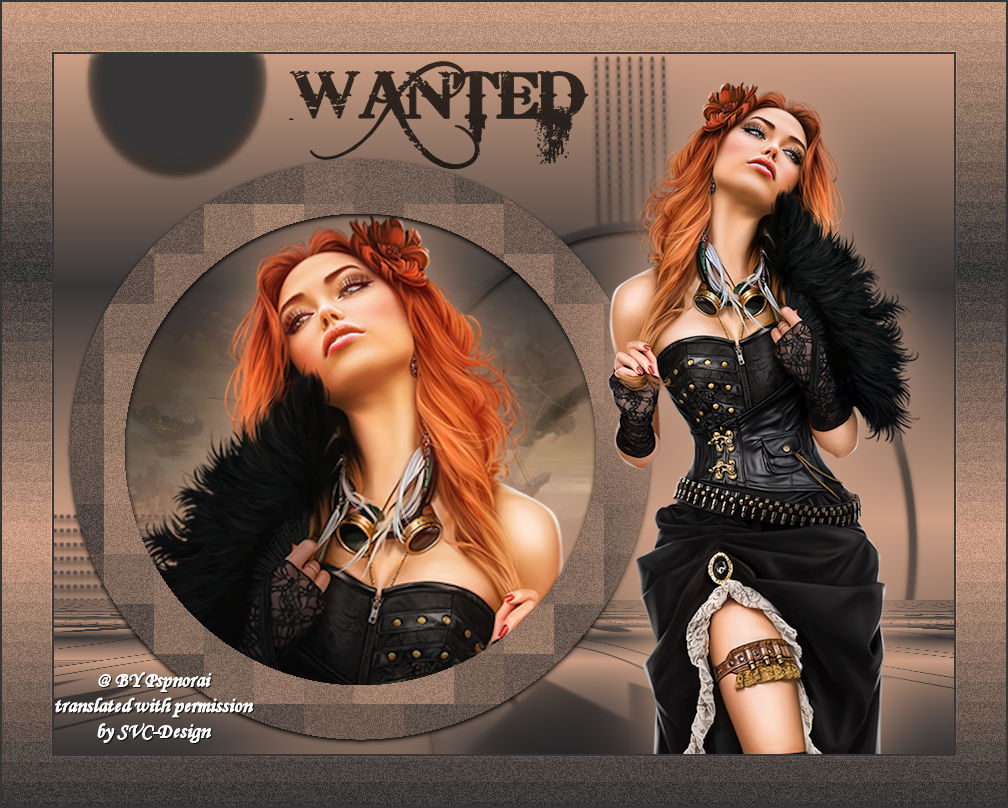
open wanted.pspimage
Edit – Copy
Edit - Paste as new layer
Image – Add Borders –symmetric - 2 pixels color #373535
Image – Add Borders –symmetric - 50 pixels color #ffffff
select with the magic wand tool that border
Layers - New Raster Layer
fill with the same gradient that we use
Effects - distortion effects - pixelate
width of blocks 20, height of blocks 20

Adjust – scharpness – scharpen
Adjust - Add / Remove Noise - Add Noise - same values as the previous one,
Selection - Select None
Image – Add Borders –symmetric - 2 pixels color #373535
11.
Apply your watermark or signature
Layer – merge – merge all (flatten)
Save as JPEG
Back
Copyright Translation 2022 by SvC-Design