
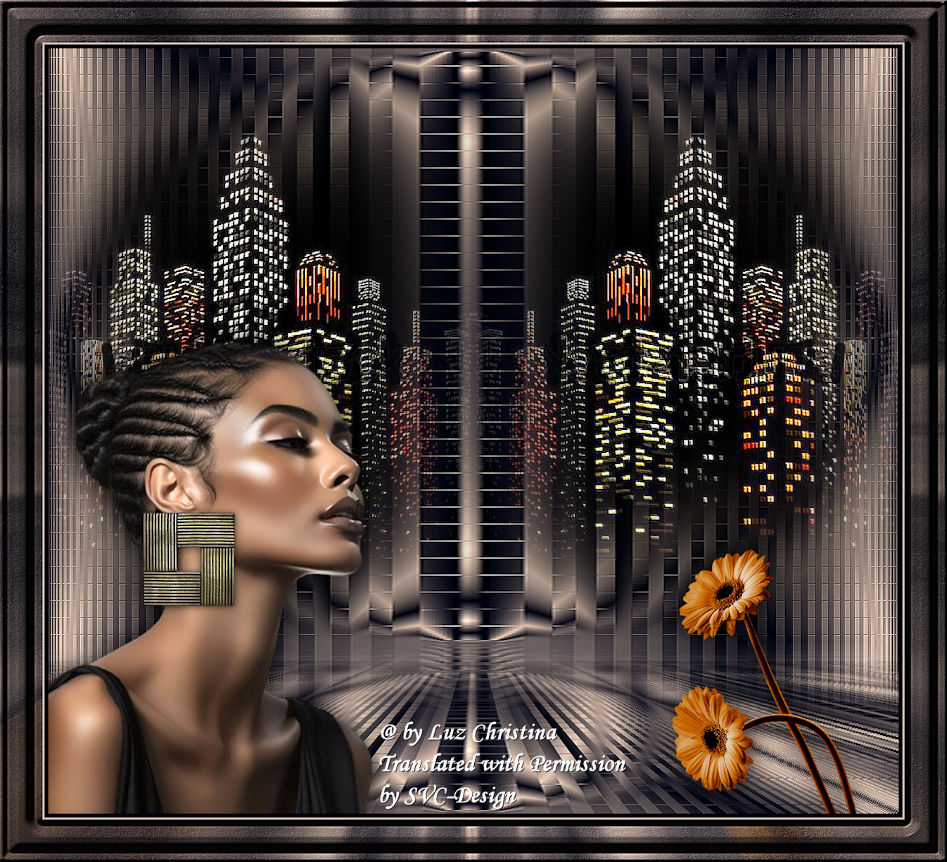
This lesson is made with PSPX9
But is good with other versions.
© by SvC-Design

Materialen Download :
Here
******************************************************************
Materials:
8252-LuzCristina
anna.br_crisantemo-rosa-by-mkatka_24-08-10s
Misted-LuzCristina
******************************************************************
Plugin:
Effects – plugin - L in K - Katharina
Effects – plugin - Simple - top left mirror
Effects - plugin - Simple - Half Wrap
Effects – plugin – FM tools - saturation emboss
Effects – plugin – mura meister - perspective tiling
Effects – plugin – Mura meister - copies
Effects - Reflection Effects – Kaleidoscope
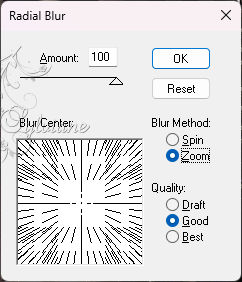
Effects - plugin - Blur - Radial blur
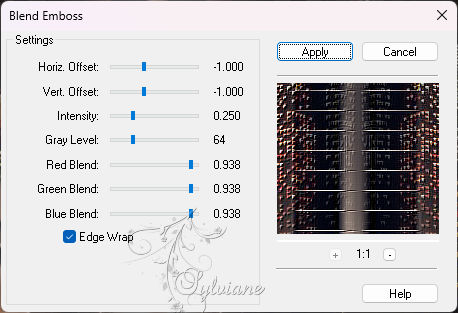
Effects – plugin - FM tools - Blend emboss
******************************************************************
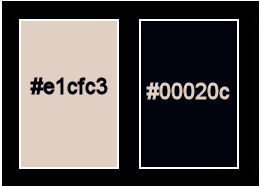
color palette
:
******************************************************************
methode
When using other tubes and colors, the mixing mode and / or layer coverage may differ
******************************************************************
General Preparations:
First install your filters for your PSP!
Masks: Save to your mask folder in PSP, unless noted otherwise
Texture & Pattern: Save to your Texture Folder in PSP
Selections: Save to your folder Selections in PSP
Open your tubes in PSP
******************************************************************
We will start - Have fun!
Remember to save your work on a regular basis
******************************************************************
1.
Open a new transparent image of 1000 X 700px
2.
foreground #e1cfc3
background #00020c
make a Radial gradient
Fill with the gradient
3.
Effects – plugin - L in K - Katharina
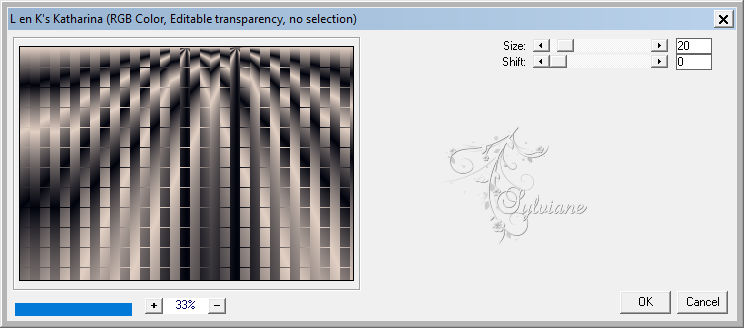
4.
Effects - Image Effects - Seamless Tiling
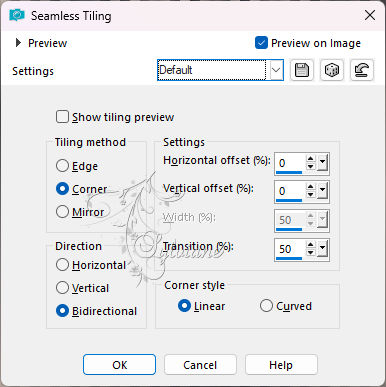
5.
Effects – reflection effects – rotating mirror
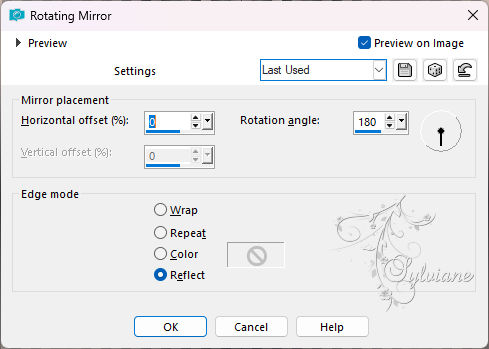
6.
Image - Mirror – mirror Vertical
7.
Effects – plugin - Simple - top left mirror
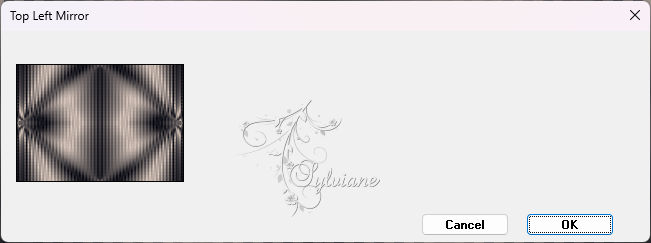
8.
Effects - plugin - Simple - Half Wrap
9.
Effects - geometric effects – cylinder vertical
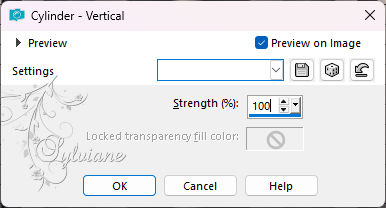
10.
Effects – plugin – FM tools - saturation emboss
(optional in your free)
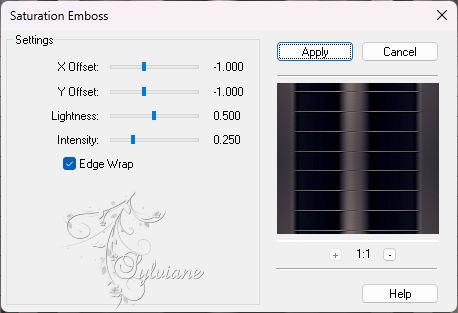
11.
Adjust – scharpness – scharpen
12.
Image – canvas size
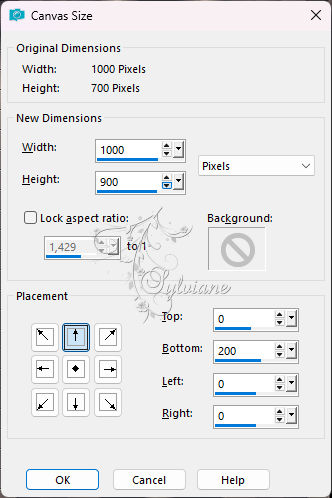
13.
Layers - duplicate
Layers – arrange – move down
14.
Effects – plugin – mura meister - perspective tiling
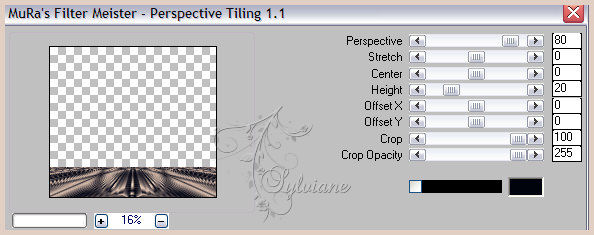
15.
Activate raster 1
Effects – plugin – Mura meister - copies
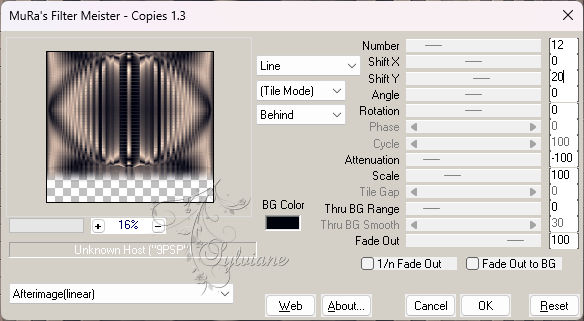
16.
Activate Misted-LuzCristina
Edit – Copy
Edit - Paste as new layer
Move the tube to the left
Layers - duplicate
Image - Mirror – mirror Horizontal
Open 8252-LuzCristina
Edit – Copy
Edit - Paste as new layer
Place like example
Effects - 3 D effects - Drop shadow
0/ 0/ 80/ 40 - color:#000000
Move the tube to the left.
Open anna.br_crisantemo-rosa-by-mkatka_24-08-10s
Edit – Copy
Edit - Paste as new layer
Place like example
Effects - 3 D effects - Drop shadow
0/ 0/ 80/ 40 - color:#000000
Move the tube down to the right
17.
Image - Add Borders – Symmetric - 5px - dark border
Image - Add Borders – Symmetric -2px - light border
Image - Add Borders – Symmetric -50px - dark borders
Select the last borders with your magic
Effects - Reflection Effects – Kaleidoscope
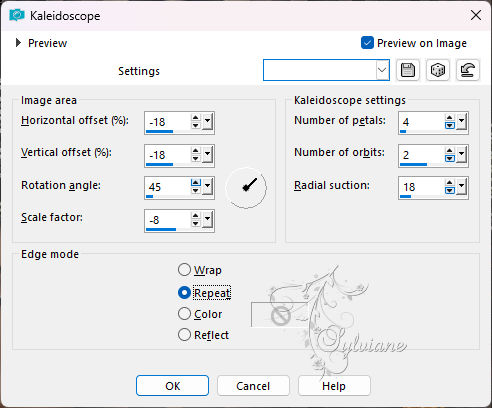
Effects - plugin - Blur - Radial blur
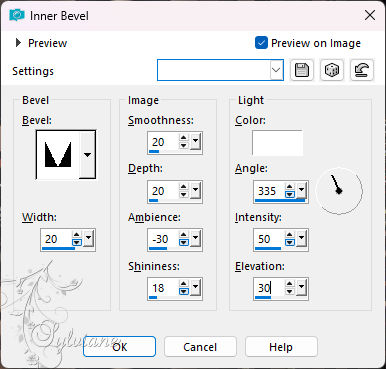
Effects – 3D effects – inner bevel
Effects – plugin - FM tools - Blend emboss
Selection - Select None
Image - Resize -85%
Check mark resize all layers
put your watermark on it
Layer – merge – merge all (flatten)
Save as JPEG
Back
Copyright Translation 2024 by SvC-Design
------------------------------------------------------------------------------
Thanks to all who created