
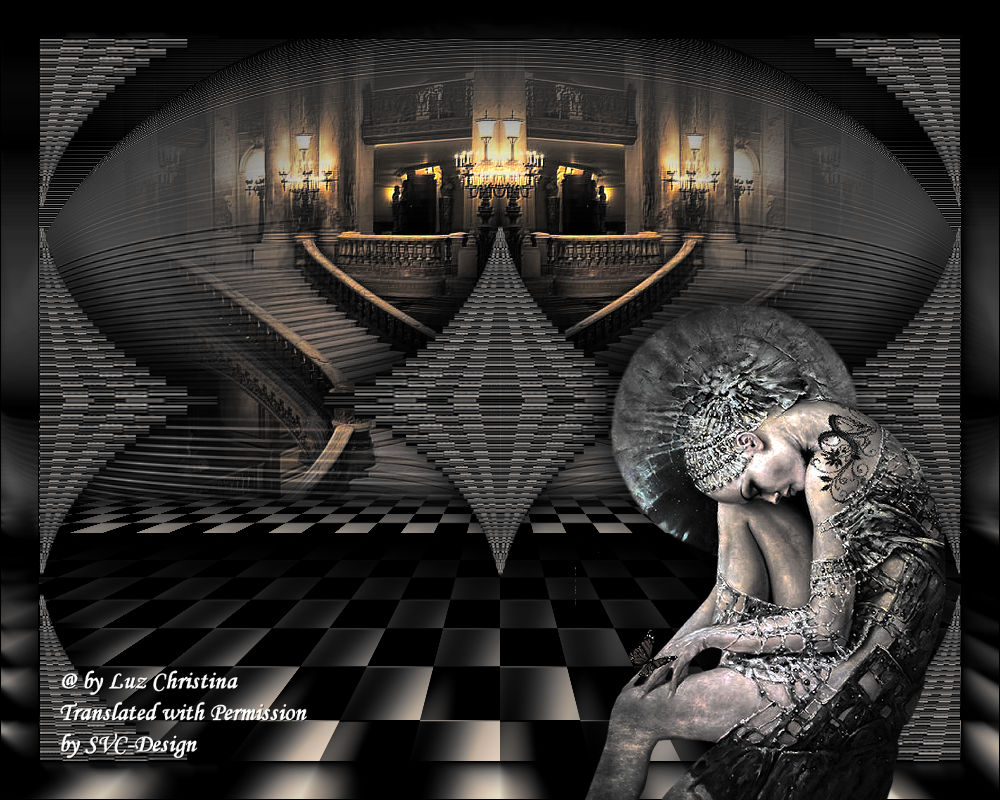
This lesson is made with PSPX9
But is good with other versions.
© by SvC-Design

Materialen Download
Here
******************************************************************
Materials:
4700-luzcristina[9511990].pspimage
FA0008[9511989].png
******************************************************************
Plugin:
Plugin - L in K - Pia
Plugin – Mura Meister – Perspective Tiling
Plugin – FM tile tools – saturation emboss
Plugin – simple – top left mirror
Plugin – AAA frames – Photo frame
Plugin - Xero - nostalgia
******************************************************************
color palette
:
******************************************************************
methode
When using other tubes and colors, the mixing mode and / or layer coverage may differ
******************************************************************
General Preparations:
First install your filters for your PSP!
Masks: Save to your mask folder in PSP, unless noted otherwise
Texture & Pattern: Save to your Texture Folder in PSP
Selections: Save to your folder Selections in PSP
Open your tubes in PSP
******************************************************************
We will start - Have fun!
Remember to save your work on a regular basis
******************************************************************
1.
Open a new transparent image of 1000x800 pixels
2.
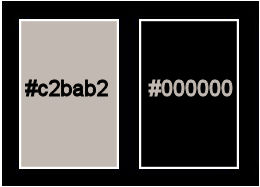
Foreground color palette # c2bab2 and background # 000000
we form a linear gradient with 0 0

fill it with Gradient
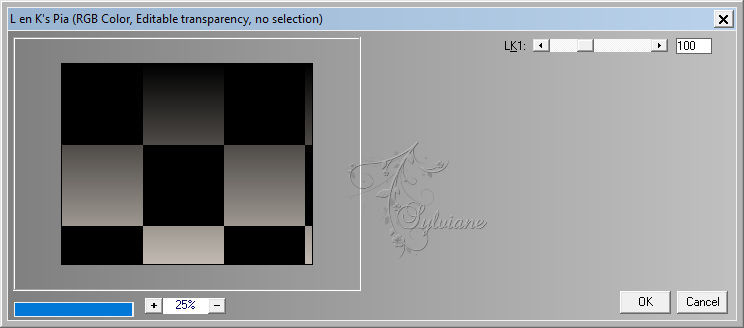
3.
Plugin - L in K - Pia
4.
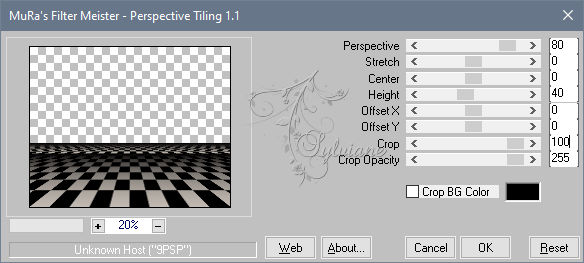
Layer - duplicate
Plugin – Mura Meister – Perspective Tiling
5.
Close raster 1
Activate Copy of Raster 1
6.
Layers - Duplicate.
7.
Adjust – blur – motion blur
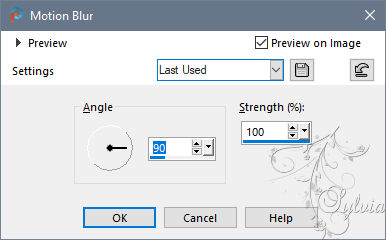
We apply it 2 times and
Blendmode : hard light.
8.
Layers – merge – merge down
9.
Set magic wand with feather to 30 and touch the transparent part
To select, click the delete key several times and we blur

Selection - Select None
10.
Layers - New Raster Layer
paint with the gradient.
Layers – arrange – move down
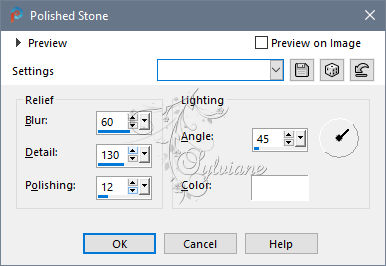
11.
Effects – texture effects – polished stone
12.
Effects - Edge Effects - Enhance
13.
Effects – geometric effects - spherize
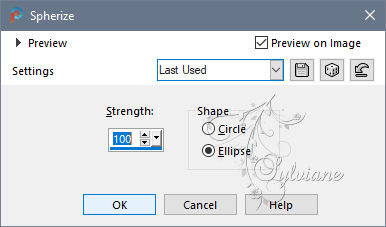
apply 2 times.
14.
Adjust - Sharpness - sharpen
15.
Open 4700-luzcristina[9511990].pspimage
Edit – Copy
Edit - Paste as new layer
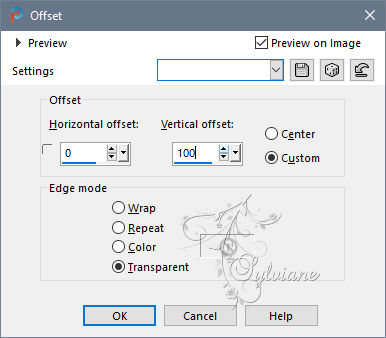
16.
Effects - Image Effects - Offset
17.
Plugin – FM tile tools – saturation emboss - default
18.
Ativate Raster 1
Layers – arrange – bring to top
19.
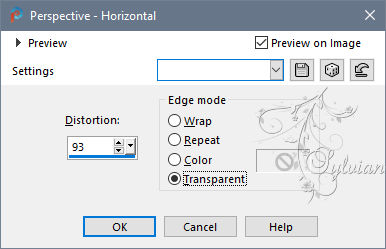
Effects – geometric effects – perspective horizontal
20.
Image - Mirror – mirror Horizontal
we apply the previous step again.
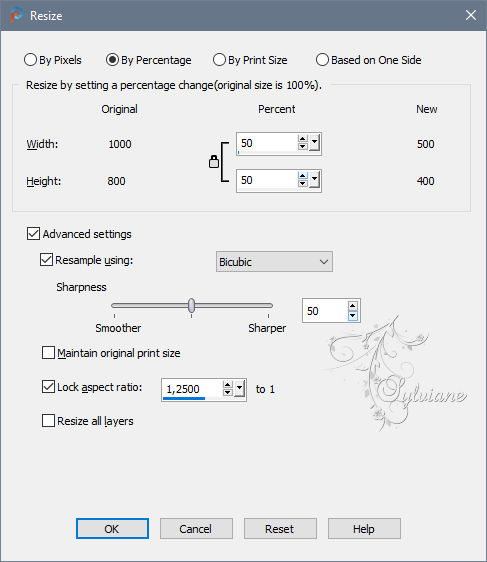
21.
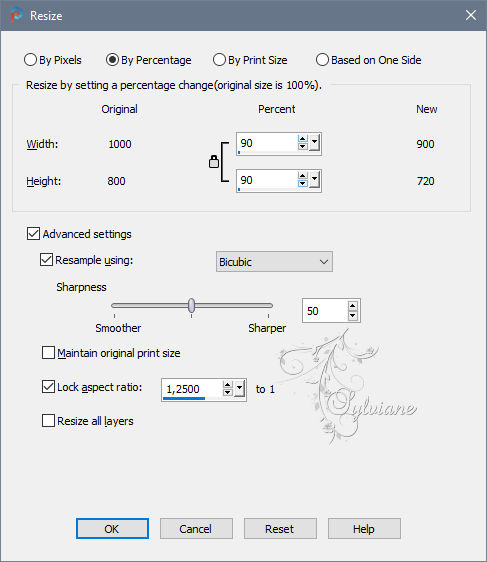
Resize only this layer in 90%
22.
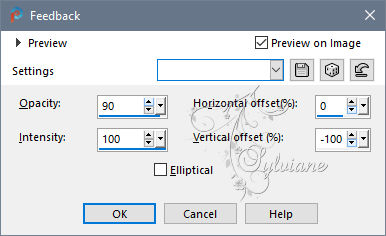
Effects – reflection effects – feedback
23.
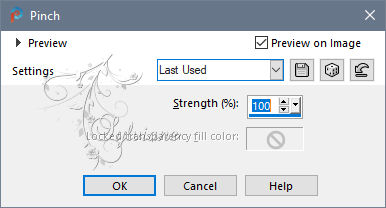
Effects - Distortion effects – pinch
24.
Plugin – simple – top left mirror
25.
Resize only this layer in 50%
26.
Layers - duplicate.
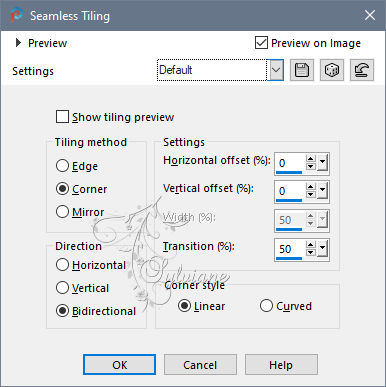
27.
Effects - Image Effects - Seamless Tiling

28.
Activate raster 1
Effects - Image Effects - Seamless Tiling - default
29.
Activate copy of raster 1
Layers – merge – merge down
30.
Effects - 3D effects - Drop shadow
-15 /-15/ 80/ 50 color:#000000
31.
Effects - 3D effects - Drop shadow
-15/ 15/ 80 /50 color:#000000
32.
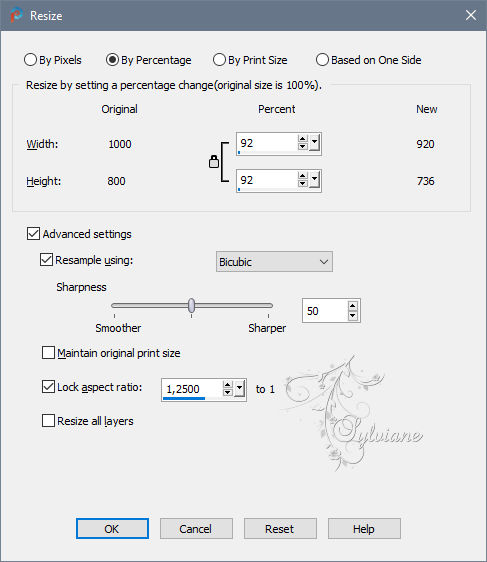
Image - Resize - 92%
33.
Layers - Merge - Merge visible layers
34.
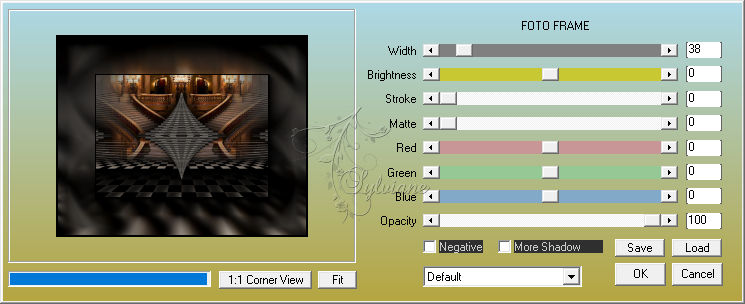
Plugin – AAA frames – Photo frame
35.
Open FA0008[9511989].png
removes watermark
Edit – Copy
Edit - Paste as new layer
36.
Effects - 3D effects - Drop shadow
-15 /-15/ 80/ 50 color:#000000
37.
Layers - Merge - Merge visible layers
38.
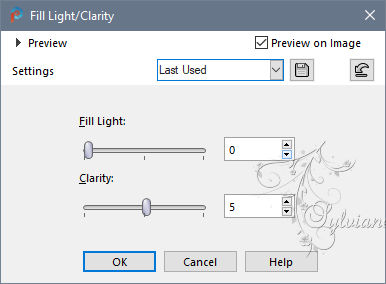
Adjust - Brightness and contrast - clarify in 5
39.
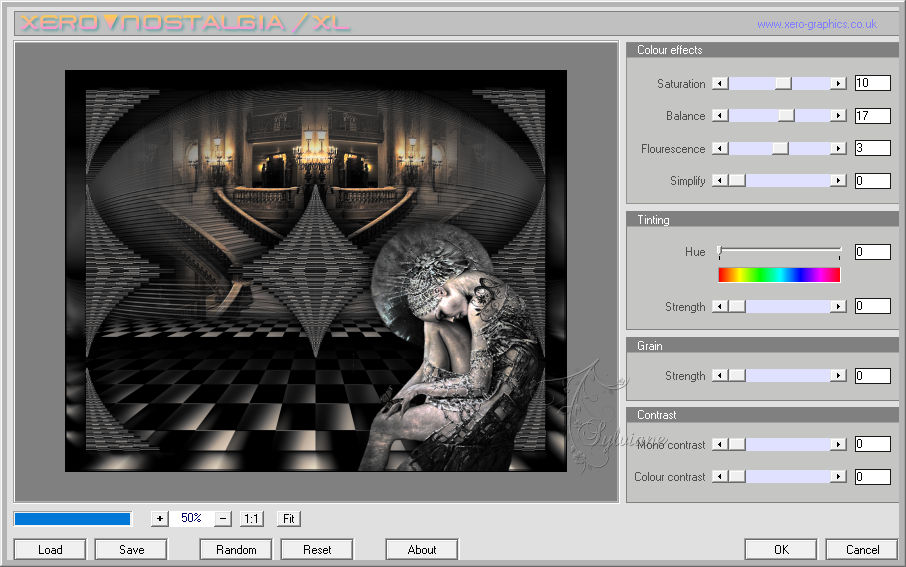
Plugin - Xero - nostalgia
40.
put your watermark on it
Layer – merge – merge all (flatten)
41.
Save as JPEG
Back
Copyright Translation © 2020 by SvC-Design