
This lesson is made with PSPX9
But is good with other versions.
© by SvC-Design

Materialen Download :
Here
******************************************************************
Materials:
aigenbycaz_hippynewyears1
Deco_Loiva
******************************************************************
Plugin:
Effects – plugin - Medhi - Weaver
Effects – plugin - AAA Frames - Foto Frame
******************************************************************
color palette
:
no
******************************************************************
methode
When using other tubes and colors, the mixing mode and / or layer coverage may differ
******************************************************************
General Preparations:
First install your filters for your PSP!
Masks: Save to your mask folder in PSP, unless noted otherwise
Texture & Pattern: Save to your Texture Folder in PSP
Selections: Save to your folder Selections in PSP
Open your tubes in PSP
******************************************************************
We will start - Have fun!
Remember to save your work on a regular basis
******************************************************************
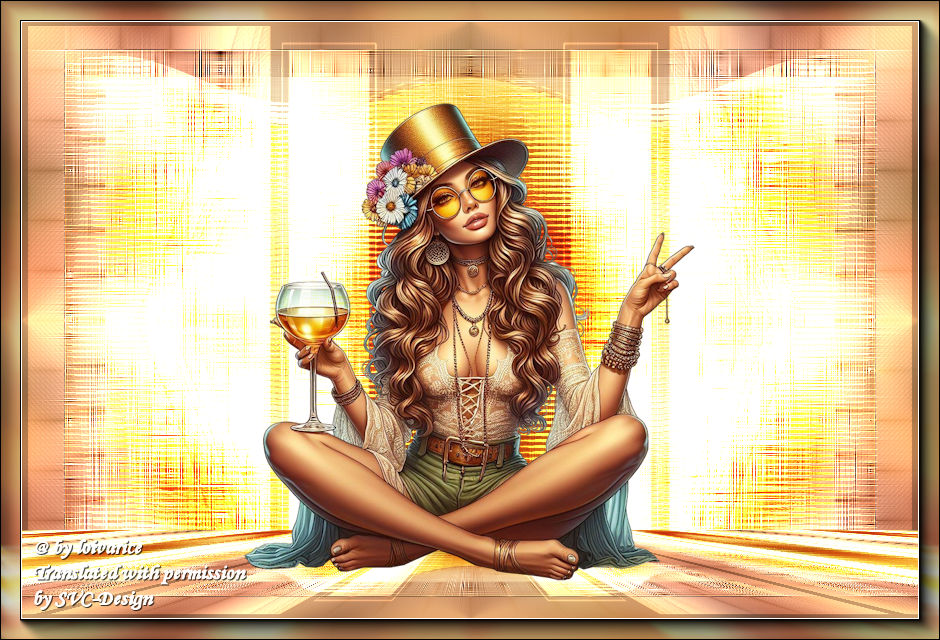
1 .
Open a new transparent image of 900x600 px
paint with a light color from your tube.
2.
Selections – select All
Open your tube
Edit – Copy
Edit - Paste into selection
Selection - Select None
3.
Adjust - blur - gaussian blur
Range: 30.00
4.
Effects - Image Effects - Seamless Tiling - default.
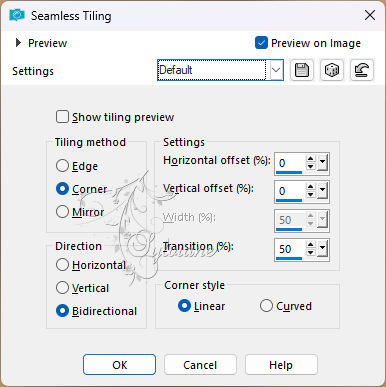
Rename background
5.
Layers – duplicate
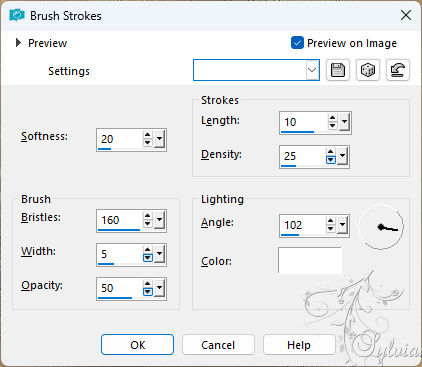
6.
Effects – art media effects – brush strokes
7.
Image - Resize - 90%.
No check mark on resize all layers
Rename layer 1
8.
Effects – plugin - Medhi - Weaver
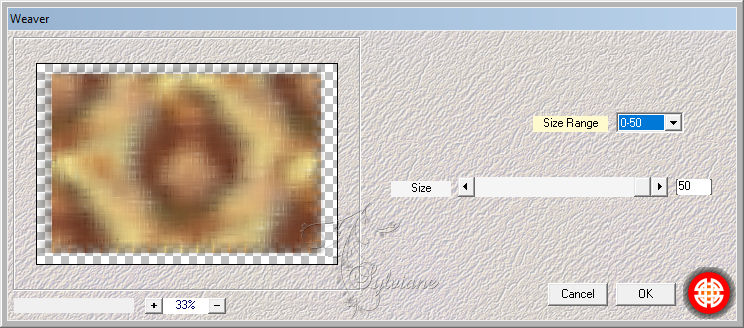
9.
Layers - duplicate
Image - Resize - 90%.
No check mark on resize all layers
Rename layer 2.
10.
Effects - 3 D effects - Drop shadow
0/0/50/20 – color:#000000
11.
Blend mode: screen
12.
Activate layer 1
Effects - Edge Effects - Enhance
13.
Activate layer 2.
Layers - duplicate
Image - Resize - 90%.
No check mark on resize all layers
Rename layer 3.
14.
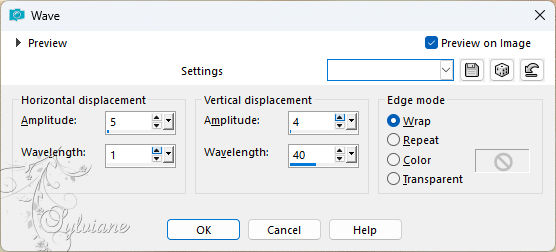
Effects - distortion effects - wave
15.
Blend mode: Overlay.
16.
Layers - duplicate
rename layer 4.
Blend mode: overlay.
17.
activate layer 2
Open Deco_Loiva
Edit – Copy
Edit - Paste as new layer
18.
blend mode: dodge
19.
Activate the top layer
Open Deco_Loiva
Edit – Copy
Edit - Paste as new layer
20.
Image - Resize - 82%.
No check mark on resize all layers
Effects - distortion effects – wave
21.
Blend mode :dodge
22.
Edit – copy special- copy merged
Edit - Paste as new layer
23.
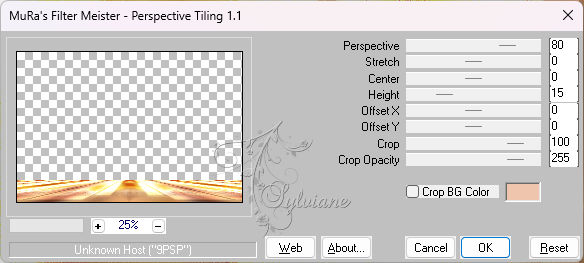
Effects – plugin - Mura's Meister - Perspective Tiling
24.
Open your tube
Edit – Copy
Edit - Paste as new layer
format change if necessary
place them as in the example
25.
Edit – copy special- copy merged
26.
Selections – select All
Image - Add Borders – Symmetric -20 pxl - any color.
27.
Selections - Invert
Edit - Paste into selection (step 25.)
28.
Selection - Select None
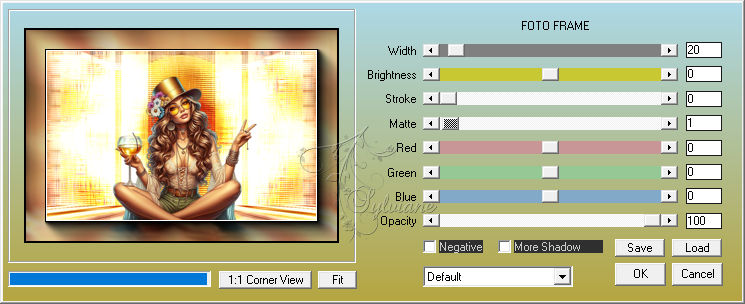
Effects – plugin - AAA Frames - Foto Frame
29.
put your watermark on it
Layer – merge – merge all (flatten)
save as jpeg.
Back
Copyright Translation 2024 by SvC-Design
------------------------------------------------------------------------------
Thanks to all who created