
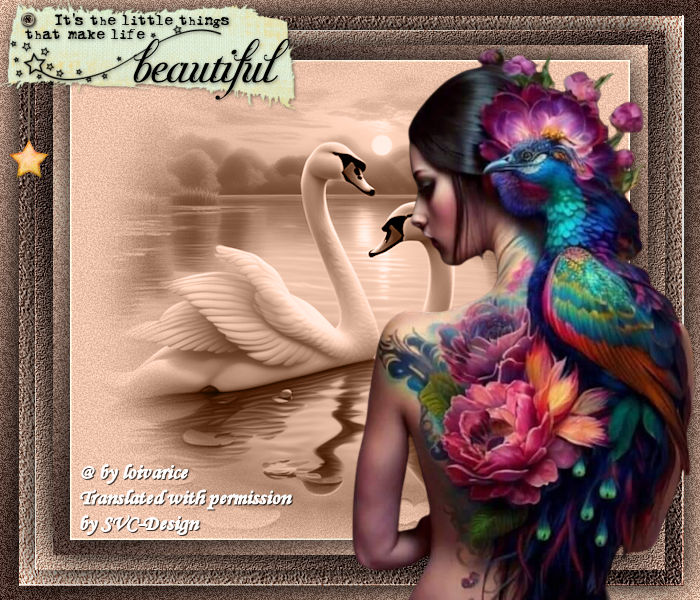
This lesson is made with PSPX9
But is good with other versions.
© by SvC-Design

Materialen Download :
Here
******************************************************************
Materials:
KLS_WA_LittleThings
mentali-misted2573
mocaAve_li
sterne
******************************************************************
Plugin:
Effects – plugin - FM Title Tools plugin - blend emboss
******************************************************************
color palette
:

******************************************************************
methode
When using other tubes and colors, the mixing mode and / or layer coverage may differ
******************************************************************
General Preparations:
First install your filters for your PSP!
Masks: Save to your mask folder in PSP, unless noted otherwise
Texture & Pattern: Save to your Texture Folder in PSP
Selections: Save to your folder Selections in PSP
Open your tubes in PSP
******************************************************************
We will start - Have fun!
Remember to save your work on a regular basis
******************************************************************
1.
Open a new transparent image of 700x600 px
Foreground color : #4a3129
Background color : #efc6ad
create a linear gradient
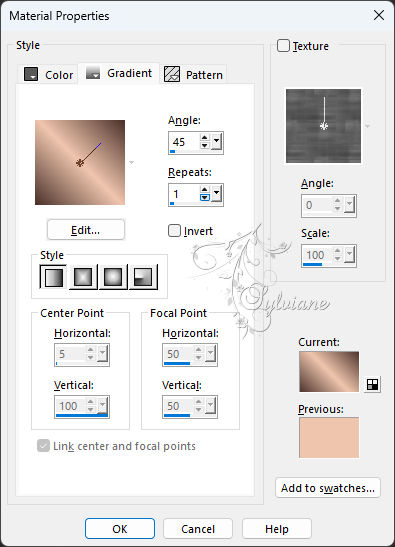
fill with the gradient
2.
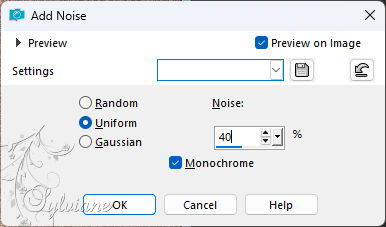
Adjust - Add / Remove Noise - Add Noise
3.
Layers - New Raster Layer
Fill the image with background gradient
4.
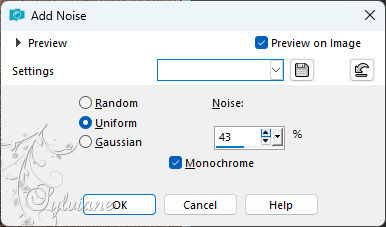
Adjust - Add / Remove Noise - Add Noise
5.
Image - Resize - 95%
No check mark on resize all layers
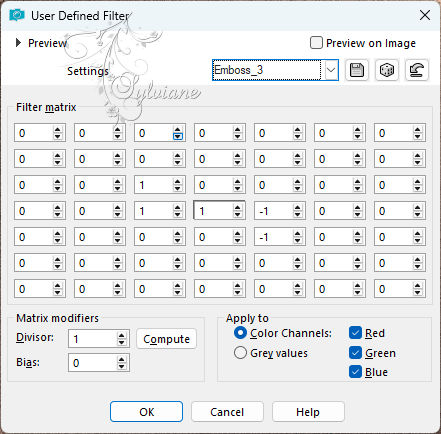
Effects - own filter - emboss 3
6.
Effects - 3 D effects - Drop shadow
0/0/100/50 color:#000000
7.
Layers - New Raster Layer
Make a linear gardient
Angle: 45
repeats to 2

fill with gradient
8.
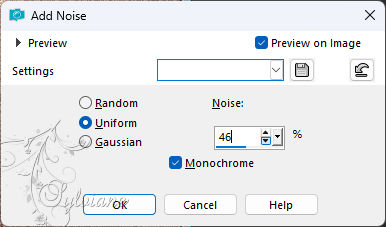
Adjust - Add / Remove Noise - Add Noise
9.
Image - Resize - 90%
No check mark on resize all layers
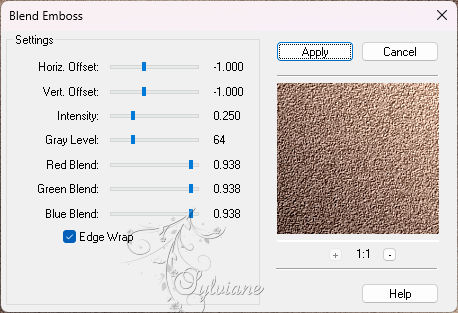
Effects – plugin - FM Title Tools plugin - blend emboss - default
10.
Effects - 3 D effects - Drop shadow
0/0/100/50 color:#000000
11.
Layers - New Raster Layer
fill with gradient

12.
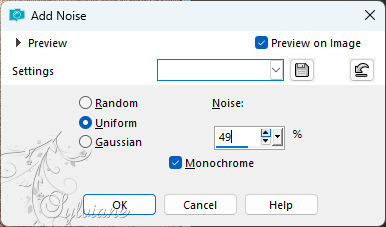
Adjust - Add / Remove Noise - Add Noise
12.
Image - Resize - 85%
No check mark on resize all layers
Effects - Edge Effects – Enhance
13.
Effects - 3 D effects - Drop shadow
0/0/100/50 color:#000000
14.
Layers - New Raster Layer
Put your foreground color in #efc6ad
15.
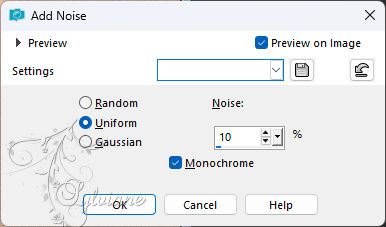
Adjust - Add / Remove Noise - Add Noise
16.
Image - Resize - 80%
No check mark on resize all layers
Adjust – scharpness – scharpen more
Effects - 3 D effects - Drop shadow
0/0/100/50 color:#000000
17.
Open mentali-misted2573
Edit – Copy
Edit - Paste as new layer
Image - Resize - 80%
No check mark on resize all layers
if you want to use a blend mode, feel free.
18.
Open mocaAve_li
Edit – Copy
Edit - Paste as new layer
resize if necessary
place as in the example
19.
Open sterne
select one of those sterne
Edit – Copy
Edit - Paste as new layer
20.
Adjust – scharpness – scharpen
place as in the example
21.
Open KLS_WA_LittleThings
Edit – Copy
Edit - Paste as new layer
place as in the example
22.
Apply your watermark or signature
Layer – merge – merge all (flatten)
Save as JPEG
Back
Copyright Translation 2024 by SvC-Design
------------------------------------------------------------------------------
Thanks to all who created