
This lesson is made with PSPX9
But is good with other versions.
© by SvC-Design

Materialen Download :
Here
******************************************************************
Materials:
FB_IMG_1708795681807-removebg-preview
******************************************************************
Plugin:
Effects – plugin - Mehdi - sorting tiles
Effects – plugin - Mehdi - Kaleidoscope 2.1
Effects – plugin - Unlimited 2.0 - AFS Plugin import - Patchwor
Effects – plugin - mura meister - perspective tiling
Effects – plugin - AAA Frames - foto frame
******************************************************************
color palette
:
no
******************************************************************
methode
When using other tubes and colors, the mixing mode and / or layer coverage may differ
******************************************************************
General Preparations:
First install your filters for your PSP!
Masks: Save to your mask folder in PSP, unless noted otherwise
Texture & Pattern: Save to your Texture Folder in PSP
Selections: Save to your folder Selections in PSP
Open your tubes in PSP
******************************************************************
We will start - Have fun!
Remember to save your work on a regular basis
******************************************************************
1.
Open a new transparent image of900x600px
paint with a light color of your tube.
2.
Selections – select All
Open FB_IMG_1708795681807-removebg-preview
Edit – Copy
Edit - Paste into selection
Selection - Select None
3.
Effects - Image Effects - Seamless Tiling - default
4.
Adjust - blur - gaussian blur
Range:20,00
5.
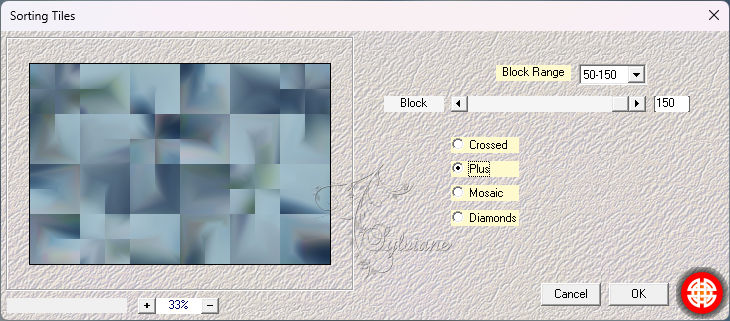
Effects – plugin - Mehdi - sorting tiles
7.
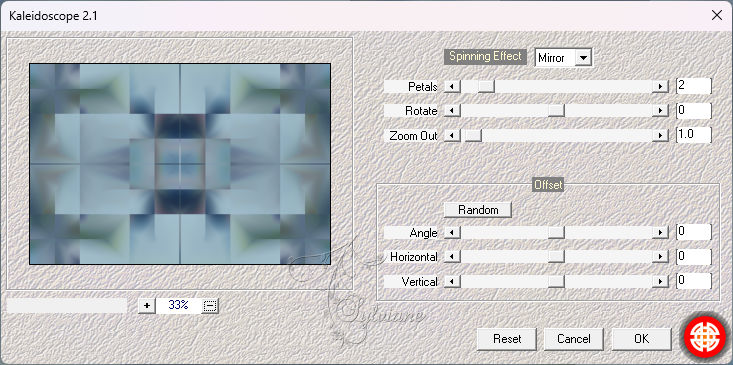
Effects – plugin - Mehdi - Kaleidoscope 2.1
8.
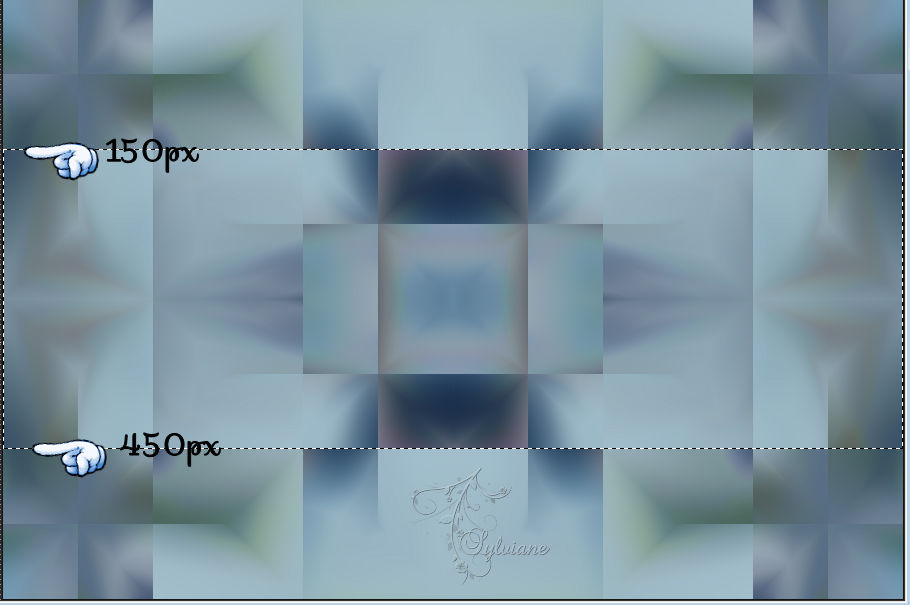
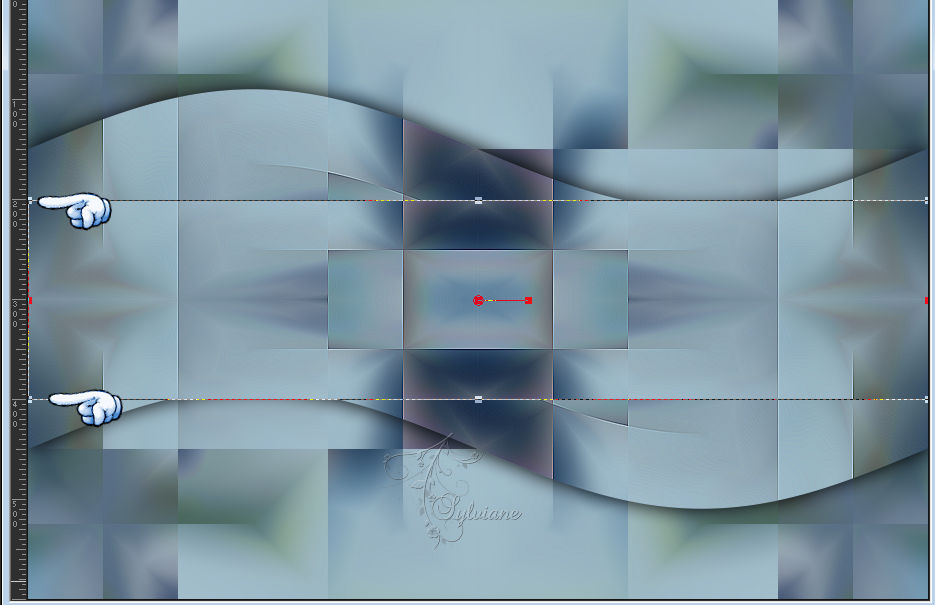
With the selection rectangle tool make the selection as in the print.
9.
Selections – Promote selections to layer
Effects - Edge effects - enhance
Layers - duplicate
Selection - Select None
10.
Activate Promoted Selection
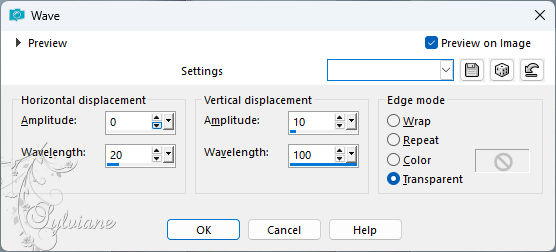
Effects - distortion effects - wave
11.
Effects - 3 D effects - Drop shadow
0/0 /100/ 30 – color: black
12.
Activate Copy of Promoted Selection
pull at the top to 200 and the lower for 400
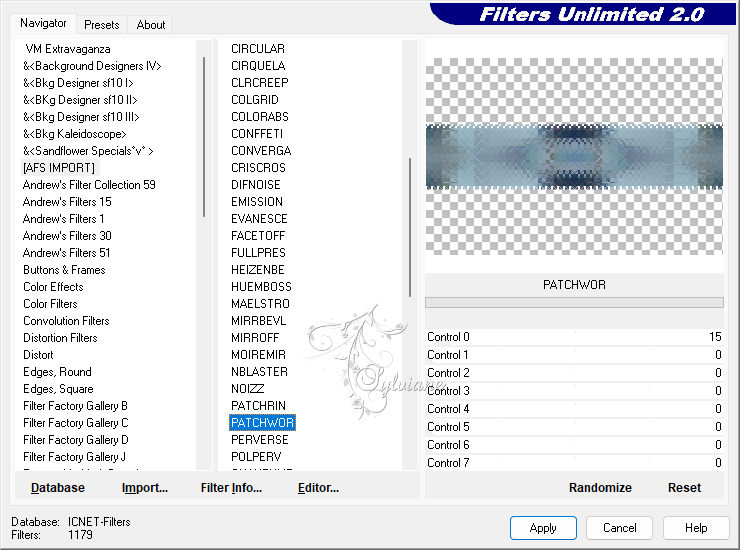
Effects – plugin - Unlimited 2.0 - AFS Plugin import - Patchwor
13.
Effects - distortion effects – wave
14.
Effects - 3 D effects - Drop shadow
0/0 /100/ 30 – color: black
15.
Layers – merge – merge down
16.
Activate selection tool (Press K on your keyboard)
And enter the following parameters:
Pos X : 0 – Pos Y : 5
Press M.
17.
Layers - duplicate
Image - Mirror – mirror Horizontal
Blend mode :Hard light.
NOTE: (This blend mode may vary according to their colors)
18.
Activate raster 1
Layers - duplicate
Layers – arrange – bring to top
19.
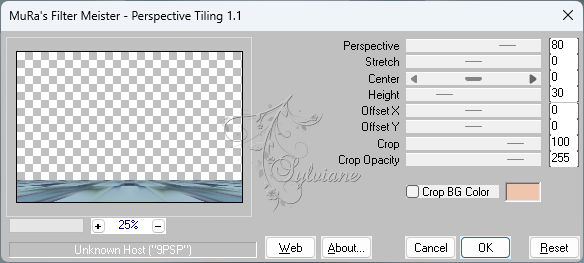
Effects – plugin - mura meister - perspective tiling
20.
Activate the Magic hand tool, configure Feather 80 click the empty space.

21.
delete 6 times.
Selection - Select None
22.
Open FB_IMG_1708795681807-removebg-preview
Edit – Copy
Edit - Paste as new layer
place as in the example
Edit – copy special- copy merged
23.
Image - Add Borders – Symmetric -1pxl - color:#000000
Image - Add Borders – Symmetric - 1pxl – color: white
Image - Add Borders – Symmetric -1pxl - color:#000000
24.
Selections – select All
Image - Add Borders – Symmetric - 30px – color: white
Selections - Invert
Edit - Paste into selection
25.
Adjust - blur - gaussian blur
Range: 30
26.
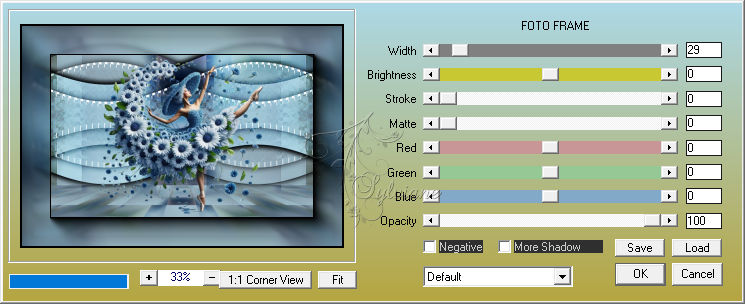
Effects – plugin - AAA Frames - foto frame
27.
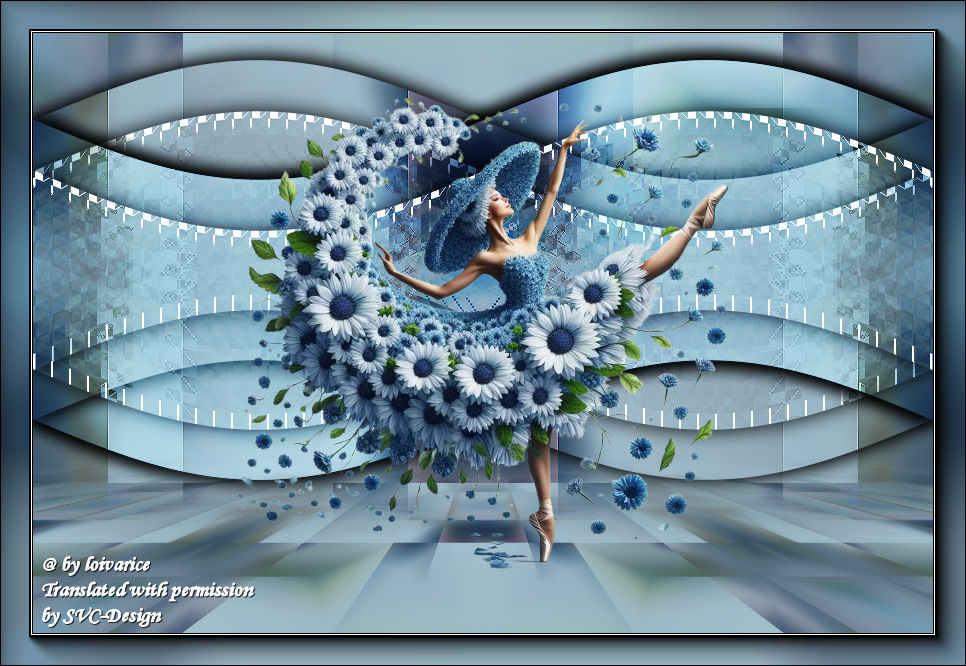
Sign and save as Jpeg.
Back
Copyright Translation 2024 by SvC-Design
------------------------------------------------------------------------------
Thanks to all who created