This lesson is made with PSPX9
But is good with other versions.
© by SvC-Design

Materialen Download :
Here
******************************************************************
Materials:
la_horizontal spiegeln.PspScript
LA_MASK 58.png
LA_MASK sig 100.png
la_metal ball 1.png
la_metal ball 2.png
la_metal ball 3.png
la_metal ball 4.png
la_metal ball 5.png
la_metal ball 6.png
la_SIG 100-1.PspSelection
la_SIG 100-2.PspSelection
la_SIG 100-3.PspSelection
la_SIG 100-4.PspSelection
******************************************************************
Plugin:
Plugins - Mehdi - Wavy Lab 1.1
Plugins - °V° Kiwi's OILFILTER - ZigZack
Plugins - °V° Kiwi's OILFILTER - Guck mal
Plugins - °V° Kiwi's OILFILTER -Setzboard
Plugins - Simple - Diamonds
Plugins - Simple - Left Right Wrap
Plugins - Simple -Bintz
Plugins - Transparency - Eliminate Black
Plugins - tramages - Perforator 1
Plugins - tramages - TeeWee
Plugins - Alien Skin Eye Candy 5:Impact - Extrude
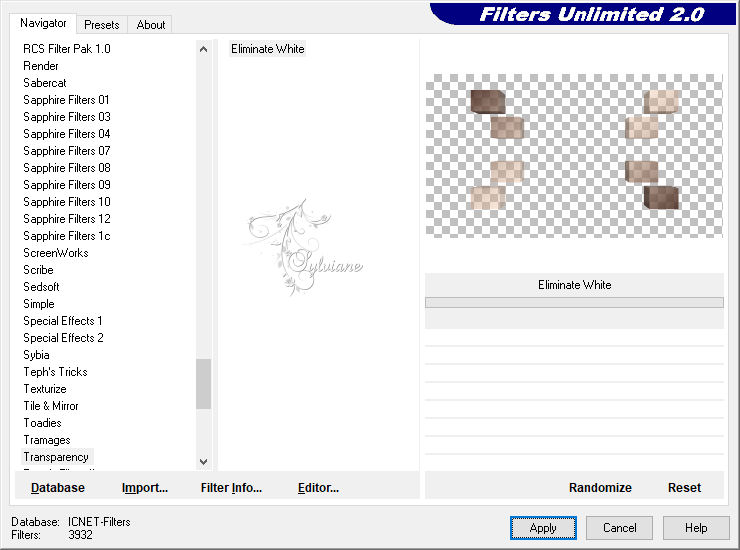
Plugins - Unlimited 2.0 - Transparency - Eliminate White
Plugins - Filter Factory Gallery A - triangular mosaic filter
Plugins - It@lian editor effect - Effetto Fantasma
Plugins - AAA frames - foto Frame
Effects - Plugins - VM Toolbox - Zoom Blur
Plugins - Filter Factory Gallery B - Fluttering Flag
Plugins - Toadies - OmmaDawn
******************************************************************
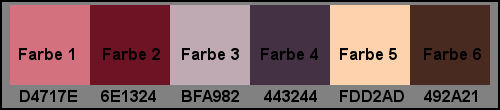
color palette
:
******************************************************************
methode
When using other tubes and colors, the mixing mode and / or layer coverage may differ
******************************************************************
General Preparations:
First install your filters for your PSP!
Masks: Save to your mask folder in PSP, unless noted otherwise
Texture & Pattern: Save to your Texture Folder in PSP
Selections: Save to your folder Selections in PSP
Open your tubes in PSP
******************************************************************
We will start - Have fun!
Remember to save your work on a regular basis
******************************************************************
When you first open your tube and get 6 colors.
3 3 dark bright, white and black.
Should not be too bright colors harmonize well with each other and should, of course.
Only Elle a own color palette. If you have chosen a color
palette, simply click on the button to the left, then click Add New.
I have my palette named Sig 100 and now you can insert in the order the color there.
Choose well what color you choose for 1 - 6 and then still white and black.
Sort the colors as well as on the preview up as I write only or also take Color 1 Color 4, etc.
If you are using an older version crafts where you don't have your own color palette, then you can simply create open 8 small new leaves with approx. 50 x 50 pixels, and fill in the order the leaves with your colors so you can then simply click with the eyedropper tool clean and you have the color you just need.
Better than if you constantly need to look or the hex code must be entered.
Now open the two masks then a transparent sheet with 900 x 500 pixels and fill your sheet with white.
2
Then place your Color 1 as a foreground and a background color 2.
Write down the hex code of the color 3 and Color 6.
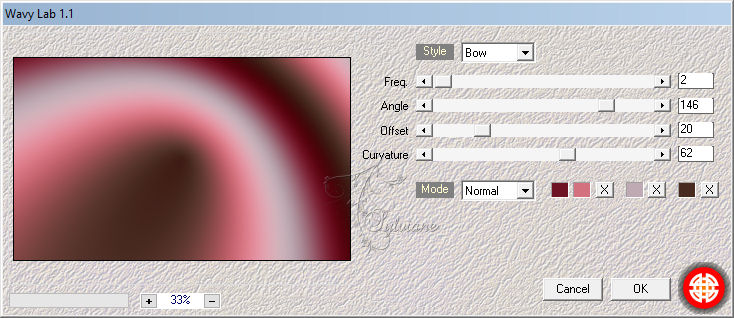
Plugins - Mehdi - Wavy Lab 1.1
3.
Plugins - °V° Kiwi's OILFILTER - ZigZack
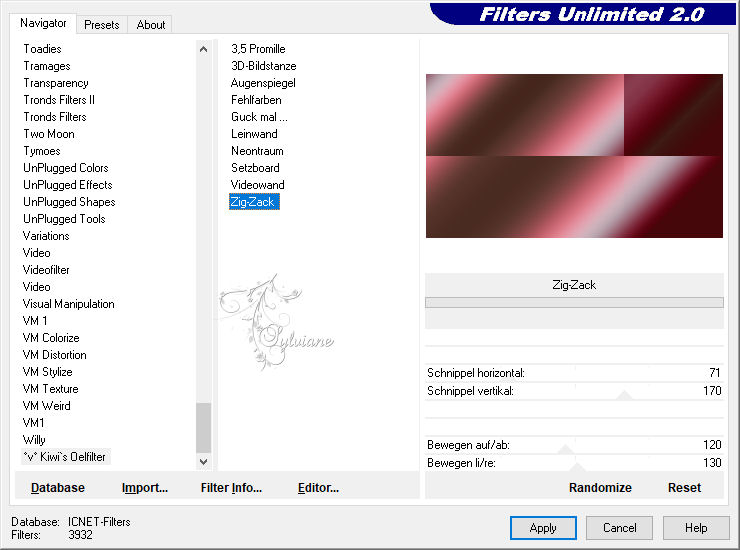
Plugins - °V° Kiwi's OILFILTER - Guck mal..., with the default setting

4.
Layer - Duplicate
effects - Adjust - Blur - Gaussian Blur, Radius:60
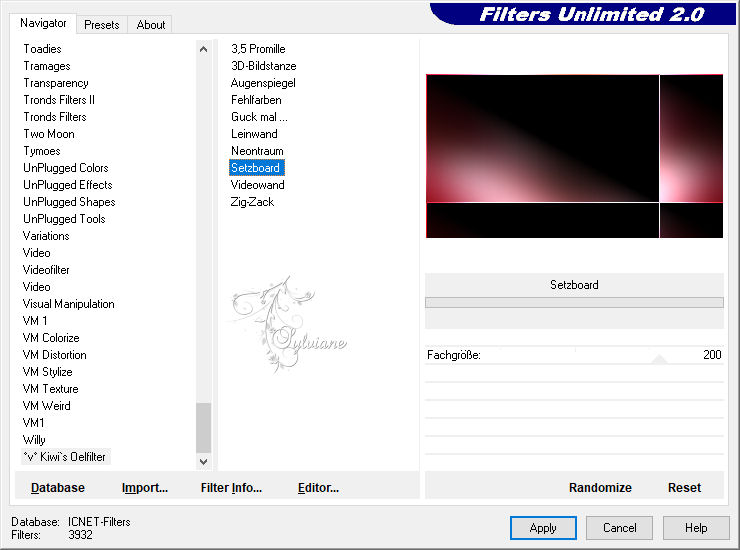
Plugins - °V° Kiwi's OILFILTER -Setzboard
Plugins - Simple - Diamonds
Plugins - Simple - Left Right Wrap
Plugins - Simple -Bintz
Blend Mode: lighten
Opacity to 50
5.
Layer - Duplicate
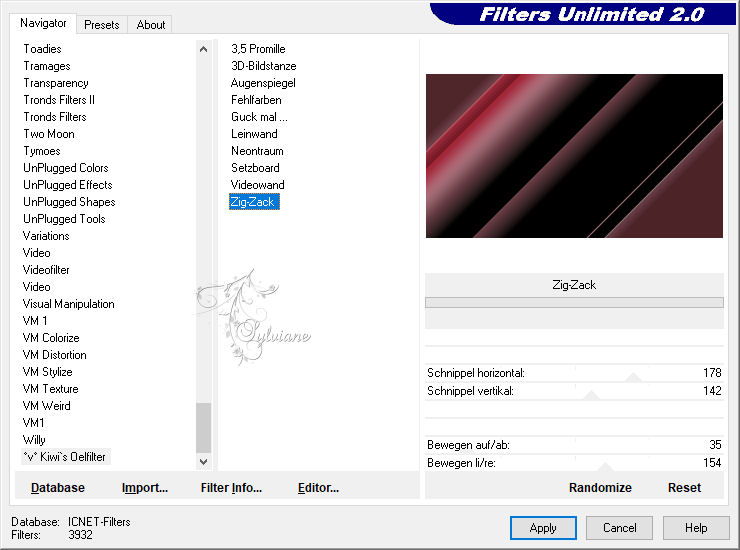
Plugins - °V° Kiwi's OILFILTER - ZigZack
Blend Mode: exclusion.
6.
Layers - New Raster Layer.
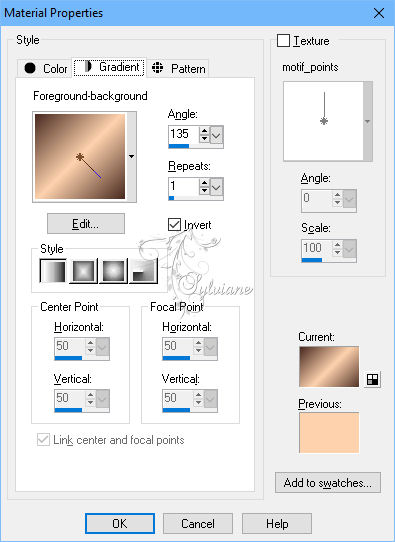
Now your color as foreground 3 and your Color 5 as background.
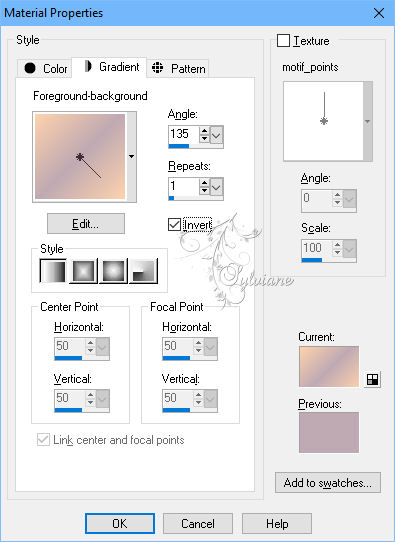
Fill the layer with the following gradient.
(3) is located in the middle of the color
Plugins - Transparency - Eliminate Black
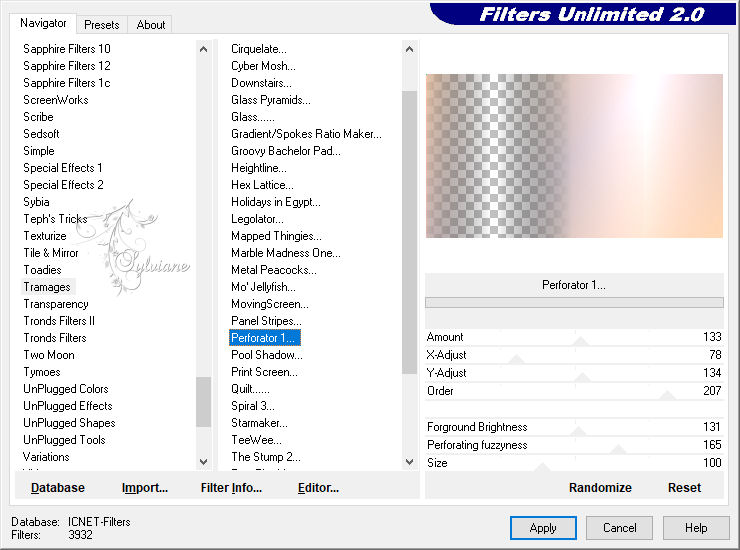
Plugins - tramages - Perforator 1 Standard
Plugins - tramages - TeeWee

Blend Mode: soft light.
7.
Add a new raster layer. Foreground Color 5 - Background Color 6.
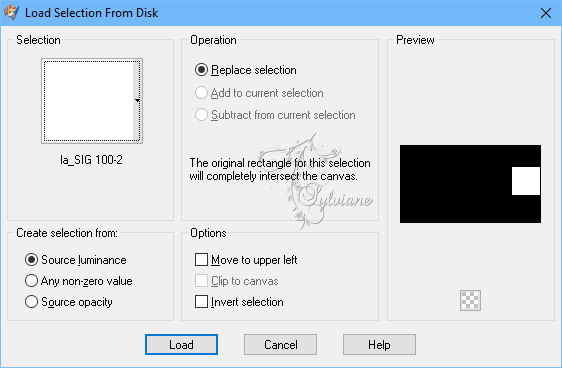
Selection - Load/save selection - Selection Load From File, pick out la_SIG 100-1

Fill these with gradient
Selection - Select None
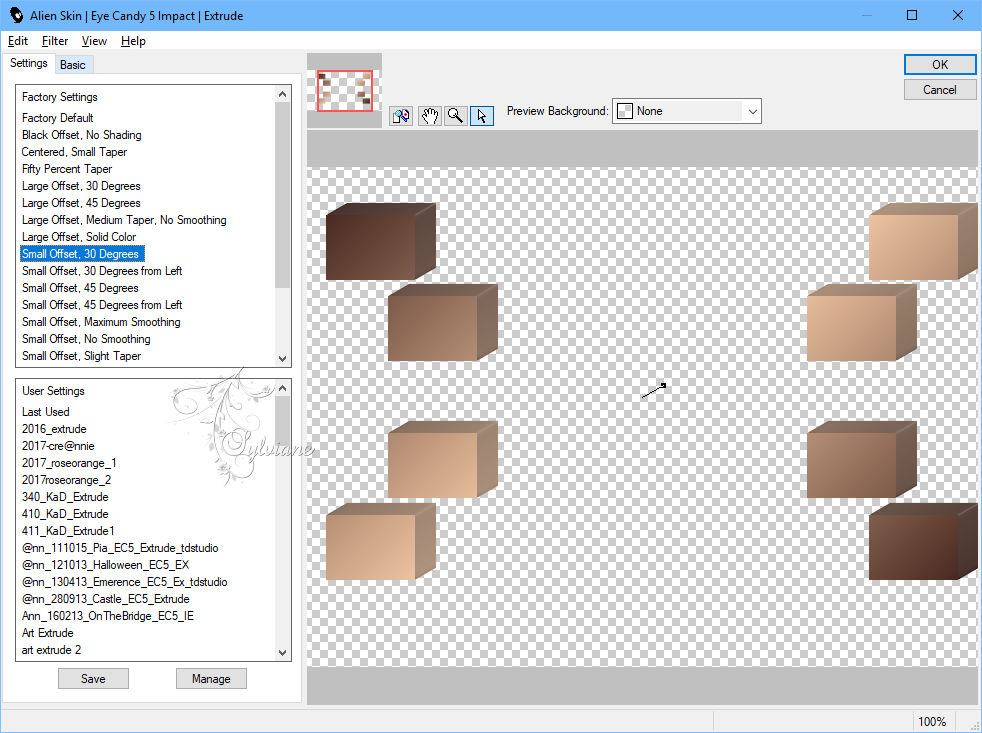
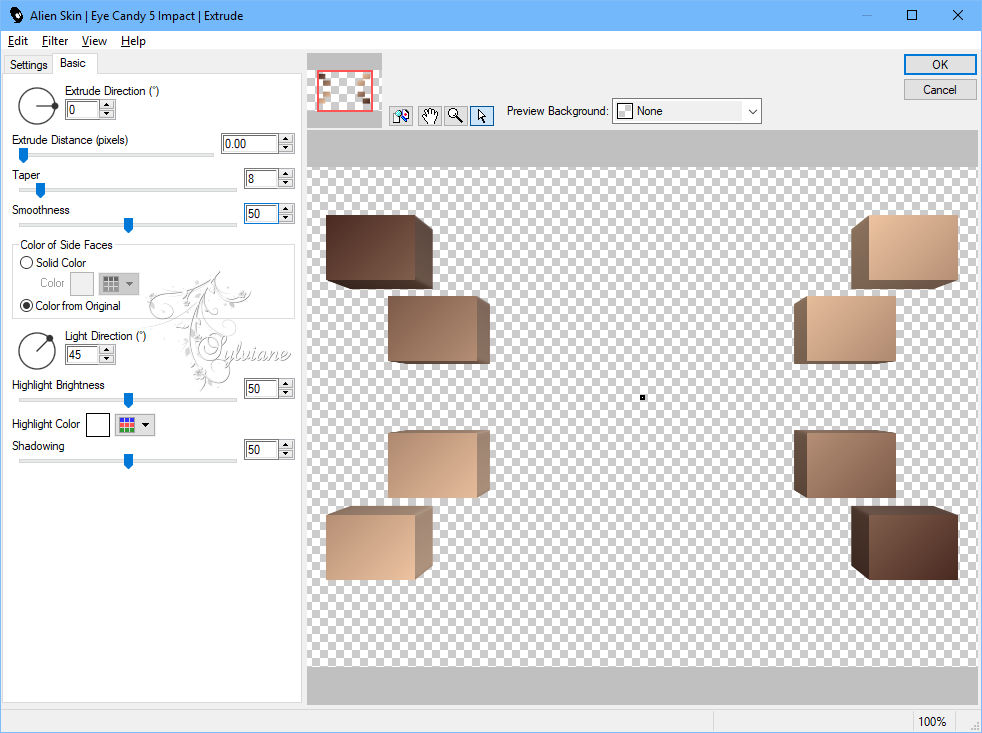
Plugins - Alien Skin Eye Candy 5:Impact - Extrude - Small Offset, 30 degress, this setting
Plugins - Unlimited 2.0 - Transparency - Eliminate White
8.
Duplicate layer.
Do you now the underlying level (second raster layer from the top)
Plugins - Filter Factory Gallery A - triangular mosaic filter, standard setting
Plugins - It@lian editor effect - Effetto Fantasma, default setting
9.
Activar Top raster layer
Edit - Copy special - Copy merged
Layers - New Raster Layer
Selection - Load/save selection - Selection Load From File, pick out la_SIG 100-2.
Edit - Paste into a selection.
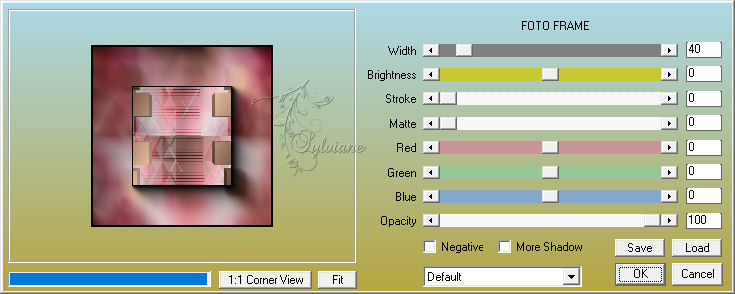
Plugins - AAA frames - foto Frame
Selection - Select None
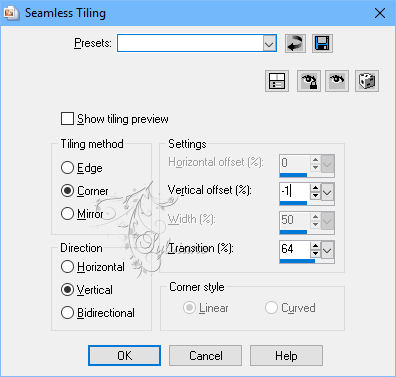
Effects - image effects - seamless tiles
Blend mode: soft light.
Effects - Plugins - VM Toolbox - Zoom Blur,default setting
10.
Add a new raster layer.
place as the foreground color 3 and a background color 4.
Gradient setting as mentioned earlier (color 3 is in the middle). To complete the level.
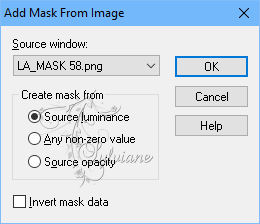
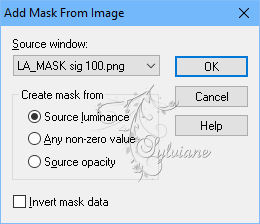
Layers - New mask layer - from image
Layers - Merge - group.
Effects - Edge Effects - Enhance
11.
Add a new raster layer.
Edit - Copy special - Copy merged
Selection - Load/save selection - Selection Load From File, pick out la SIG 100-3
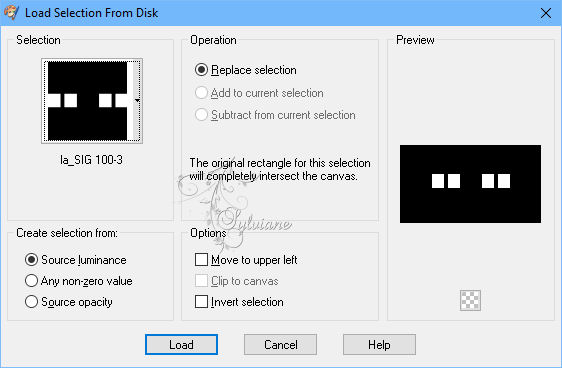
the selection and fill it with your color 4.
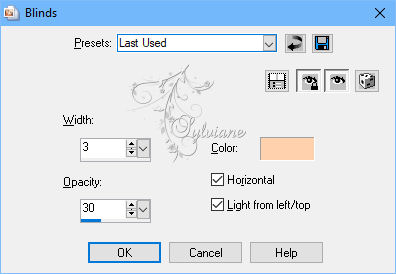
Effects - Texture effects - Blinds
Selection - modify - contract :18.
Pusch Delete
Add a new raster layer.
Edit - Paste into a selection.
Selection - Select None
Blend mode: difference.
12.
Do you now the level with the 4 small frame (second raster layer from the top)
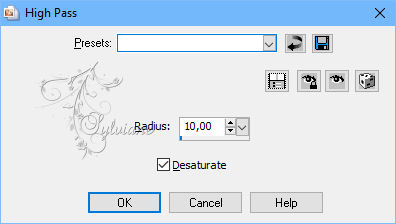
effects - Edge Effects - High Pass
Duplicate. Effects - image effects - seamless tiles, default setting what you have retained.
Plugins - Filter Factory Gallery B - Fluttering Flag, default setting.
Plugins - Simple - Pizza Slice mirror
Effects - Edge Effects - Enhance
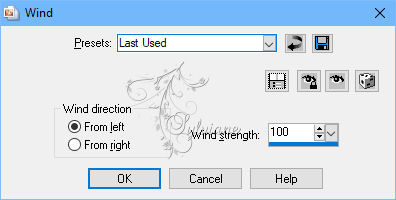
Effect - Distortion Effects - Wind
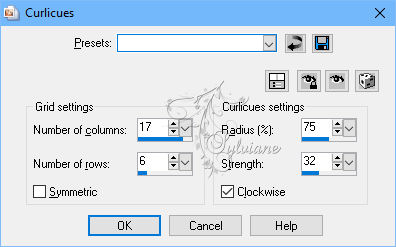
Effect - Distortion Effects – Curlicues
13.
Stay still on this level.
Plugins - Toadies - Omma Dawn
Image - negative image.
Image - Mirror - flip horizontally (X3, X6, my script)
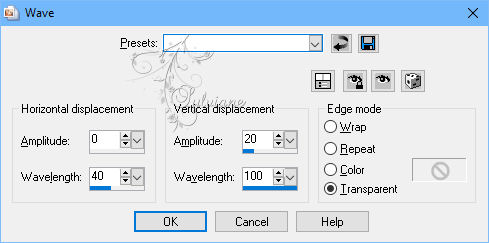
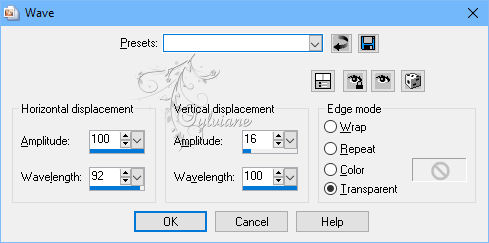
Effect - Distortion Effects - Wave
Blend mode: lighten
Transparency to 70.
14.
Activate Top raster layer.
Add a new raster
Selection - Load/save selection - Selection Load From File, pick out la SIG 100-4
zoom your image is larger and fill it with your color 5.
Selection - Select None
Effect - Distortion Effects - Wave
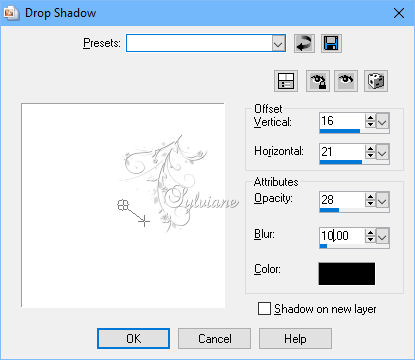
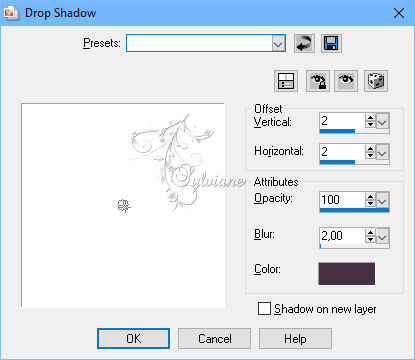
Effects - 3D Effects - Drop Shadow
15.
Add a new raster layer.
Set your foreground color to color 1 color 6
layer with your background to foreground color fill.
Effects - Plugins - Mehdi - Wavy Lab 1.1
.jpg)
Layers - New Mask Layer - From Image
Layers - Merge - Merge Group
Layers - Duplicate
Layers - merge - merge down
Layers - Duplicate
16.
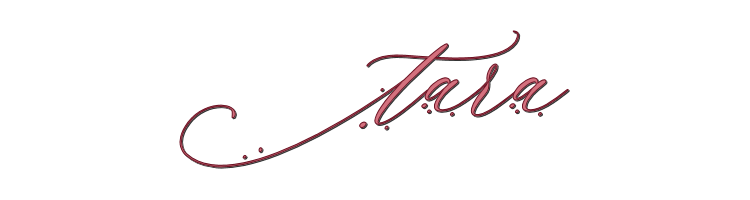
Activate your Text tool and write with your color 6, a font of your choice on your image a word to your liking.
It should be a fairly straight i take
silver dollar
i use font size 20 and place it in bold and italic
Objects – align – center in canvas
Convert to Raster Layer
Duplicate Image
Image - Mirror - Vertical Mirror
move the duplicated text at the bottom of the other text
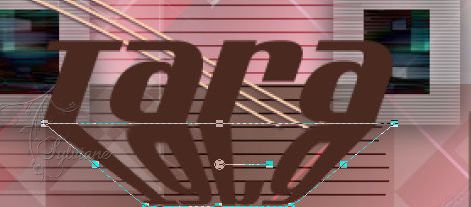
Now press the K key mode, the location on perspective(Ctrl), go to the left side on the bottom of the small square
Watch the bottom of the bar on the value of the X-axis is located,
My stands on 351, drag it with the mouse the small square to the right until it is approximately around 60 more, in my case 411.
The values vary depending on the font and font size, but around 60 more should fit.
Here's a preview for better understanding.
17.
The mode on top of the bar now on scale. Now go with your mouse on the no square in the middle
Now look to the value of the Y-axis
In my case 320, drag the small square high should be then about 76 show less, with me 244, an example here again
Now press the M key.
18.
Now move both words, links down to the mask, see fig.
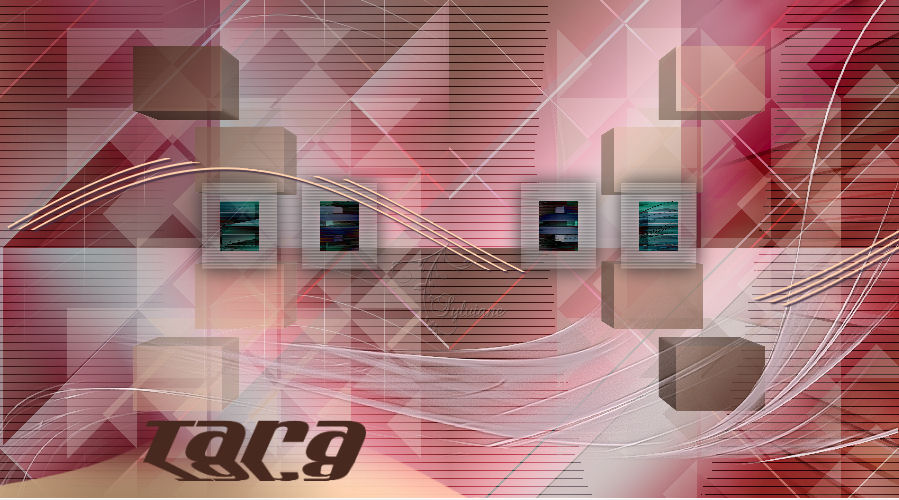
The word you with the Object Selection tool button (K) do you
Blend Mode: soft light.
The other word as do you apply effects
Plugins - Filter Factory Galler A - Pool Shadow, with the default setting
19.
Top raster layer should be enabled. Now write the same word again with the color 5 with a different font on your image, I have the honor to
Letterype: INKLAND
i take font size 28, is up to you what you are using.
Move the text in the upper right-hand corner or where you like it.
Please contact the following shadow on
Blend Mode: hard light
Transparency to 65
20.
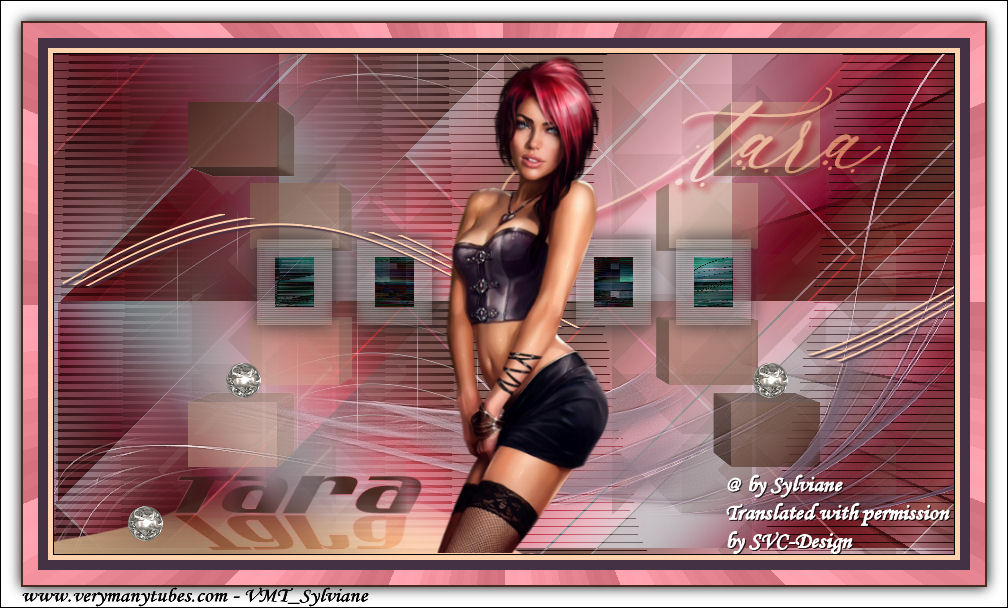
Now open your tube, on-demand, reduce approximately to a height between 485 - 950 pixels, varies depending on the tube.
Edit – Copy
Edit - Paste as new layer
Adjust - Sharpness - Sharpen
Move it quite in the center of your image.
I have my tube a little bit shifted to the right.
Apply the following shadow with the color black

21.
Open la_metal ball 3.png
Edit – Copy
Edit - Paste as new layer
Image - Resize -12%
Adjust - Sharpness - Sharpen
I use 2 ball on the 3D Rectangles and one at the name on the left.
22.
Image - Add Borders - 1 pixel – color: #000000
Image - Add Borders - 5 pixels – color:#fdd2ad
Image - Add Borders - 10 pixels - color:#443244
Image - Add Borders - 15 pixels – color:#d4717e
With the Magic Wand (tolerance and feather must be based on 0
Plugin - tramages - Gradient/Spokes - Ratio Maker - value 107.
Image - Add Borders - 2 pixels – color: #492a21
Image - Add Borders - 20 pixels - color:#ffffff
Activate the magic wand.
Select the white
Invert selection.
Turning this shadow on
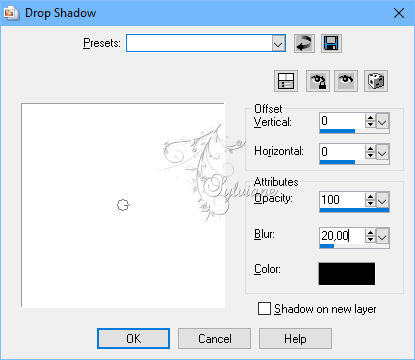
Image - Add Borders - 1 pixel – color: #000000
Now put your watermark and the copy statement on your image
Save as JPEG
Back
Copyright Translation © 2018 by SvC-Design