

This lesson is made with PSPX9
But is good with other versions.
© by SvC-Design

Materialen Download :
Here
******************************************************************
Materials:
Background Bridge_AI_DK
Buttons_DK
divers17VSP
Fairy_AI_DK
Lines_DK
Magical fantasy kleuren
Magical Fantasy_Sel
Magical fantasy_tekst
maskcameron_pop2
******************************************************************
Plugin:
Effects – plugin - Mehdi - Waylab 1.1
Effects - Plugins - Mehdi - Sorting tiles
Effects - Plugins - Simple - Horizontail Grain
Effects - Plugins - Mehdi - Weaver
Effects - Plugins - “v” Kiwi's Oelfilter - 3.5 promille
Effects - Plug-in filters - Mura's Meister - Perspective Tiling
Effects - Plugins - Tramages - Wee Scratches
Effects - Plugins - Toadies - Ommadawn
Effects - Plugins - Filter unlimited - Bkg desginers SF10 IV- Easy corner upper left
Effects - Plugins - Carolaine & Sensibility - CS_Dots
Effects - Plugins - Simple - Quick tile
Effects - Plugins - Graphic Plus - Cross shadow
Effects - Plugins - AAA frames – foto frame
******************************************************************
color palette
:

******************************************************************
methode
When using other tubes and colors, the mixing mode and / or layer coverage may differ
******************************************************************
General Preparations:
First install your filters for your PSP!
Masks: Save to your mask folder in PSP, unless noted otherwise
Texture & Pattern: Save to your Texture Folder in PSP
Selections: Save to your folder Selections in PSP
Open your tubes in PSP
******************************************************************
We will start - Have fun!
Remember to save your work on a regular basis
******************************************************************
1.
Open Magical Fantasy_Sel
Window - duplicate
Minimize the original - we are working on the copy
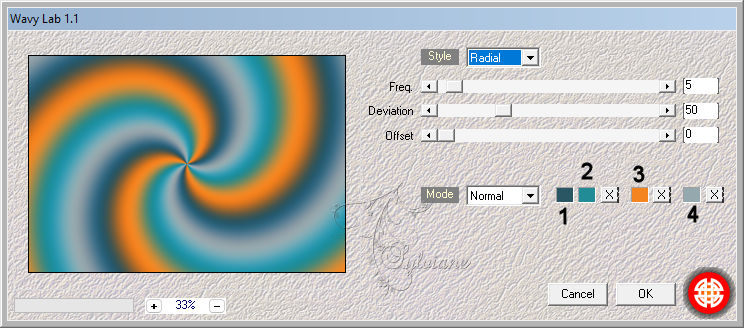
2.
Effects – plugin - Mehdi - Waylab 1.1
3.
Adjust - blur - gaussian blur
Range: 25
4.
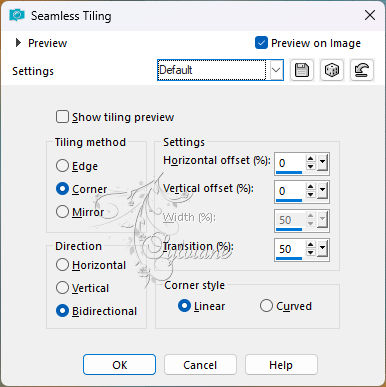
Effects - Image Effects - Seamless Tiling
5.
Layers - Duplicate
6.
Effects - Plugins - Mehdi - Sorting tiles

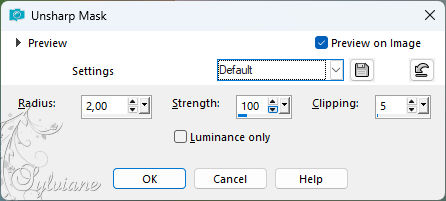
7.
Adjust - Sharpness - Unsharp mask - Default
8.
Effects - Plugins - Simple - Horizontail Grain
9.
Layers - Properties - Blend mode on Luminance Old
10.
Layers - Merge - Merge Down
11.
Effects - Image Effects - Seamless Tiling (stands good)
12.
Selections - Load/Save selection - Load selection from alpha channel -mf1

13.
Selections – Promote selections to layer
14.
Layers - New raster layer and fill with white
15.
Selections - Modify - contract with 5 and push on delete.
16.
Layers - Merge - Merge down.
17.
Adjust - blur - gaussian blur
Range: 25
18.
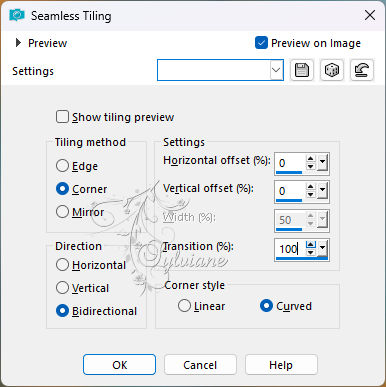
Selection - Select None
Effects - Image Effects - Seamless Tiling (looks good)
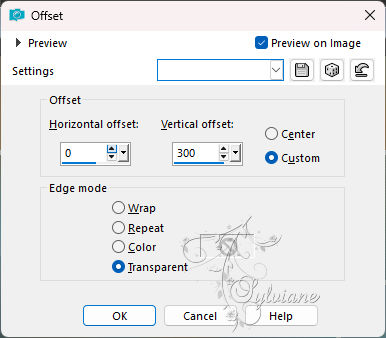
20.
Effects - Image Effects - Offset
21.
Layers - Duplicate
22.
Image - Mirror – mirror Vertical
23.
Layers - Merge - Merge down
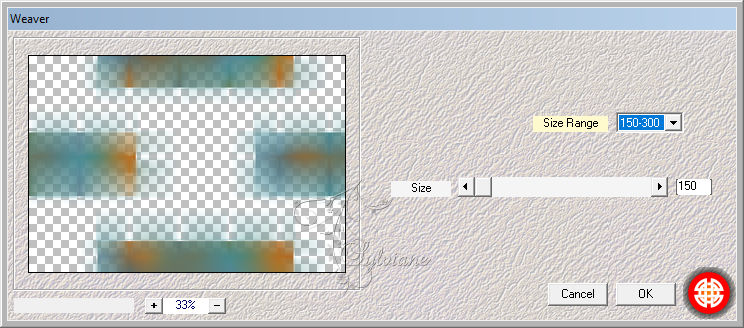
24.
Effects - Plugins - Mehdi - Weaver
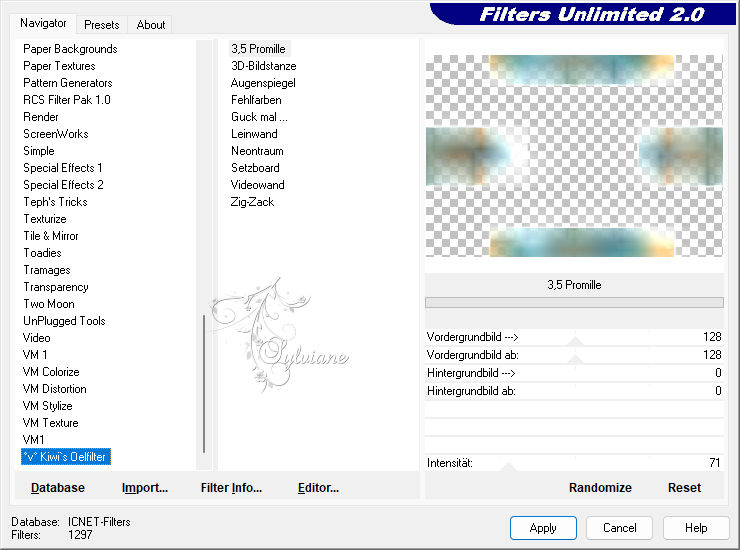
25.
Effects - Plugins - “v” Kiwi's Oelfilter - 3.5 promille
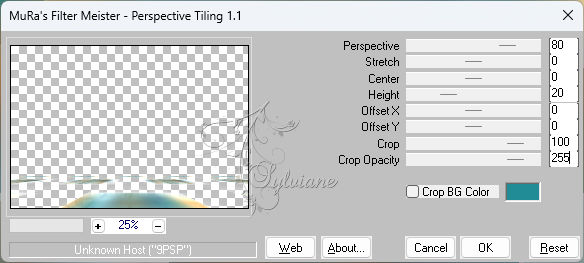
26.
Effects - Plug-in filters - Mura's Meister - Perspective Tiling
27.
Effects - 3D effects - Drop shadow
0/0/60/40 - color Black
28.
Adjust - Sharpness - Unsharp mask - Default
29.
Activate the bottom layer in your layer palette
30.
Selections - Load/Save selection - Load selection from alpha channel – mf2
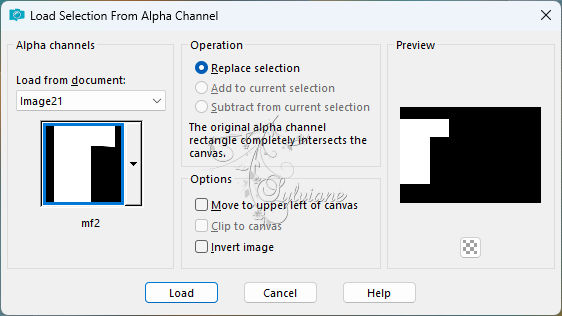
31.
Selections – Promote selections to layer
32.
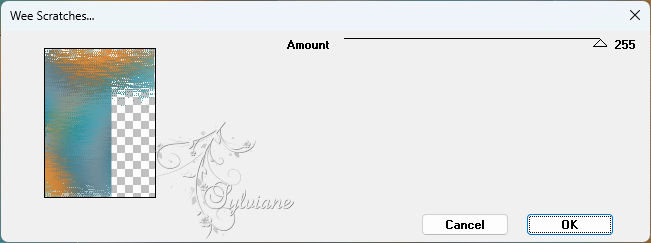
Effects - Plugins - Tramages - Wee Scratches
33.
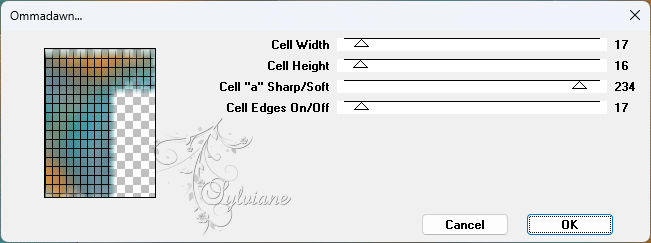
Effects - Plugins - Toadies - Ommadawn
34.
Selection - Select None
35.
Layers - Properties - Blend mode on Soft Light and opacity on 50
36.
Effects - 3D effects - Drop shadow
0/0/60/40 - color Black
37.
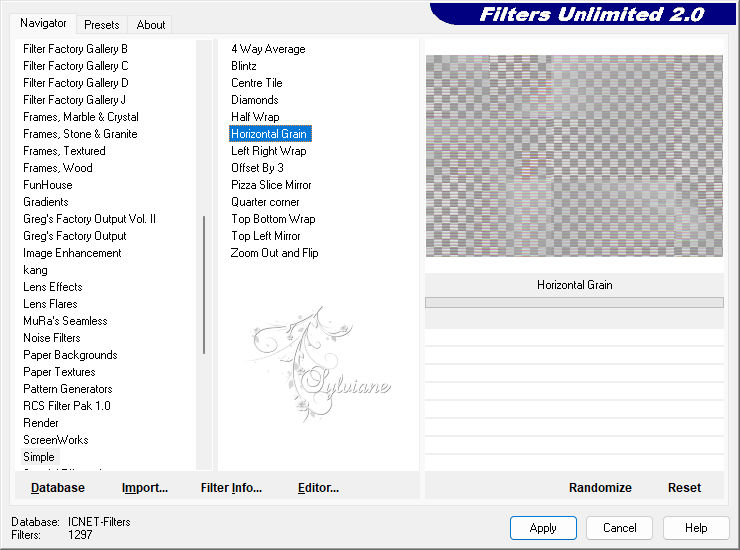
Effects - Plugins - Filter unlimited - Bkg desginers SF10 IV- Easy corner upper left

38.
Effects - Image Effects - Seamless Tiling - Setting to default
39.
Activate the top layer in your layer palette
40.
Selections - Load/Save selection - Load selection from alpha channel -mf3
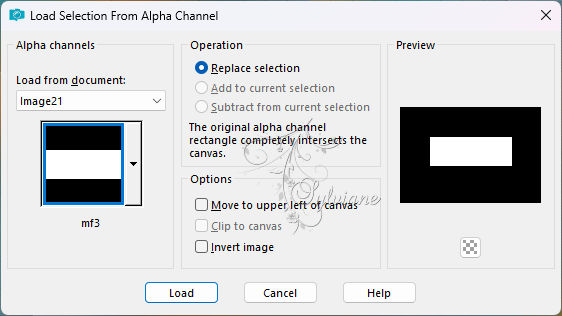
41.
Flood fill selection with white
Selections - Modify - contract with 5 and push on delete.
42.
Effects - 3D effects – Cutout

43.
Layers - New raster layer
44.
Layers - Arrange - Down
45.
Open Background Bridge_AI_DK
Edit – Copy
Edit - Paste into selection
46.
Layers - Properties - Blend mode on Luminance (legacy)
47.
Selection - Select None
48.
Activate the top layer in your layer palette.
49.
Layers - Merge - Merge down.
50.
Open divers17VSP
Edit – Copy
Edit - Paste as new layer
51.
Activate selection tool (Press K on your keyboard)
And enter the following parameters:
Pos X : 426 – Pos Y : 360
Press M.
52.
Select with your selection tool the part in your background and press delete.
53.
Selection - Select None
53.
Layers - Arrange - Down
54.
Layers - Duplicate
55.
Image - Mirror - Mirror vertically
56.
Image - Mirror - Mirror horizontal
57.
Activate selection tool (Press K on your keyboard)
And enter the following parameters:
Pos X : 146 – Pos Y : 150
Press M.
58.
Layers - Merge - Merge down
59.
Open Lines_DK
Edit – Copy
Edit - Paste as new layer
60.
Activate selection tool (Press K on your keyboard)
And enter the following parameters:
Pos X : 0 – Pos Y : 13
Press M.
61.
Activate the second layer from below (Made to layer selection 1) in your layer palette
62.
Layers - New raster layer and Fill with color 3
63.
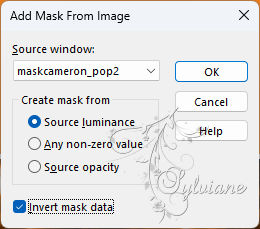
Layers - New Mask Layer - From Image - maskcameron_pop2
64.
Layers - Merge - Merge Group
65.
Layers - Properties - Blend mode on Soft Light and opacity on 60
66.
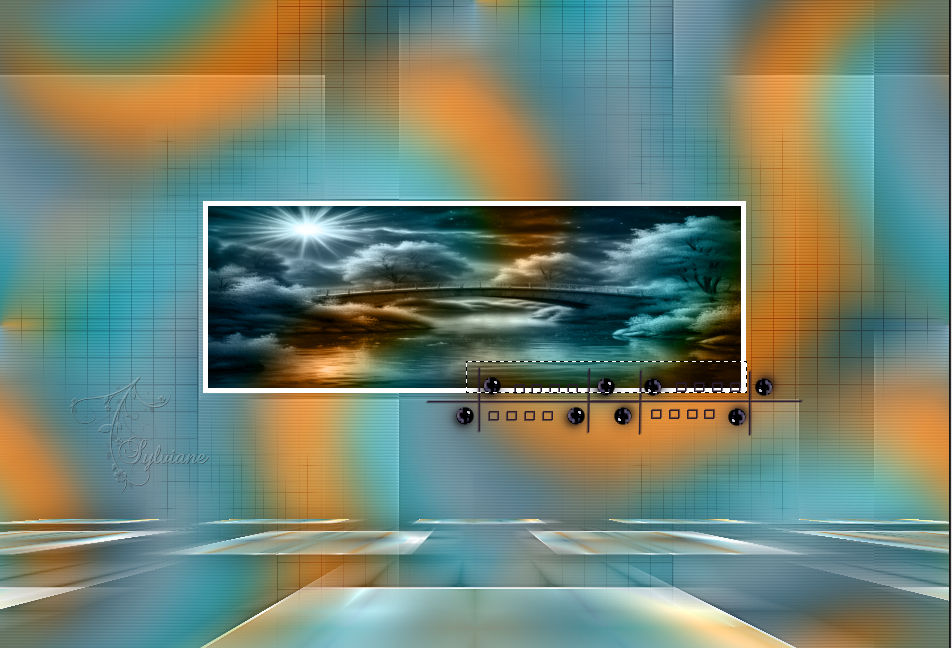
Selections - Load/Save selection - Load selection from alpha channel – mf3
67.
Push on delete
Selection - Select None
68.
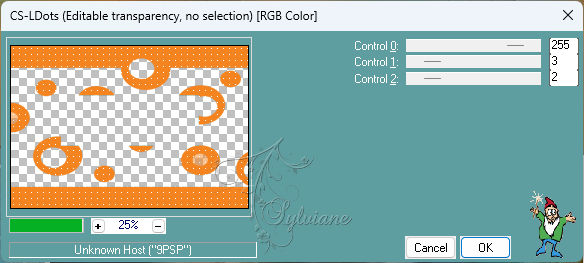
Effects - Plugins - Carolaine & Sensibility - CS_Dots
69.
Effects - Edge effects - enhance
70.
Image - Add borders - Symmetric - 2 px - color 1
71.
Selections - Select all
72.
Image - Add borders - Symmetric - 50 px - color 5
73.
Selections - Invert
74.
Effects - Plugins - Simple - Quick tile
75.
Adjust - blur - gaussian blur
Range: 25
76.
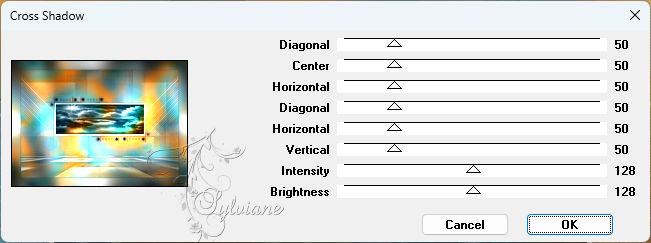
Effects - Plugins - Graphic Plus - Cross shadow - Default (all on 50 and the bottom 2 on 128)
77.
Effects - Plugins - AAA frames – foto frame

78.
Selection - Select None
79.
Open Fairy_AI_DK
Edit – Copy
Edit - Paste as new layer
80
Image - Resize - 70%,
No check mark on resize all layers
move to the right
81.
Effects - 3D effects - Drop shadow
0/0-60-40, color Black
82.
Open Buttons_DK
Edit – Copy
Edit - Paste as new layer
82.
Activate selection tool (Press K on your keyboard)
And enter the following parameters:
Pos X : -4 – Pos Y : 27
Press M.
83.
Effects - 3D effects - Drop shadow
1/1/60/2 - color Black
84.
Open Magical fantasy_tekst
Edit – Copy
Edit - Paste as new layer
85.
Effects - 3D effects - Drop shadow,
1/1/60/2 - color Black, I did this 1 more time.
86.
Place your watermark.
87.
Layers - Merge - Merge visible layers.
88.
Resize to 1000 pix if necessary
89.
Save as JPEG
Back
Copyright Translation 2024 by SvC-Design
------------------------------------------------------------------------------
Thanks to all who created