

This lesson is made with PSPX9
But is good with other versions.
© by SvC-Design

Materialen Download :
Here
******************************************************************
Materials:
alpha_rosie.pspimage
AnaRidzi1476.pspimage
deco 1 Cloclo.pspimage
deco 2 Cloclo.pspimage
deco 3 cloclo.png
deco 4 cloclo.png
Francesca maszk 2.jpg
misted Cloclo.png
vase.png
Watermark_Pour tuto.png
******************************************************************
Plugin:
Plugins - Filters Unlimited 2.0 - VM Natuaral - Lightsplash
Plugins - MuR'as Meister - Perspective Tiling
Plugins - Graphics Plus - Cross Shadow
Plugins - I.C.NET Software - Filters Unlimited 2.0 - Pattern Generators - Sine Pattern
Plugin - Graphics Plus - Quick Tile 1
******************************************************************
color palette
:
******************************************************************
methode
When using other tubes and colors, the mixing mode and / or layer coverage may differ
******************************************************************
General Preparations:
First install your filters for your PSP!
Masks: Save to your mask folder in PSP, unless noted otherwise
Texture & Pattern: Save to your Texture Folder in PSP
Selections: Save to your folder Selections in PSP
Open your tubes in PSP
******************************************************************
We will start - Have fun!
Remember to save your work on a regular basis
******************************************************************
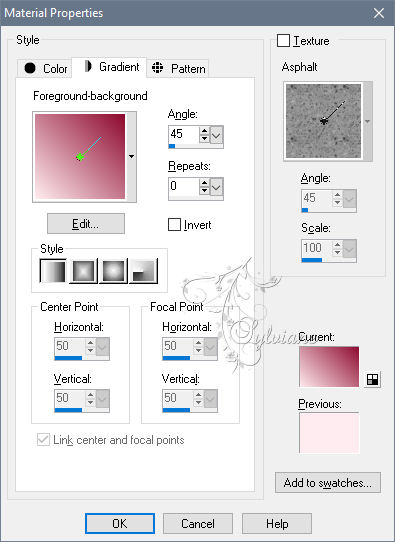
In the color palette put these colors just click with the eyedropper / In the corresponding box
Foreground 1 / Background 2
Prepare a Halo gradient

2.
Open Alpha channel rosi
Duplicate it
Close original
Rename raster1
Fill with gradient
Layers - New raster layer
Fill with foreground color
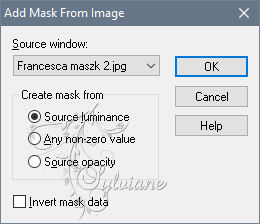
Open Francesca maszk 2 mask
Layers - New mask layer - From an image -
Francesca maszk 2 mask
layers - Duplicate
Layers - Merge - Merge Group
Adjust – scharpness – scharpen more
layers - Duplicate
Image - Mirror – mirror Horizontal
Image - Mirror - Vertical Mirror
Layers – merge – merge down
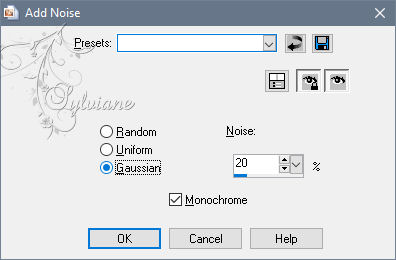
Adjust - Add / Remove Noise - Add Noise
3.
Open decoration 1 Cloclo
Edit copy
Edit paste as a new layer
Do not move
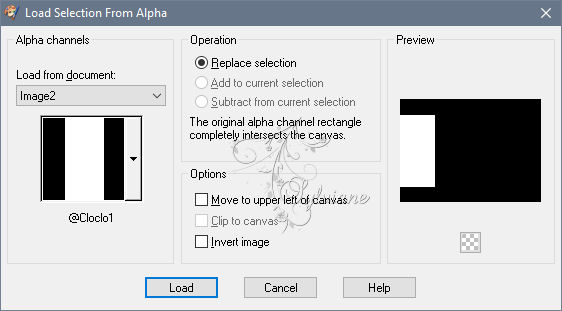
Selections - Load / Save - Load selection from Alpha Channel@ Cloclo1
Layers - New Raster Layer
Fill with Linear gradient
Keep select
4.
Open decoration 2 Cloclo
Edit copy
Edit paste as a new layer
Object - Align left
Blend Mode: Hard light
Layers – merge – merge down
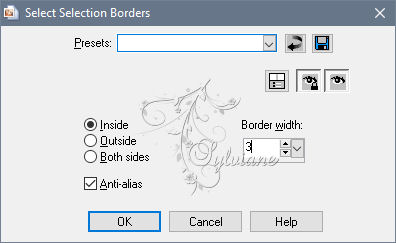
Selections - Modify - Select selection borders
Layers - New raster layer
Fill with background color
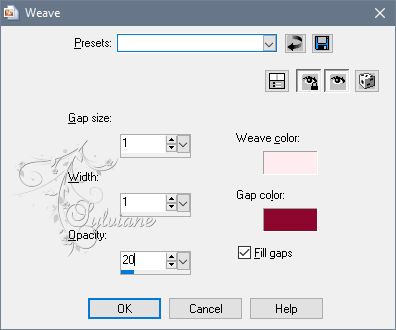
Effects - Texture Effects - wave
Effects - Edge Effects - Enhance
Selection - Select None
Layers – merge – merge down
Layers - Duplicate
Image - Mirror – mirror Horizontal
Layers – merge – merge down
5.
Activate bottom layer
Open misted Cloclo.png
Edit - copy
Edit - paste as a new layer
Move slightly to the left
Adjust – scharpness – scharpen
Go back to the top layer
Layer - New raster layer
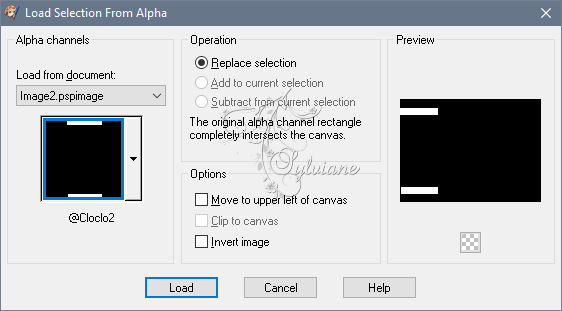
Selections - Load / Save - Load selection from Alpha Channel - @ Cloclo2
Fill background color
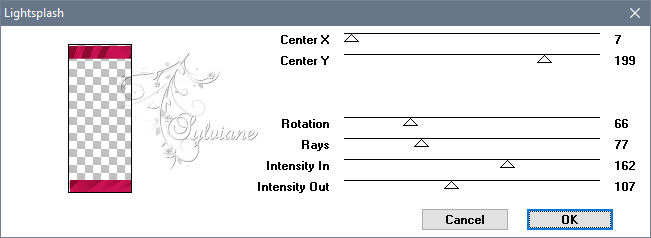
Plugins - Filters Unlimited 2.0 - VM Natuaral - Lightsplash
Blend Mode: Multiply
6.
Plugins - AAA Frame - Foto frame

Selection - Select None
Layers - Duplicate
Image - Mirror – mirror Horizontal
Layers – merge – merge down
7.
Open the deco tube 3 Cloclo
Edit - copy
Edit - paste as a new layer
Do not move
Effects - 3D Effects - Drop Shadow
2/2/65/12 color:#000000
Open the deco tube 4 Cloclo
Edit - copy
Edit - paste as a new layer
Center well
Layers - Merge - Merge visible layers
Edit copy
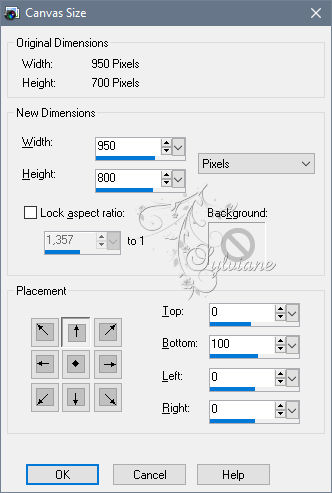
Image - canvas size
Activate magic wand
Select the transparent bottom part
Layers - New raster layer
Edit - paste in the selection
It is in memory
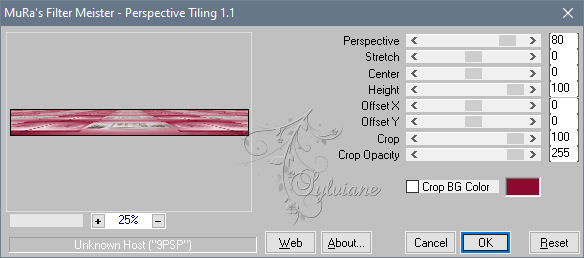
Plugins - MuR'as Meister - Perspective Tiling
Selection - Select None
Effects - 3D effects - Drop shadow / 2/2/100/15 / Background color
8.
Layers - Merge - Merge visible layers
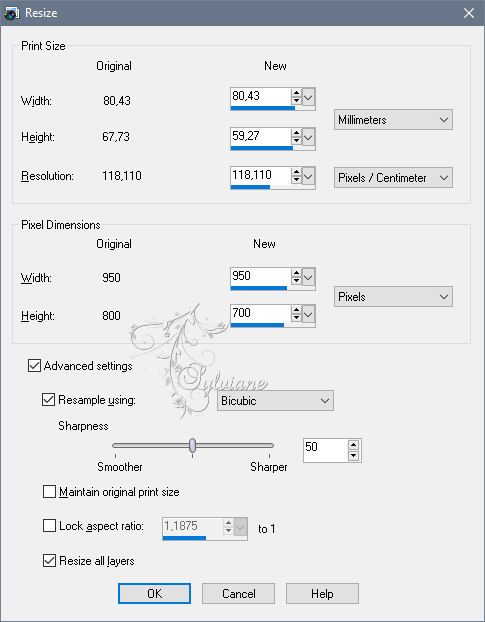
Images - Resize
Edit - copy
9.
Image - Add a 1 pixel border - Foreground color
Image - Add a border of 3 pixels - Background color
Selection - Select all
Image - Add a border of 20 foreground colors
Selection - Invert
Edit - paste in the selection it is in memory
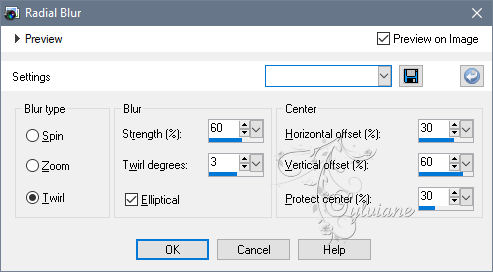
Adjust - blur - radial blur
Plugins - Graphics Plus - Cross Shadow - Default
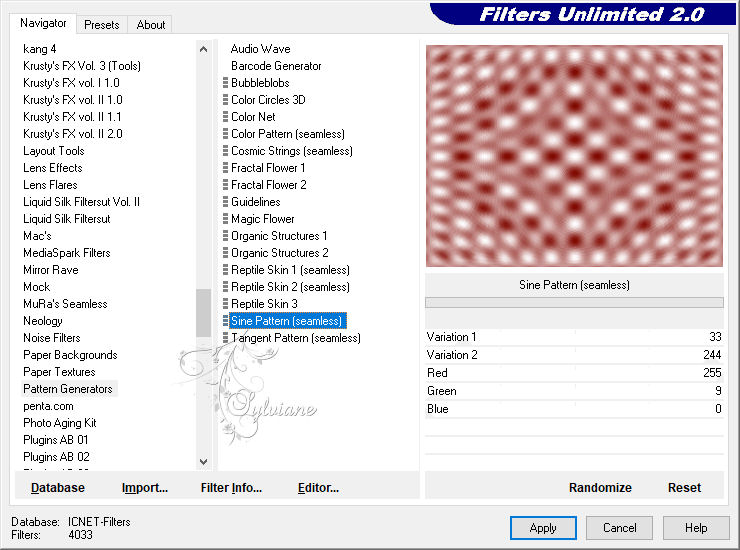
Plugins - I.C.NET Software - Filters Unlimited 2.0 - Pattern Generators - Sine Pattern
Adjust - Hue and Saturation - Colorize
Hue 245 / Saturation 141
Selections - Invert
Effects - 3D effects - Drop shadow / 3/3/50/25 / Background color / Redo in negative
Selection - Select None
10.
Image - Add a 1 pixel border - Foreground color
Image - Add a border of 3 pixels - Background color
Image - Add a border of 10 white color
Selection - Select all
Image - Add a border of 40 foreground colors
Selection - Invert
Edit - paste in the selection it is in memory
Adjust - blur - radial blur - As before
Plugin - Graphics Plus - Quick Tile 1 - Default
Selection - Select None
11.
Open vase.png
Edit - copy
Edit - paste as a new layer
Place bottom left / See final
Effects - 3D Effects - Drop Shadow / 3/3/50/25 - Black
Open female tube AnnaRidzi1476
Edit - copy
Edit - paste as a new layer
Image - Mirror – mirror Horizontal
Image - Resize to 74%
All layers unchecked
Place right / See final
Effects - 3D Effects - Drop Shadow / 3/3/50/25 / Black
12.
Put monwatermark
Sign your work
Put your copyright if necessary
Save as JPEG
Back
Copyright Translation © 2020 by SvC-Design