
This lesson is made with PSPX9
But is good with other versions.
© by SvC-Design
.gif)
Materialen Download :
Here
******************************************************************
Materials:
167_Femme_Page6_Animabelle.png
265_animabelle_tubes_animaux.png
266_animabelle_tubes_animaux.png
Deco_DM_Animabelle.png
douceur_hivernale1_animabelle.PspSelection
douceur_hivernale2_animabelle.PspSelection
sharlimarMask121.jpg
******************************************************************
Plugin:
Plugins - Texture – Texturizer
Plugins - Graphics Plus - Cross Shadow
Plugins - <I.C.NET Software> - Filters Unlimited 2.0& <Bkg Designer sf10 1> - Cut Glass 01
Plugins - <I.C.NET Software> - Filters Unlimited 2.0 Buttons & Frames - 3D Glass Frame 2
******************************************************************
color palette
:

******************************************************************
methode
When using other tubes and colors, the mixing mode and / or layer coverage may differ
******************************************************************
General Preparations:
First install your filters for your PSP!
Masks: Save to your mask folder in PSP, unless noted otherwise
Texture & Pattern: Save to your Texture Folder in PSP
Selections: Save to your folder Selections in PSP
Open your tubes in PSP
******************************************************************
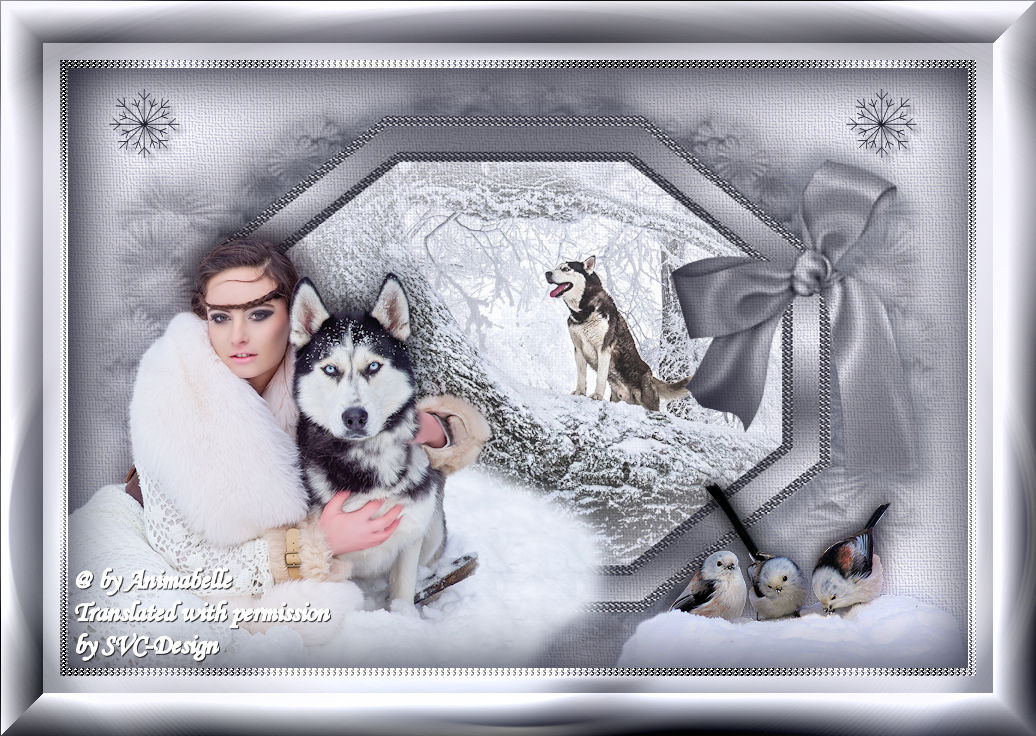
We will start - Have fun!
Remember to save your work on a regular basis
******************************************************************
1.
Activate the eyedropper tool
Take 5 beautiful colors matching your tubes, images, misteds ...
Here are the ones I chose for this tutorial
Color 1 # 1d1c2b
Color 2 # f1f0ff
Open all items in your PSP
Duplicate them and close them, so as not to work on the originals.
Gently remove the watermarks with the eraser
2.
File - New - Open a new transparent image of 900 x 600 pixels
Fill it with color 1
Layers - New raster layer
Fill it with color 2
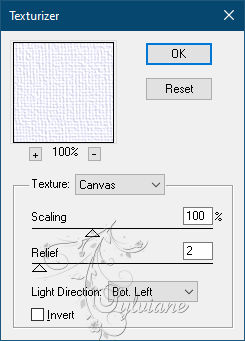
Plugins - Texture – Texturizer
3.
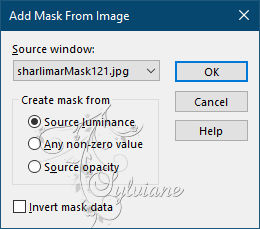
Layers - New Mask Layer - From Image
Apply the mask "sharlimarMask121"
Layers - Merge - Merge group
Settings - Sharpness – Sharpness
4.
Layers - New raster layer
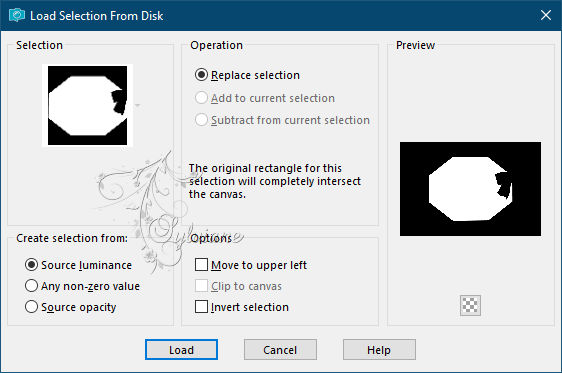
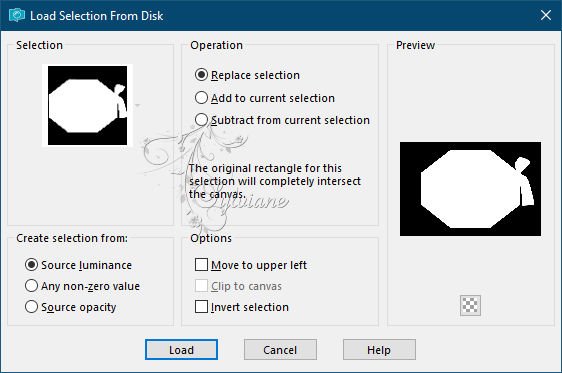
Selections - Load / save selection - Load selection from disk
Load the selection "Winter_now1_animabelle"
Open 266_animabelle_tubes_animaux.png
Delete watermark
Edit – Copy
Edit - Paste as new layer
Image - Resize to 75%
(resize all layers: unchecked)
Center the misted well in the selection
Selections - Invert
Edit - Cut
Layers - Properties - Opacity at 85 or leave the opacity at 100 (up to you)
Settings - Sharpness - Sharpness
Layers - New raster layer
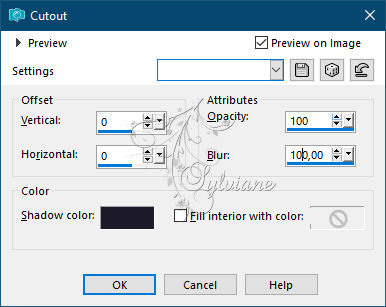
Effects - 3D effect - Cutting - Color 1 or very dark
5.
Layers - New raster layer
Selections - Load / save selection - Load selection from disk -
douceur_hivernale2_animabelle.PspSelection
Effect - 3D effect - Drop shadow
12/12/35/20 / Color # 4c5364
Redo the 3D effect with the following data
(- 12) / (- 12)
Selection - Select None
6.
Open 167_Femme_Page6_Animabelle.png
Delete watermark
Edit – Copy
Edit - Paste as new layer
Image - Resize to 95%
(resize all layers: unchecked)
Place the tube at the bottom left (see final result)
Layers - Duplicate
Activate the layer below
Adjust - blur - gaussian blur - Radius at 15
Layers - Properties - Blend mode on "Multiply"
7.
Open 265_animabelle_tubes_animaux.png
Delete watermark
Edit – Copy
Edit - Paste as new layer
Image - Resize to 45%
(resize all layers: unchecked)
Settings - Sharpness - Sharpness
Place the tube at the bottom right (see final result)
Layers - Duplicate
Activate the layer below
Adjust - blur - gaussian blur - Radius at 9
Layers - Properties - Blend mode on "Multiply"
Layers - Merge All (Flatten)
8.
Selections - Select all
Effects - 3D effect - Cutting
Image - Add Borders – symmetrical - 8 pixels - color 2
Selections - Invert
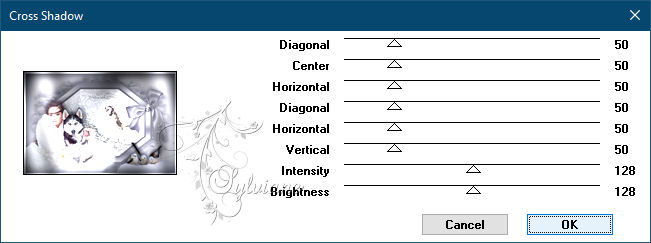
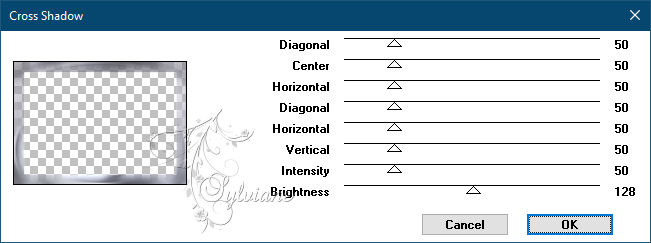
Plugins - Graphics Plus - Cross Shadow - default
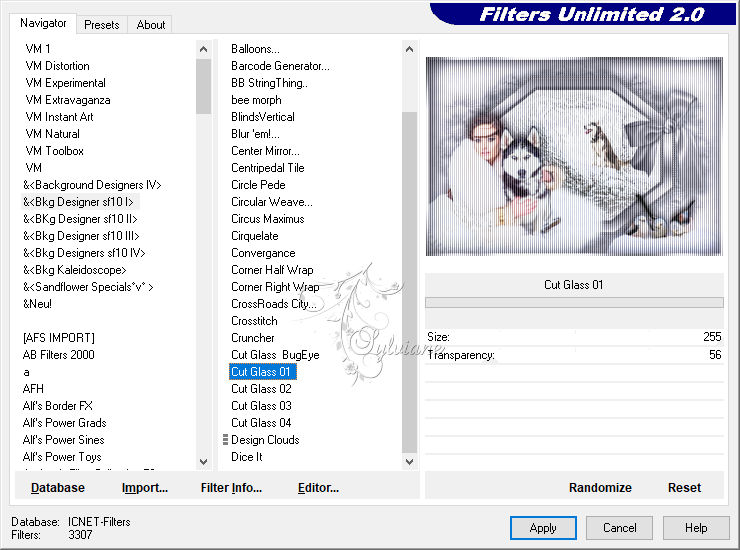
Plugins - <I.C.NET Software> - Filters Unlimited 2.0& <Bkg Designer sf10 1> - Cut Glass 01
Adjust – scharpness – scharpen more
Selection - Select None
9.
Edit - Copy
Selections - Select all
Image - Add Borders – symmetrical - 60 pixels - color 2
Selections - Invert
Selections – Promote selections to layer
Edit - Paste in selection
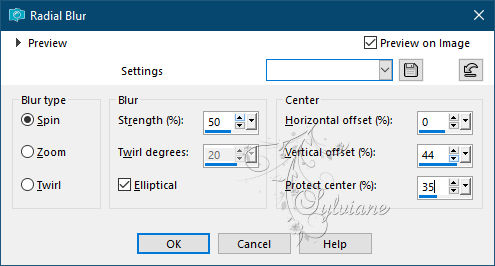
Adjust - blur - radial blur
Plugins - Graphics Plus - Cross Shadow
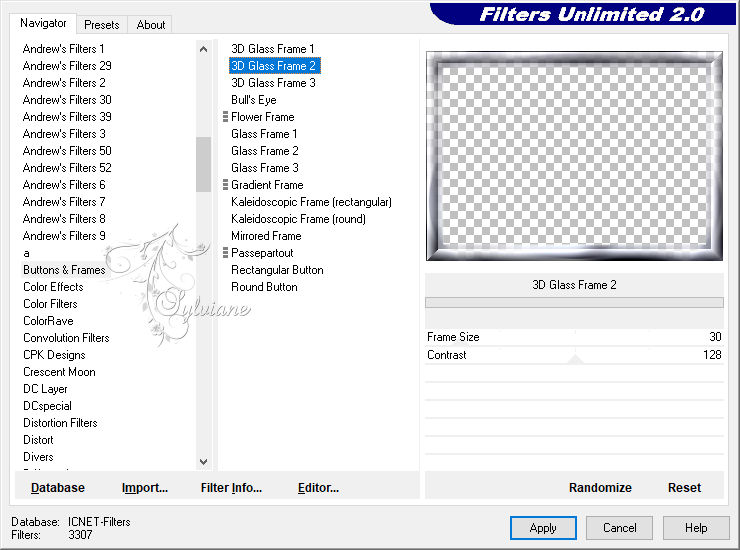
Plugins - <I.C.NET Software> - Filters Unlimited 2.0 Buttons & Frames - 3D Glass Frame 2
Selection - Select None
10.
Open Deco_DM_Animabelle.png
Edit – Copy
Edit - Paste as new layer
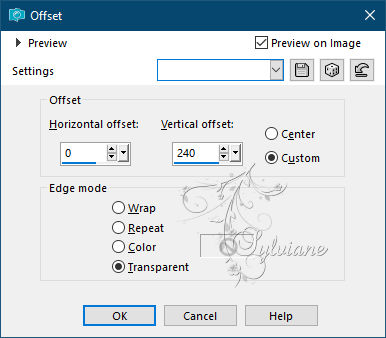
Effects - Image Effect - Offset
11.
13.
put your watermark on it
Layers - Merge All (Flatten)
Save as JPEG
Back
Copyright Translation © 2021 by SvC-Design