
This lesson is made with PSPX9
But is good with other versions.
© by SvC-Design
Materialen Download :
Here
******************************************************************
Materials:
Misted_EdithS
Narah_mask_Abstract132
Texto_Edith
******************************************************************
Plugin:
Effects – plugin - Funhouse - Cirquelate
******************************************************************
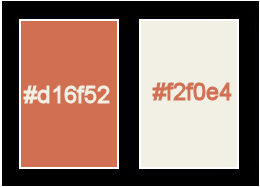
color palette
:
******************************************************************
methode
When using other tubes and colors, the mixing mode and / or layer coverage may differ
******************************************************************
General Preparations:
First install your filters for your PSP!
Masks: Save to your mask folder in PSP, unless noted otherwise
Texture & Pattern: Save to your Texture Folder in PSP
Selections: Save to your folder Selections in PSP
Open your tubes in PSP
******************************************************************
We will start - Have fun!
Remember to save your work on a regular basis
******************************************************************
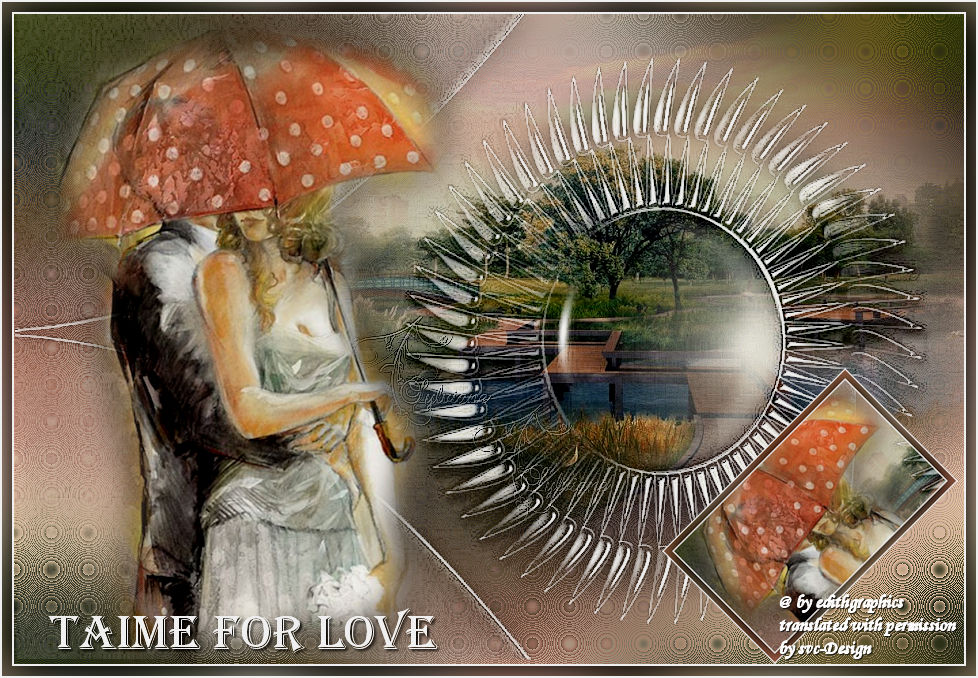
1.
Open a new transparent image of 950 x 650px
Foregroundcolor : #4c4729
Backgroundcolor: #aeb098
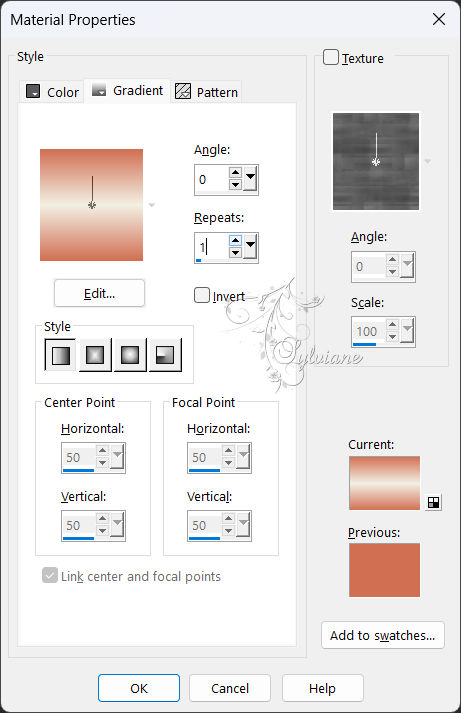
fill with a linear gradient
2.
Selections – select All
Open Misted_EdithS
Edit – Copy
Edit - Paste into selection
Selection - Select None
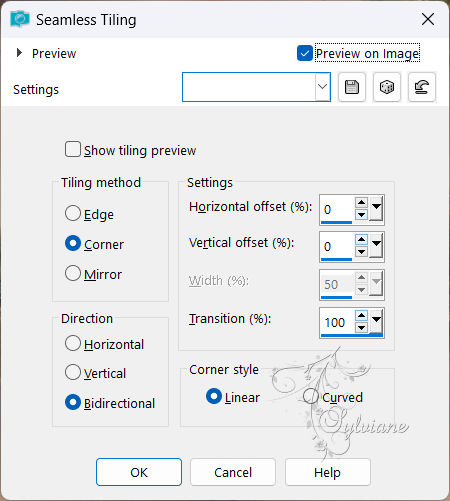
3.
Effects - Image Effects - Seamless Tiling
4.
Adjust - blur - gaussian blur
Range: 30,00
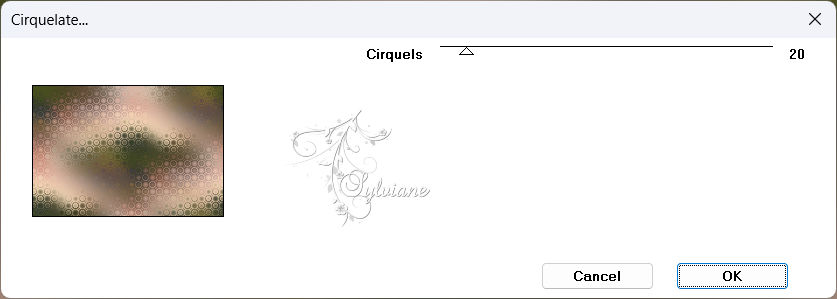
5.
Effects – plugin - Funhouse - Cirquelate - Default
6.
Adjust – scharpness – scharpen
7.
Layers - New Raster Layer
paint with the light color (aeb098) of your gradient.
8.
Layers - New Mask Layer - From Image - Narah_mask_Abstract132

Layers - Merge - Merge Group
9.
Layers - duplicate
Layers – merge – merge down
10.
Effects - Edge Effects - Enhance More
11.
Effects - 3 D effects - Drop shadow
0/0/80/40 – color: black
12.
open Misted_EdithS
Edit – Copy
Edit - Paste as new layer
13.
Layers - Arrange - Move Down
Adjust or Sharpen (as you prefer)
14.
open your main tube
Edit – Copy
Edit - Paste as new layer
use sharpen and drop shadow (how to prefer)
15.
Layers - Merge - Merge visible layers
16.
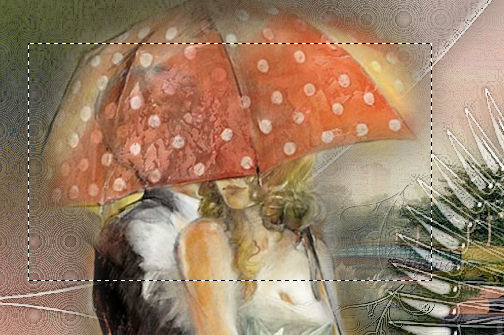
Activate the Selection tool - rectangle
and draw a small rectangle of your tube
17.
Edit – Copy
edit - paste as a new image
go back to your creation
Selection - Select None
18.
back to your little creations
Make the edges of the comic as you prefer. Or follow it steps from 23 to 28
Layer – promote background layer
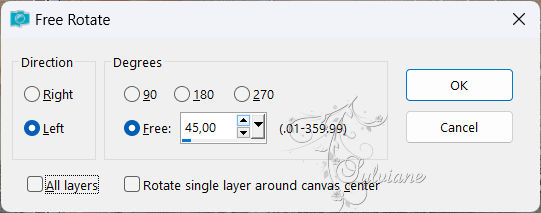
19.
Image - Free Rotate - 45
20.
Edit – Copy
21.
Edit - Paste as new layer
Image - Resize -, I did 60%
No check mark on resize all layers
place as in the example
22.
Open Texto_Edith
Edit – Copy
Edit - Paste as new layer
place as in the example
23.
Image - Add Borders – Symmetric - 2 px – color:#ffffff
Selections – select All
Image - Add Borders – Symmetric -10 px - Other color.
24.
Effects - Image Effects - Seamless Tiling - Default
25.
Selections - Invert
26.
Adjust - blur - gaussian blur
Range: 30,00
27.
Selections - Invert
Effects - 3 D effects - Drop shadow
0/0/100/50 - color:black
Selection - Select None
28.
Image - Add Borders – Symmetric -2 px – color: black
29.
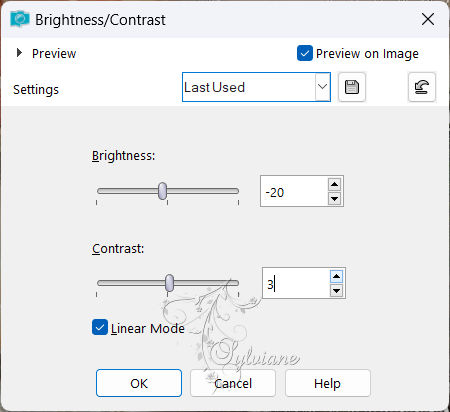
Adjust – brightness and contrast – brightness/contrast
30.
put your watermark on it
Layer – merge – merge all (flatten)
Save as JPEG
Back
Copyright Translation 2024 by SvC-Design
------------------------------------------------------------------------------
Thanks to all who created