
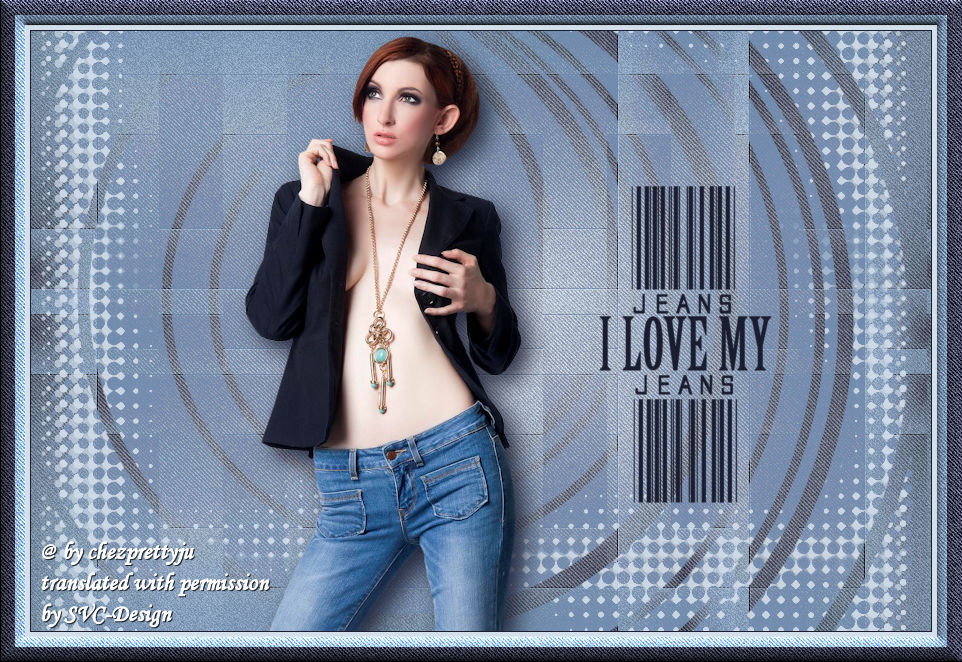
This lesson is made with PSPX9
But is good with other versions.
© by SvC-Design
Materialen Download :
Here
******************************************************************
Materials:
prettyju_denim_mask.jpg
prettyju_denim_mask2.jpg
prettyju_denim_wa.png
******************************************************************
Plugin:
plug-ins - ICNET Softwares - Filters Unlimited - [AFS IMPORT] - BORFADE1
plug-ins - FM Tile Tools - Blend Emboss
plug-ins - DSB Flux - Linear Transmission
plug-ins - ICNET Softwares - Filters Unlimited - Penta.com - jeans
******************************************************************
color palette
:

******************************************************************
methode
When using other tubes and colors, the mixing mode and / or layer coverage may differ
******************************************************************
General Preparations:
First install your filters for your PSP!
Masks: Save to your mask folder in PSP, unless noted otherwise
Texture & Pattern: Save to your Texture Folder in PSP
Selections: Save to your folder Selections in PSP
Open your tubes in PSP
******************************************************************
We will start - Have fun!
Remember to save your work on a regular basis
******************************************************************
1.
Open a new transparent image of 900 x 600 px
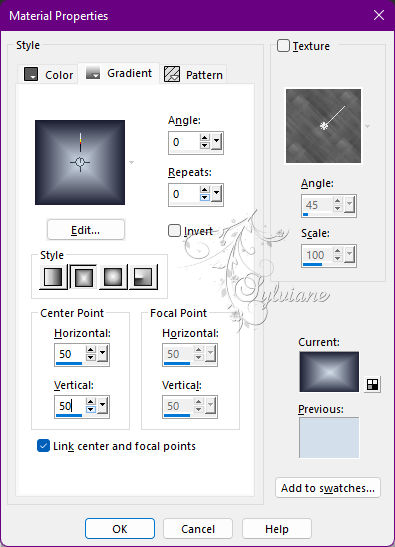
Paint this new image with a rectangular
gradient (color 3 in the foreground, color 2 in the background):
2.
Adjust - blur - gaussian blur : 35.
3.
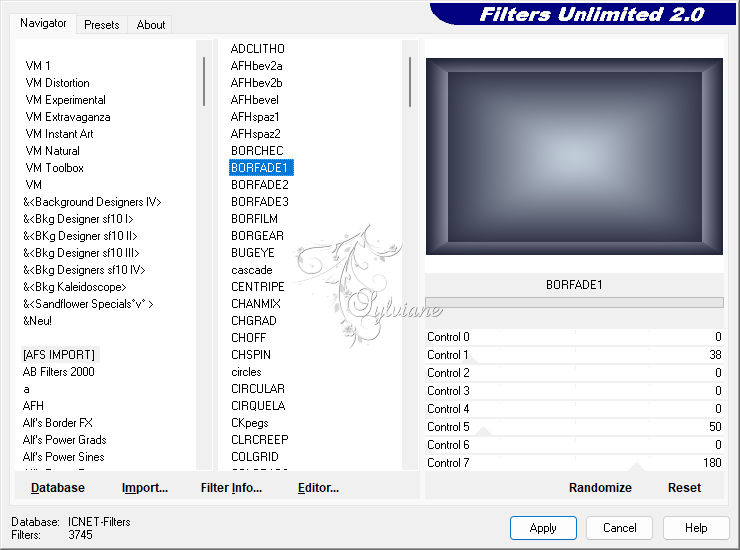
plug-ins - ICNET Softwares - Filters Unlimited - [AFS IMPORT] - BORFADE1:
4.
Effects - Image Effects - Seamless Tile
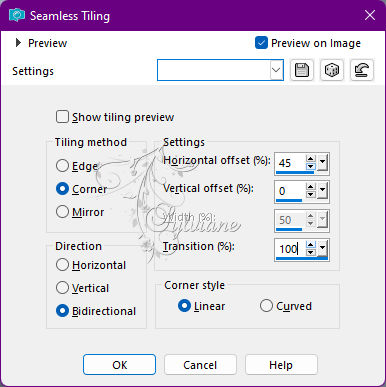
5.
Effects - Artistic Effects - Colored Edges: (Color 2):
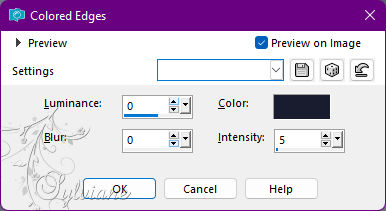
6.
plug-ins - FM Tile Tools - Blend Emboss:
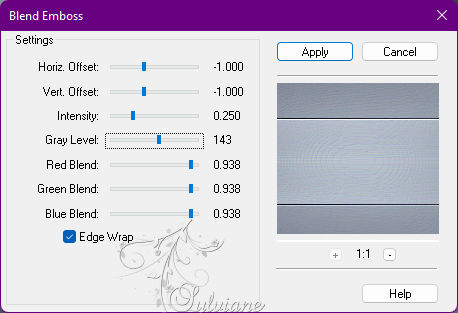
7.
plug-ins - DSB Flux - Linear Transmission:
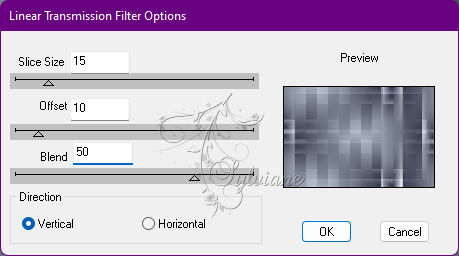
8.
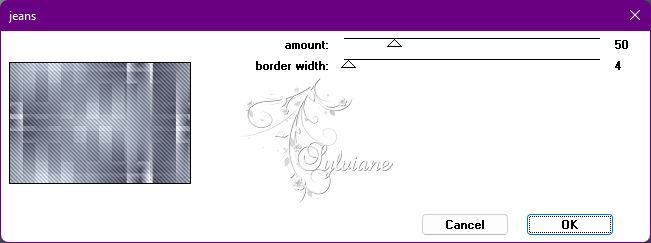
plug-ins - ICNET Softwares - Filters Unlimited - Penta.com - jeans:
9.
Layers - new raster layer.
Paint this new image with a rectangular
gradient (color 3 in the foreground, color 1 in the background):
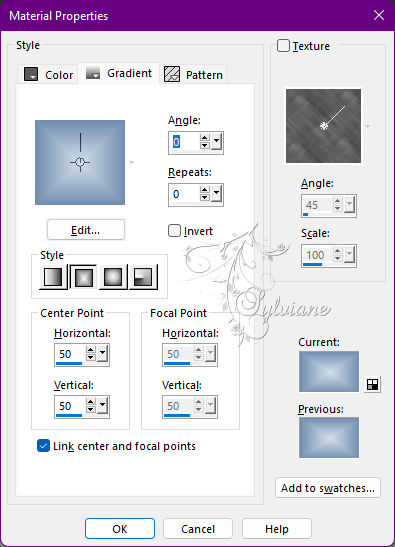
Set the layer overlay mode to: Darken
(or any other mode that better suits your colors).
Reduce layer opacity to 80%.
10.
Layers - Merge - Merge visible layers
11.
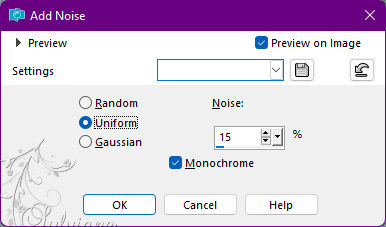
Adjust - Add / Remove Noise - Add Noise
12.
Layers - new raster layer.
Paint your color 1.
13.
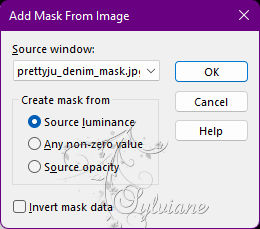
Layers – new mask layer - from image - prettyju_denim_mask.jpg
Layers - Merge - Merge Group
14.
Effects - 3D Effects - Drop Shadow:
5/-5/65/0 - (Color 3):
Set layer overlay mode to: lighten
15.
Effects - 3D Effects - Drop Shadow:
5/-5/65/0 - (Color 3):
16.
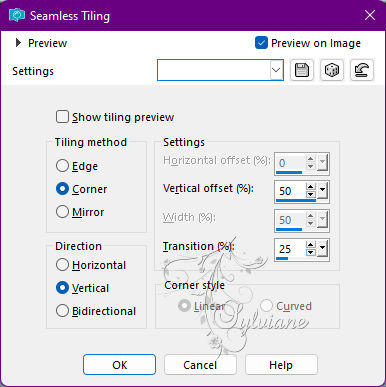
Effects - Image Effects - Seamless Tile
17.
Layers – new mask layer - from image - prettyju_denim_mask2.jpg
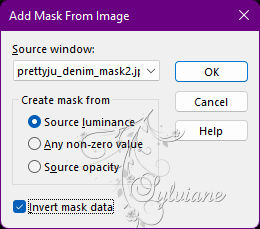
Layers - Merge - Merge Group
18.
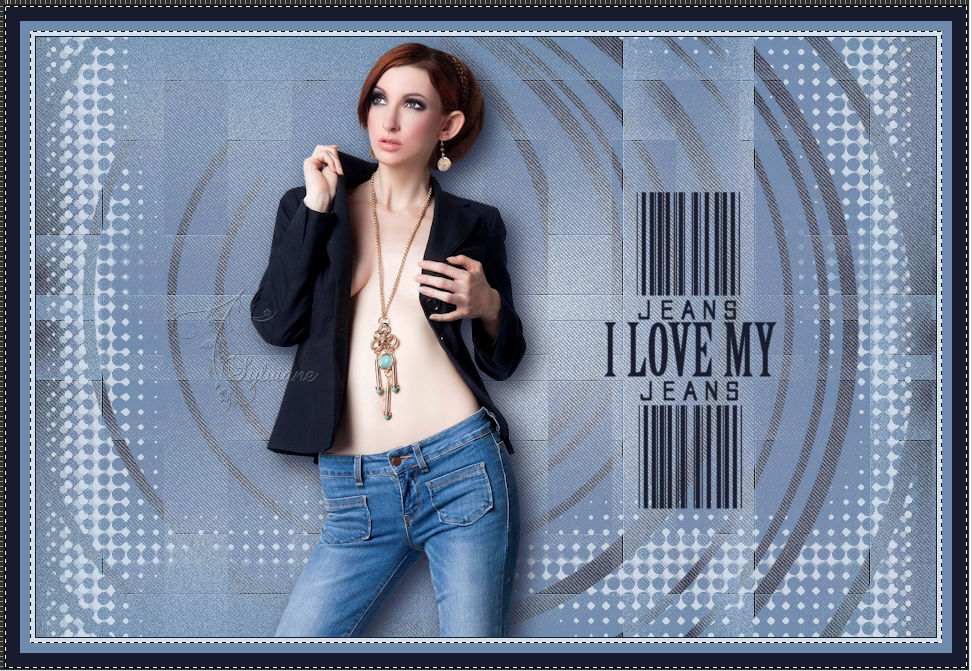
Resize the character tube if necessary.
Edit - Copy
Edit - Paste As New Layer
put it like this in the example
Effects - 3D effects - Drop shadow (to taste, if desired).
19.
Open prettyju_denim_wa.png
Edit - Copy
Edit - Paste As New Layer
put it like this in the example
20.
Setting - Hue and saturation - Hue/Saturation/Brightness (check colorize)
to get the color of your choice (I put the color 2).
21.
Effects - 3D effects - Drop shadow (to taste, if desired).
22.
Image – Add Borders –symmetric - 1px - color 2
Image – Add Borders –symmetric - 5px - color 3
Image – Add Borders –symmetric - 10px - color 1
Image – Add Borders –symmetric - 15px - color 2
23.
With the magic wand, select these last two borders:
24.
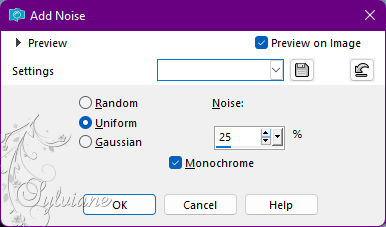
Adjust - Add / Remove Noise - Add Noise
25.
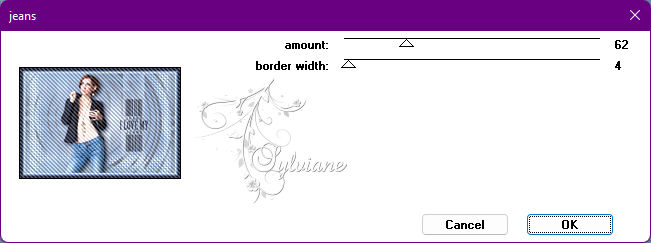
Effects - plug-ins - Penta.com - jeans:
26.
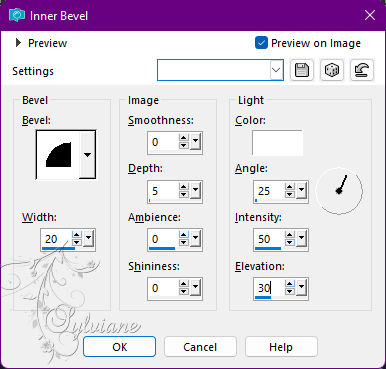
Effects - 3D effects - inner bevel
Selection - Select None
27.
Apply your watermark or signature
Layer – merge – merge all (flatten)
Save as JPEG
Back
Copyright Translation 2022 by SvC-Design