
This lesson is made with PSPX9
But is good with other versions.
© by SvC-Design

Materialen Download :
Here
******************************************************************
Materials:
PARTIE DE MON IMAGE PAYAGE POUR ETAPE 4 A COLLER DANS LE CERCLE.pspimage
8192676.jpg
COULEURS VERSION 1 NOEL.png
DECO PERSO 1 202 OCTOBRE 2023.png
DECO PERSO 2 202 BLANCHE OU COULEUR OCTOBRE 2023.png
DECO TEXTE 202 COULEUR SWEETY.png
SIGNATURE TUTORIELS .pspimage
SELECTION 1 202 .PspSelection
SELECTION 2 202 .PspSelection
5a5fc27ab4bf91e4ad4a529178bedb42.jpg
NOVEMBRE 2023 NADEGE 22 11 23 SWEETY.png
OCTOBRE 2022 CHANT HIVERNAL 14 10 22 SWEETY.png
******************************************************************
Plugin:
******************************************************************
color palette
:
******************************************************************
methode
When using other tubes and colors, the mixing mode and / or layer coverage may differ
******************************************************************
General Preparations:
First install your filters for your PSP!
Masks: Save to your mask folder in PSP, unless noted otherwise
Texture & Pattern: Save to your Texture Folder in PSP
Selections: Save to your folder Selections in PSP
Open your tubes in PSP
******************************************************************
We will start - Have fun!
Remember to save your work on a regular basis
******************************************************************
1.
Open a new transparent image of 950x600 px
Selection - Select All
Open 5a5fc27ab4bf91e4ad4a529178bedb42.jpg
Edit - Copy.
Edit - Paste into selection.
Selection - Select None
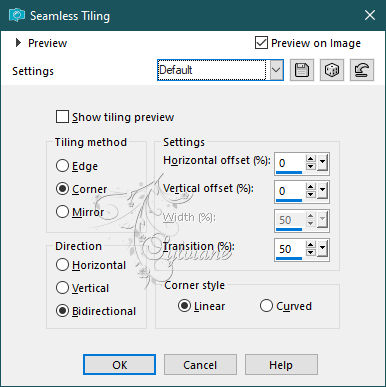
Effects - Image Effects - Seamless Tiling - default:
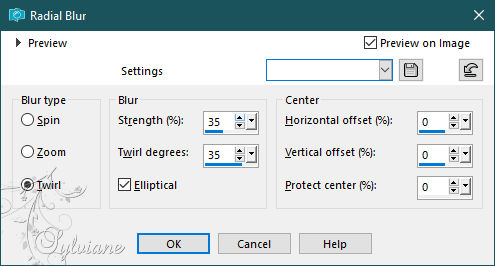
Adjust - blur - radial blur
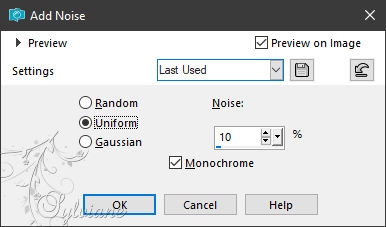
Adjust - Add / Remove Noise - Add Noise
=============================================================
2.
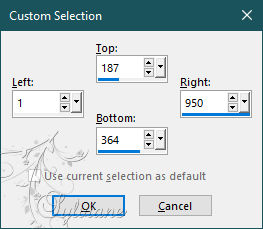
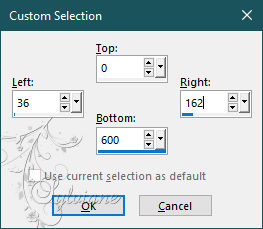
Activate Selection - Custom selection
Layers - New Raster Layer
Fill the selection with the ARP color
Selection - modify - contract – 2px
CLEAR or DELETE on keyboard
Selection - modify - contract – 10px
Fill the selection with the ARP color
Selection - modify - contract – 2px
CLEAR or DELETE on keyboard
CAUTION: Change the opacity of the paint can to 30 %
Fill the selection with the ARP color
Selection - Select None
Remember to reset the opacity of the paint can to 100 
=============================================================
3.
Activate Selection - Custom selection
Layers - New Raster Layer
Fill the selection with the ARP color
Selection - modify - contract – 2px
CLEAR or DELETE on keyboard
Selection - modify - contract – 10px
Fill the selection with the ARP color
Selection - modify - contract – 2px
CLEAR or DELETE on keyboard
CAUTION: Change the opacity of the paint can to 30
Fill the selection with the ARP color
Selection - Select None
Remember to reset the opacity of the paint can to 100
=============================================================
4.
At the moment we are on *Raster 3*
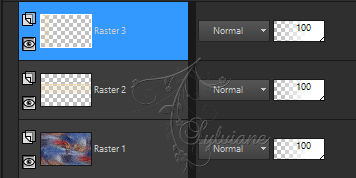
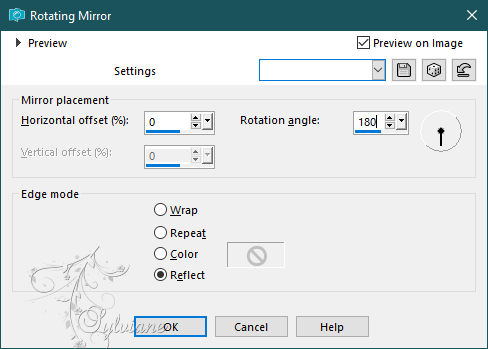
Effects – reflection effects – rotating mirror
Layers - New Raster Layer
Layers – arrange – move down (2x)
(Above *Raster 1*)
Selections - Load / Save - Load selection from disk - SELECTION 1 202 .PspSelection
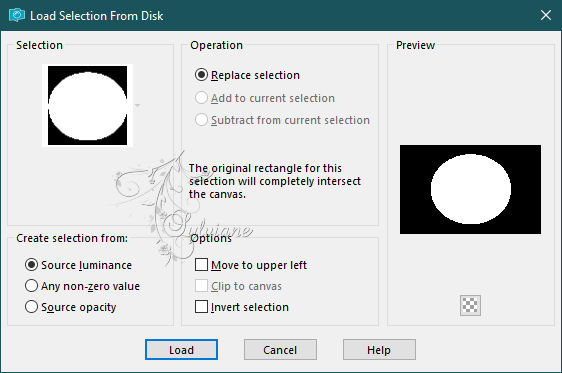
Fill the selection with the color ARP.
Selection - modify - contract – 2px
CLEAR or DELETE on the keyboard.
Open 5a5fc27ab4bf91e4ad4a529178bedb42.jpg
Edit - Copy.
Edit - Paste into selection
Selection - modify - contract – 10px
CLEAR or DELETE on the keyboard.
Fill the selection with the color ARP.
Selection - modify - contract – 2px
CLEAR or DELETE on keyboard
Layers - New Raster Layer
Layers – arrange – move down
Open 5a5fc27ab4bf91e4ad4a529178bedb42.jpg
Edit - Copy.
Edit - Paste into selection
=============================================================
5.
We are on Raster 5
Selection INVERT.
Effects - 3 D effects - Drop shadow
0 / 0 / 60 / 30 – color:#000000
Layers - New Raster Layer
Selection INVERT.
Open DECO PERSO 1 202 OCTOBRE 2023.png
Edit - Copy.
Edit - Paste into selection
Selection - Select None
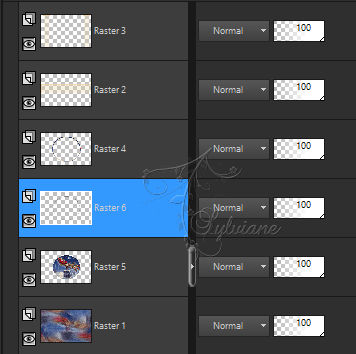
Here we are on * Raster 6
=============================================================
6.
Activar Raster 4
Layers – merge – merge down (2x)
Activar Raster 2
Layers – Duplicate
Activar Raster 3
Layers - Duplicate
Layers – arrange – move down
Activar Copy of Raster 3
Layers – merge – merge down
=============================================================
7.
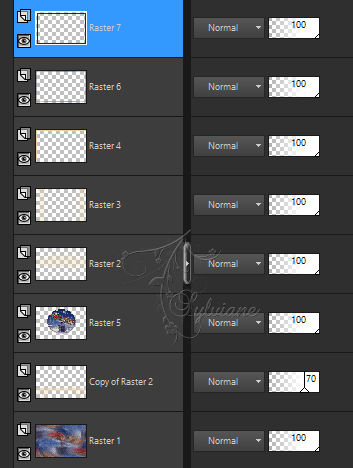
Our layers and tag:
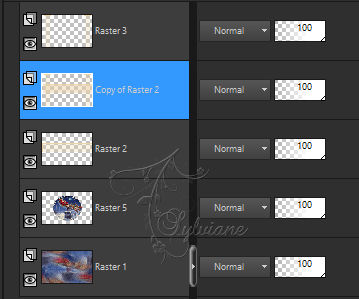
Still on Copy Raster 2.
Effects - Geometric Effects - Perspective-Vertical
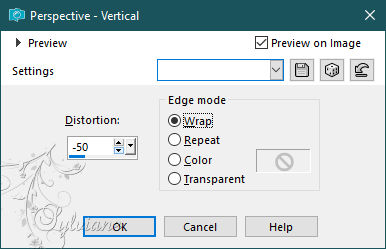
Selector Tool Enabled (K on Keyboard)
Move the pointer over the top center cursor and scroll down like on my screenshot:
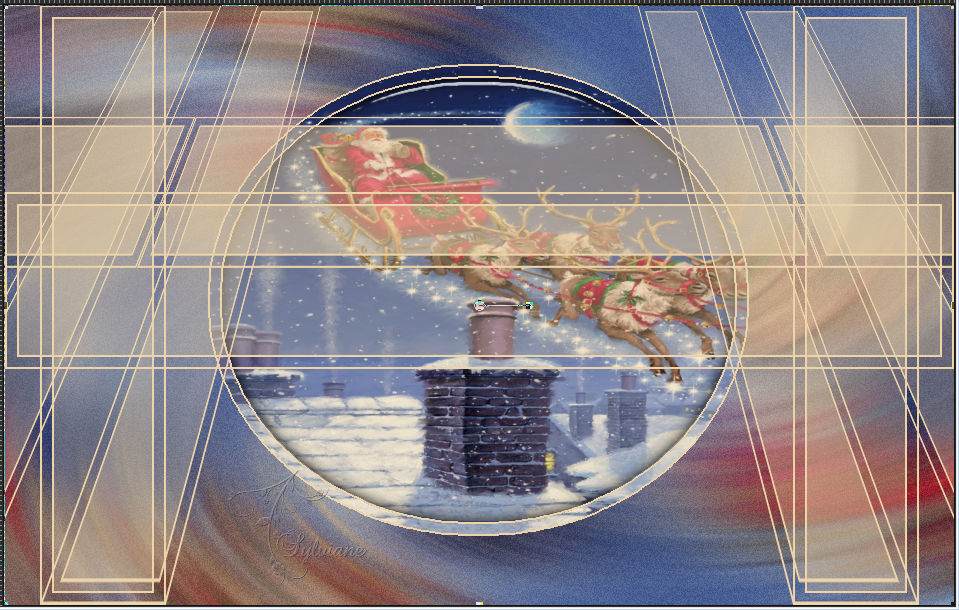
After :
Disable Ruler and Selector Tool (M on Keyboard)
Layers – arrange – move down (2x)
(Between *Raster 1* and *Raster 5*)
If you find the effect a bit too dark, you can lower its opacity
For my 1st version I set *opacity* to 70
=============================================================
8.
Activate Raster 5
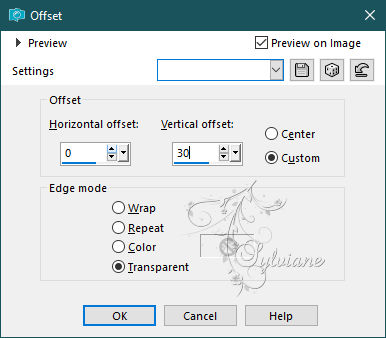
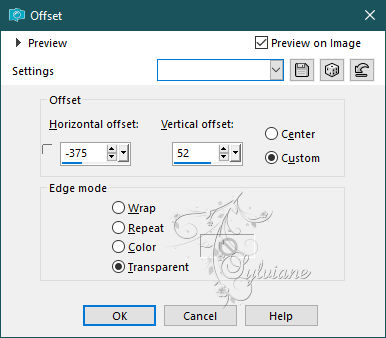
Effects - Image Effects - Offset
Activate Raster 2
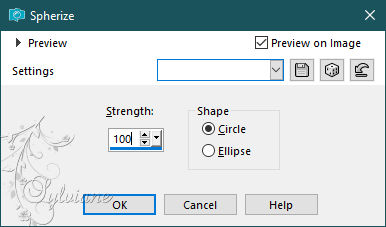
Effects – geometric effects – spherize
Effects - Image Effects - Offset
=============================================================
9.
We're on *Raster 2*
Activate Raster 3
Edit – copy special- copy merged
(Image Remembers)
Layers - New Raster Layer
Selection - Select All
Fill the selection with the color AVP or ARP
Selection - modify - contract -2 px
CLEAR or DELETE on keyboard
Fill the selection with the color ARP or AVP
Selection - modify - contract -2px
CLEAR or DELETE on the keyboard.
Fill the selection with the color AVP or ARP
Selection - modify - contract -2 px
CLEAR or DELETE on keyboard
GARDER LA SELECTION ACTIVE …
=============================================================
10.
The selection always active and still on raster 6
Layers - New Raster Layer
Paste the image copied in step 9 into the selection:
(Normally it is in memory)
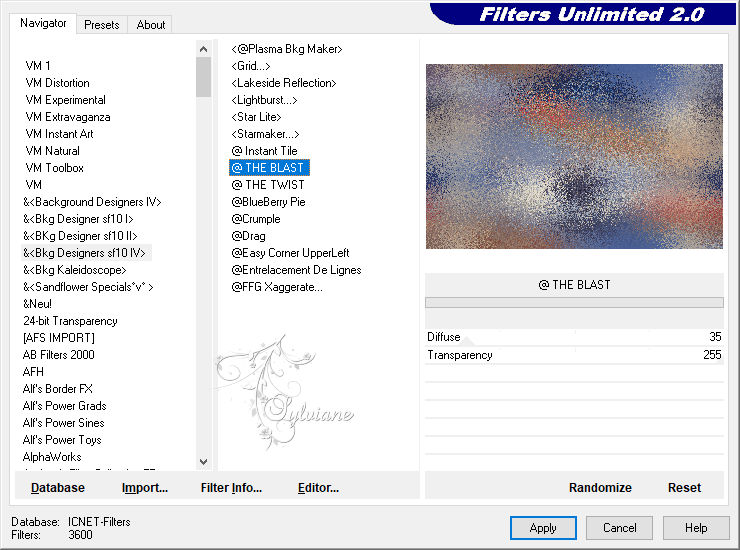
Filters – plugin - Unlimited 2.0==>&<Bkg Designers sf10> - @THE BLAST
Selection - modify - contract -10px
CLEAR or DELETE on keyboard
GARDER LA SELECTION ACTIVE …
=============================================================
11.
The selection is always on...
Layers - New Raster Layer
Fill the selection with the color AVP or ARP
Selection - modify - contract -2 px
CLEAR or DELETE on keyboard
Fill the selection with the color ARP or AVP.
Selection - modify - contract -2 px
CLEAR or DELETE on the keyboard.
Fill the selection with the color AVP or ARP
Selection - modify - contract -2 px
CLEAR or DELETE on keyboard
Selections - Invert
Effects - 3 D effects - Drop shadow
0 / 0 / 60 / 30 – color:#000000
Selection - Select None
=============================================================
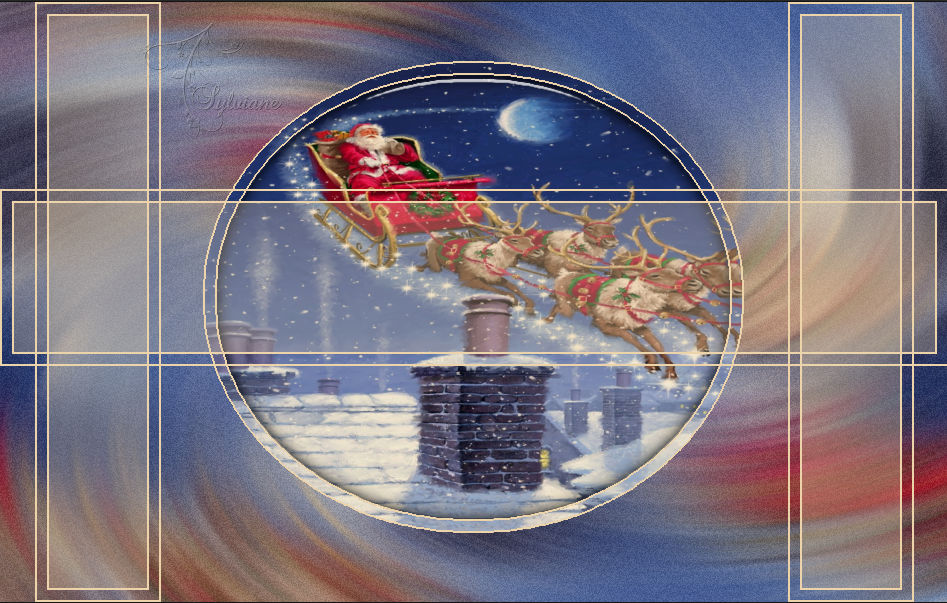
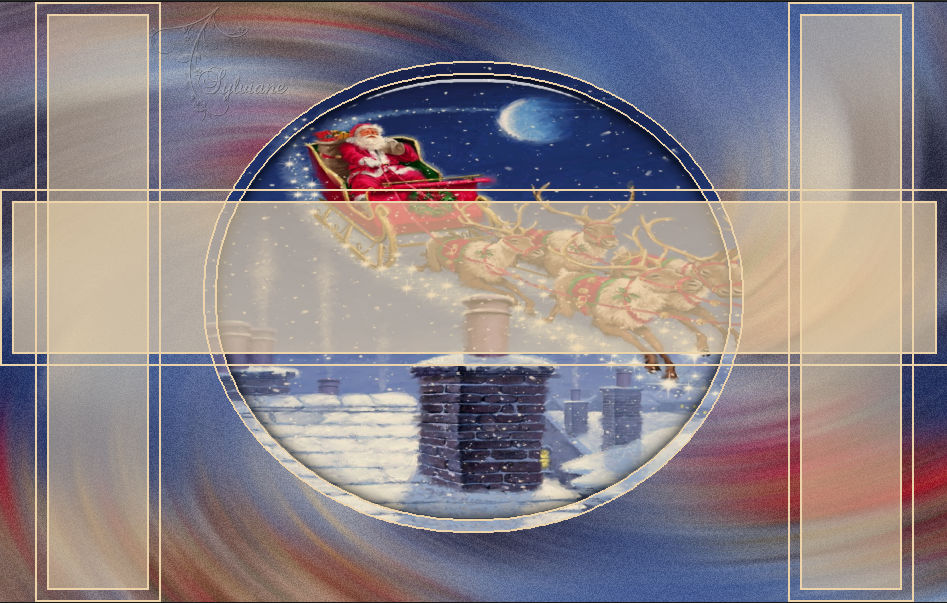
12.
Our result:
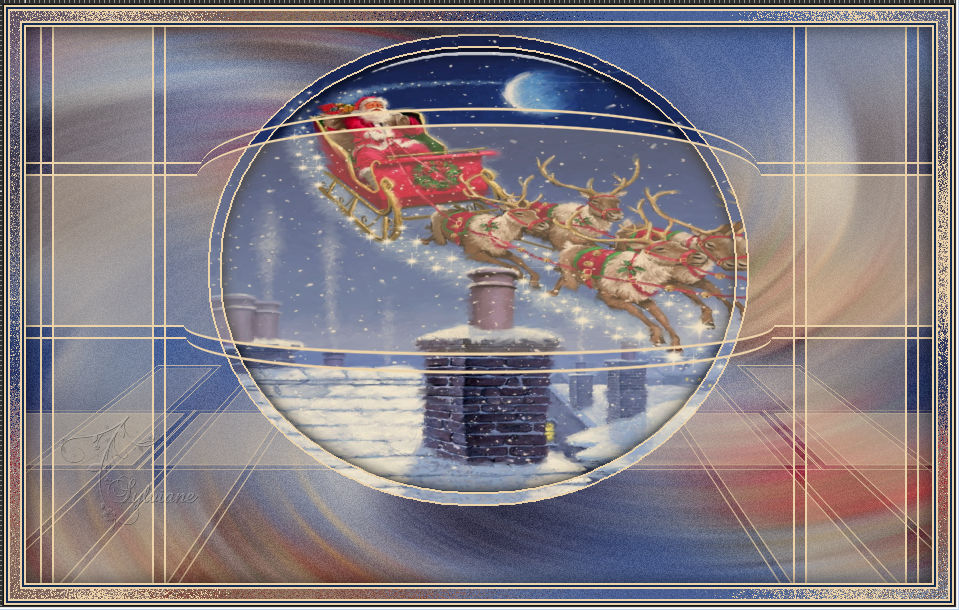
We're on Raster 7
Open on desktop mask * 8192676.jpg *
Layers - New Raster Layer
Layers – arrange – move down (6x)
(It must be between the *Copy of Raster 2* and the *Raster 5*)
Fill with ARP color (For my 2nd version AVP color)
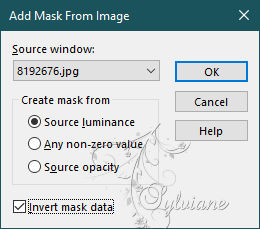
Layers - New Mask Layer - From Image - 8192676.jpg
Adjust – scharpness – scharpen
Layers - Merge - Merge Group
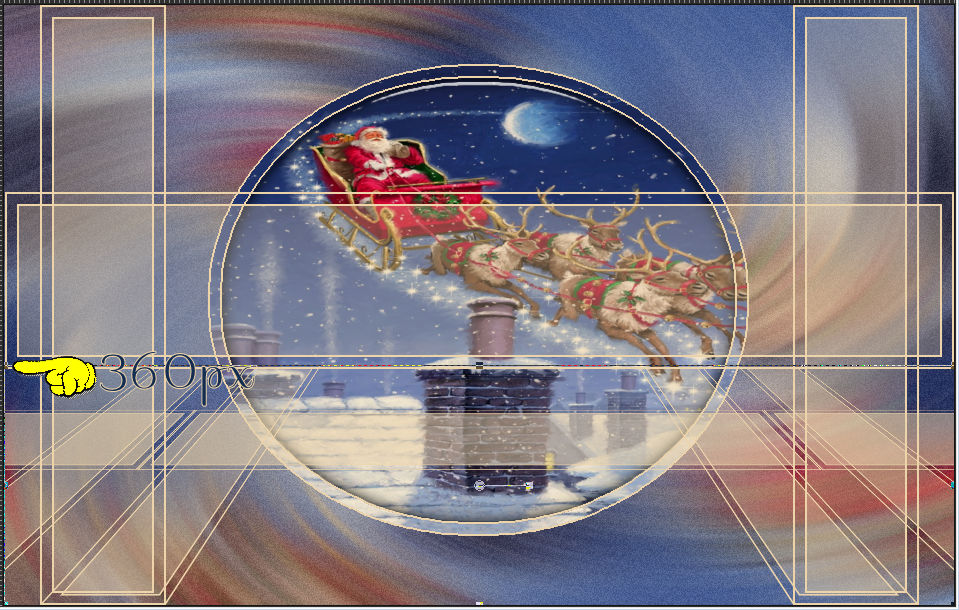
Open DECO PERSO 2 202 BLANCHE OU COULEUR OCTOBRE 2023.png
select the white frame if you make version 1
Edit – Copy
Edit - Paste as new layer
Don't panic if you don't see it, we'll fix it
Effects - Image Effects - Offset
Layers - arrange – up (2x)
(It must be between *Raster 2* and *Raster 3 * ):
NOTE: I'm putting this decoration in white... All you have to do is colour it according to your tastes
With the magic wand tolerance 0 click inside this deco
Open 5a5fc27ab4bf91e4ad4a529178bedb42.jpg
Edit - Copy.
Edit - Paste into selection.
Selection - Select None
Effects – reflection effects – rotating mirror
Layers – merge – merge down
=============================================================
13.
Open NOVEMBRE 2023 NADEGE 22 11 23 SWEETY.png
Edit – Copy
Edit - Paste as new layer
Image - Mirror – mirror Horizontal
Image - Resize to 68%
No check mark on resize all layers
Layers - arrange – up (Just above *Raster 3*)
Open OCTOBRE 2022 CHANT HIVERNAL 14 10 22 SWEETY.png
Edit – Copy
Edit - Paste as new layer
Not Resized
Open DECO TEXTE 202 COULEUR SWEETY.png
Edit – Copy
Edit - Paste as new layer
(NOTE: I'm whitening this text decoration... All you have to do is colour it according to your tastes
Place as on my model (See final result)
Effects - 3 D effects - Drop shadow
0 / 0 / 60 / 30 – color:#000000
=============================================================
14.
Our layers and tag before animation:

We're on *Raster 11* (Text)...
At the top of the pile...
Affix your signature and mine if you wish -
IF YOU DON'T DO THE ANIMATION ...
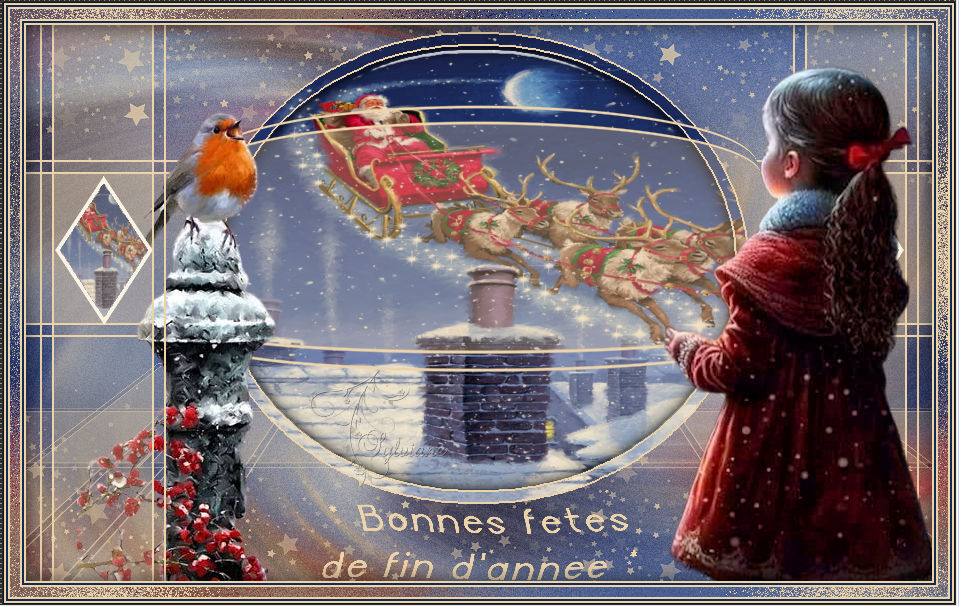
Merge All (Flatten) . Resize to 950 pixels –
Save your work:
Layer – merge – merge all (flatten)
Save as JPEG
=============================================================
For animation:
Activate Raster 5
Selections - Load / Save - Load selection from disk - SELECTION 2 202 .PspSelection

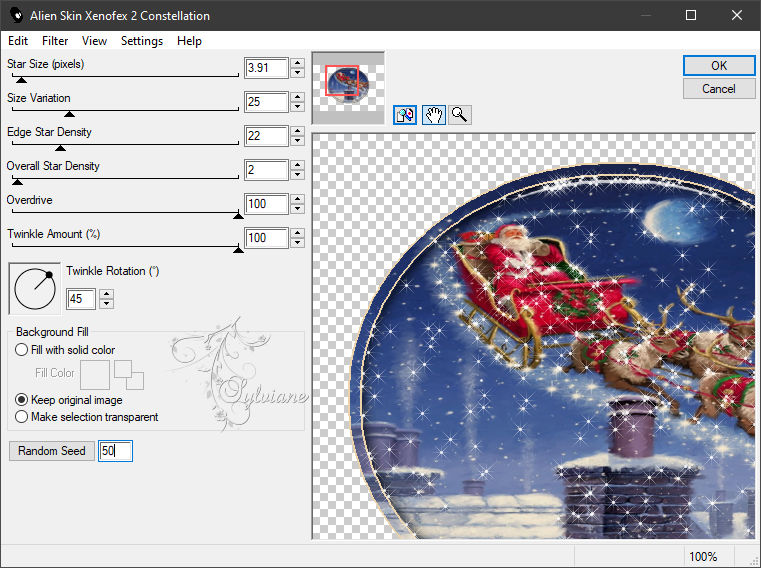
Effects – plugin - Alien Skin Xenofex 2 – Constellation - configured as follows:
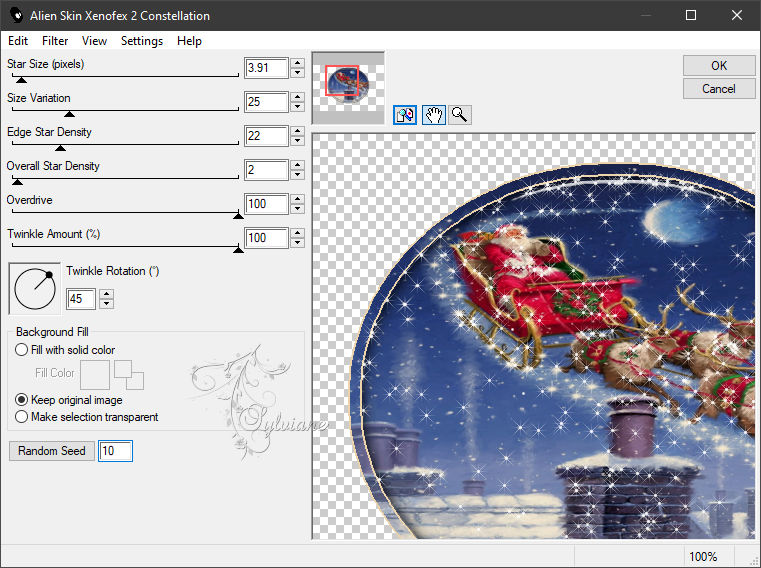
Selection - Select None
Edit – copy special- copy merged
Open your Jasc Animation Shop ...
Paste AS NEW ANIMATION in Animation Shop
Back in PSP ...
ANNNULER DESELECT ALL as well as Alien Skin Xenofex 2==>Constellation ...
REDO:
Effects – plugin - Alien Skin Xenofex 2==>Constellation==> Just the value of Random Seed to 30
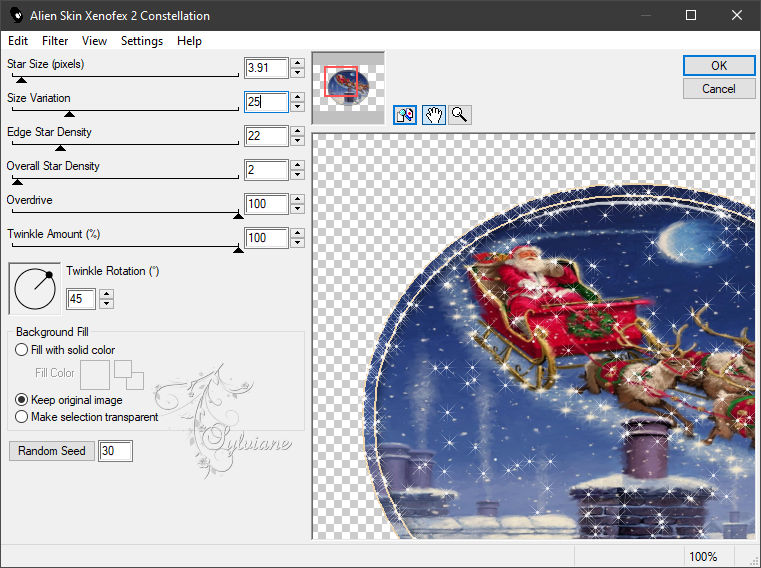
Selection - Select None
=============================================================
16.
We're still on RASTER 5 THE CIRCLE – Hover over the layer just below:
Activate Group - Raster 8
NOTE: For my 1st version I set the mode to screen
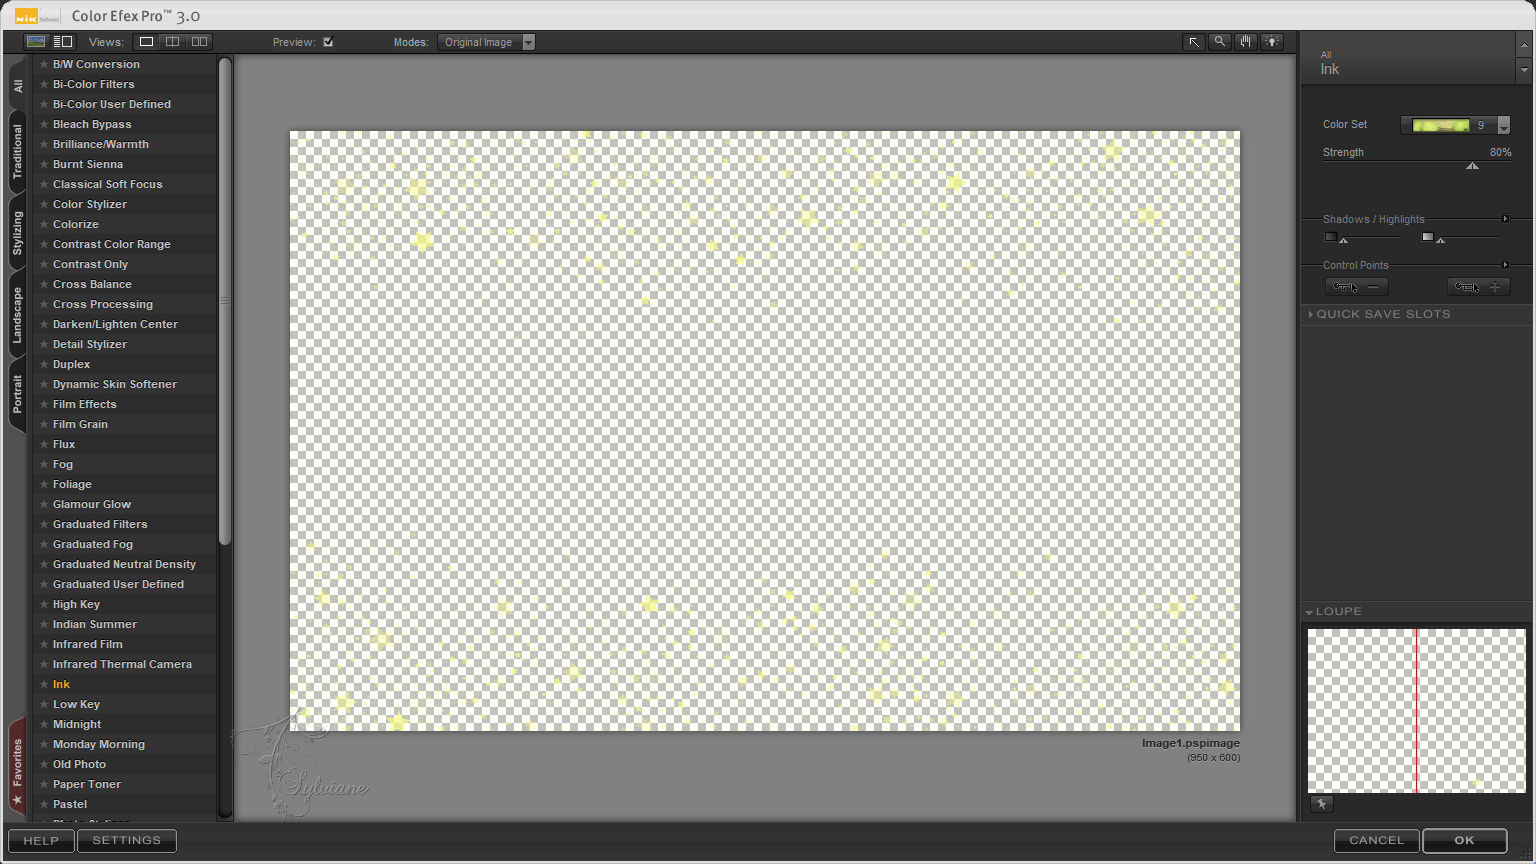
Effects – plugin - Nick Software - Color Effex Pro 3.0==>configured as follows OR others of your choice:
Activate Raster 6
NOTE: For my 1st version I set the mode to * Multiply *
Effects – plugin - Nick Software==>Color Effex Pro 3.0==>Same as before, always in memory
(NOTE: If you wish, you can apply the same effect to the *Raster 11*) text decoration
Or another effect like for my 1st version I set its opacity 50
Edit – copy special- copy merged
Coller APRES L’IMAGE ACTIVE dans animation Shop –
Back in PSP ...
Edit UNDO all steps until you end up on the circle layer (Raster 5)
Edition CANCEL DESELECT ALL ... Edition CANCEL Alien Skin Xenofex 2==>Constellation ...
=============================================================
17.
Effects – plugin - Alien Skin Xenofex 2==>Constellation==> Just the value of Random Seed to 50
Selection - Select None
Edit – copy special- copy merged
Coller APRES L’IMAGE ACTIVE dans animation Shop –
Still in animation Shop...
We have THREE IMAGES AND WE ARE ON THE 3rd –
Go to FIRST IMAGE. SELECT IT & DO Edition S
ELECT ALL -
Image Ownership at 30 -
Now you can visualize your result to do this:
Click on the * View Animation * symbol:
If you are happy with the result, do the following:
File Save As...
Back
Copyright Translation 2023 by SvC-Design
------------------------------------------------------------------------------
Thanks to all who created