
This lesson is made with PSPX9
But is good with other versions.
© by SvC-Design

Materialen Download :
Here
******************************************************************
Materials:
2da2518c970985ca24f4ea5ada465d90
MODELE FOND 208 VERSION 2 FETE DES PERES
COULEURS VERSION 2
DECO PERSO 1 208 ETAPE 2 MARS 2024 SWEETY
DECO PERSO 2 208 MERS 2024 SWEETY
e0b3d2ca
MARS 2024 CUBE UN PAPA C'EST 16 03 24 SWEETY
SIGNATURE TUTORIELS
SELECTION 1 208 SWEETY
SELECTION 2 BIS 208
SELECTION 2 208 SWEETY
SELECTION 3 208 SWEETY
SELECTION 4 208 SWEETY
a808178644d8fd2cbd993a758dd94726
MAI 2024 GENEREE ET TUBE IA UN HEUREUX PAPA 21 05 24 SWEETY
******************************************************************
Plugin:
Effects – plugin – Mehdi - Absolute Color
effects – plugin - VMToolbox - Zoom Blur
Effects – plugin - Filters Unlimited 20 – Tramages - Panel Stripes
Effects – plugin - AAA Frames - Foto Frame
******************************************************************
color palette
:

******************************************************************
methode
When using other tubes and colors, the mixing mode and / or layer coverage may differ
******************************************************************
General Preparations:
First install your filters for your PSP!
Masks: Save to your mask folder in PSP, unless noted otherwise
Texture & Pattern: Save to your Texture Folder in PSP
Selections: Save to your folder Selections in PSP
Open your tubes in PSP
******************************************************************
We will start - Have fun!
Remember to save your work on a regular basis
******************************************************************
1.
Open MODELE FOND 208 VERSION 2 FETE DES PERES
Window - duplicate
Minimize the original - we are working on the copy
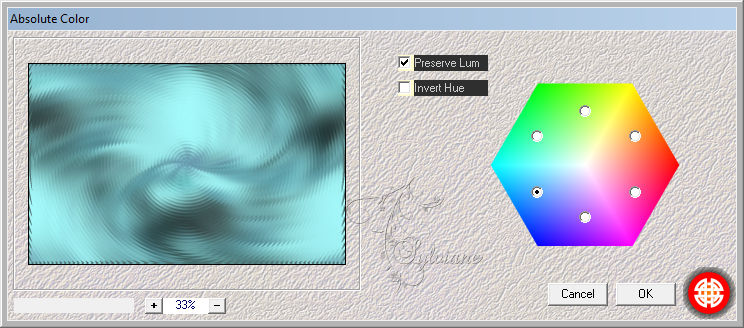
EXAMPLE NOTE: For my 2nd version I colored by applying the following effect:
Effects – plugin – Mehdi - Absolute Color
Open 2da2518c970985ca24f4ea5ada465d90
Layers - New Raster Layer
Fill with a color from your background: (Clear if possible)
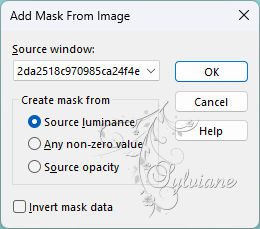
Layers - New Mask Layer - From Image - 2da2518c970985ca24f4ea5ada465d90
Effects - Edge Effects - Enhance
Layers - Merge - Merge Group
Keeping the mask on the desk we will need it further field
==================================================
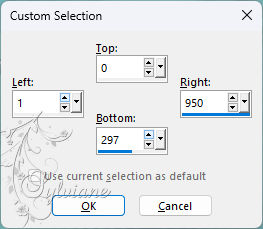
2.
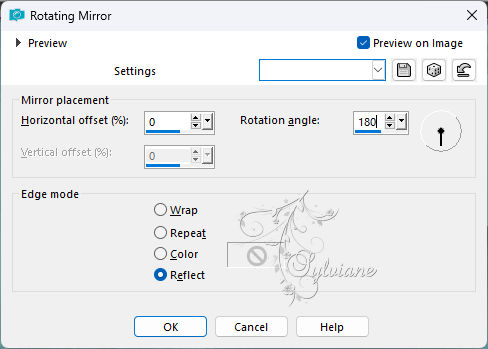
Effects – reflection effects – rotating mirror
Activate Selection - Custom selection
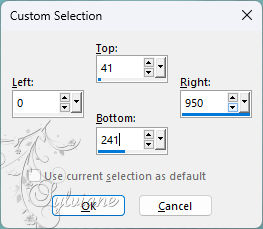
ERASE or DELETE on the keyboard.
Selection - Select None
Layers - duplicate
Image - Mirror - Vertical Mirror
Layers – merge – merge down
Open DECO PERSO 1 208 ETAPE 2 MARS 2024 SWEETY
Edit – Copy
Edit - Paste as new layer
Layers – arrange – move down
Activate Group - Raster 1
Layers – merge – merge down
==================================================
3.
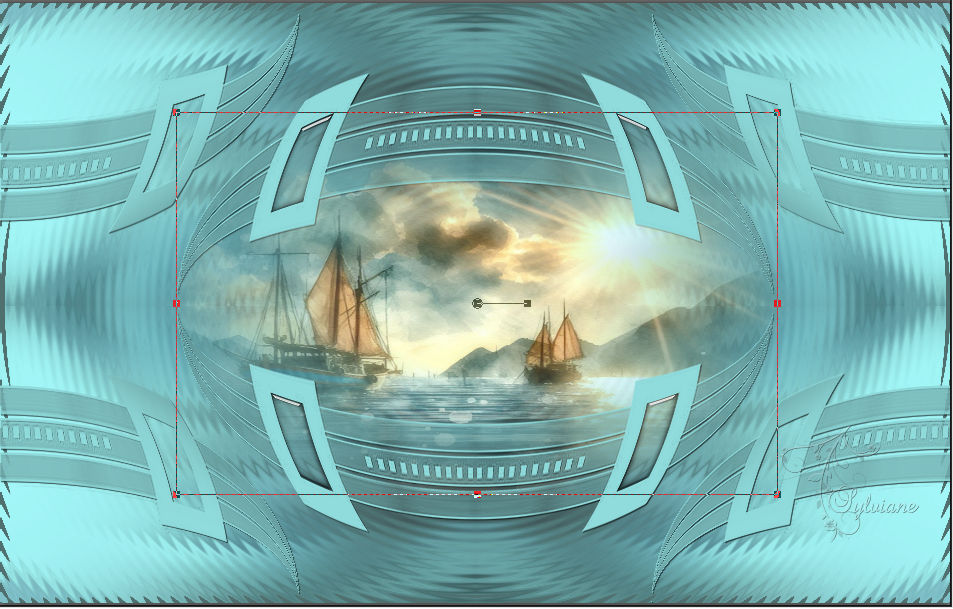
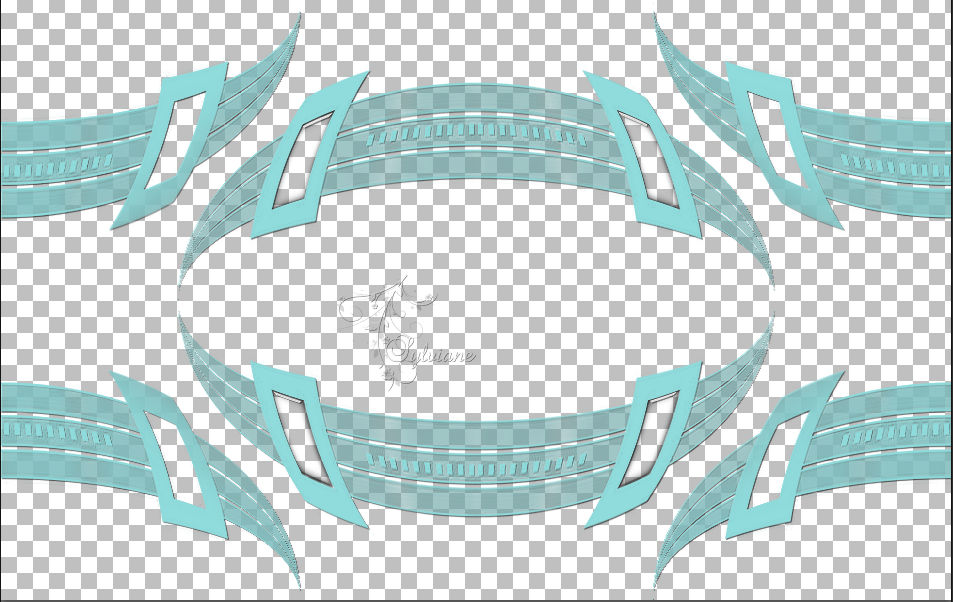
Here we are:
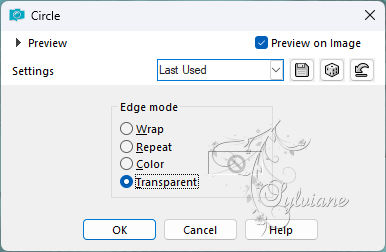
Effects - geometric effects – Circle
On the BOTTOM layer (Background)
Layer – promote background layer
Activate Selection - Custom selection
ERASE or DELETE on the keyboard.
Selection - Select None
Layers - duplicate
Image - Mirror - Vertical Mirror
Layers – merge – merge down
Effects – reflection effects – rotating mirror

==================================================
4.
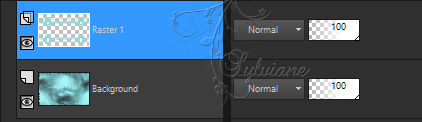
For ease of the following, close the eye of the layer * Raster 1 * -
We are STILL ON THE BOTTOM LAYER (RASTER BACKGROUND 2)
Layers - New Raster Layer
Fill with a color from your background: (Clear if possible)
Layers - New Mask Layer - From Image - 2da2518c970985ca24f4ea5ada465d90
Effects - Edge Effects - Enhance
Layers - Merge - Merge Group
Effects – reflection effects – rotating mirror
Activate Selection - Custom selection
ERASE or DELETE on the keyboard.
Selection - Select None
Layers - duplicate
Image - Mirror - Vertical Mirror
Layers – merge – merge down
==================================================
5.
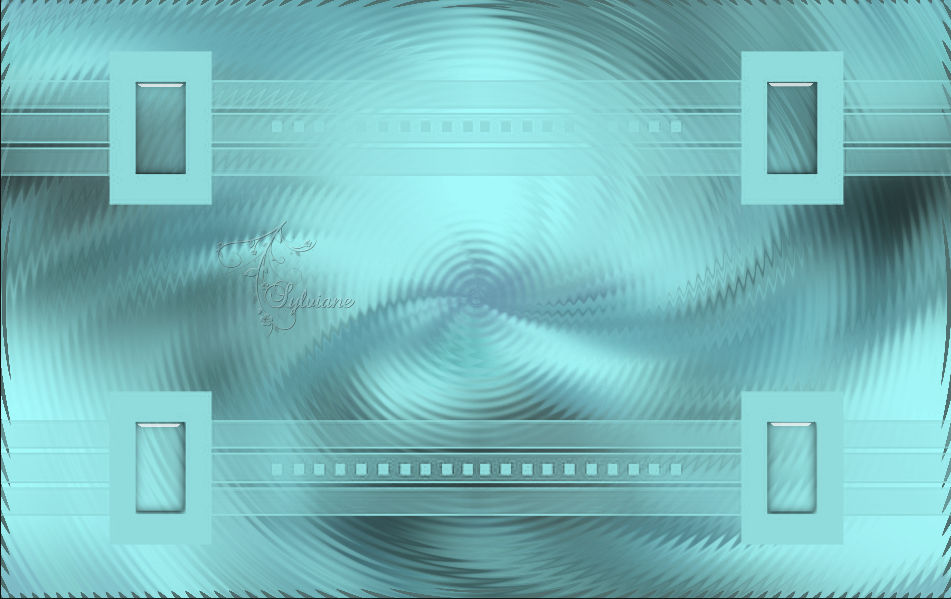
Here we are:
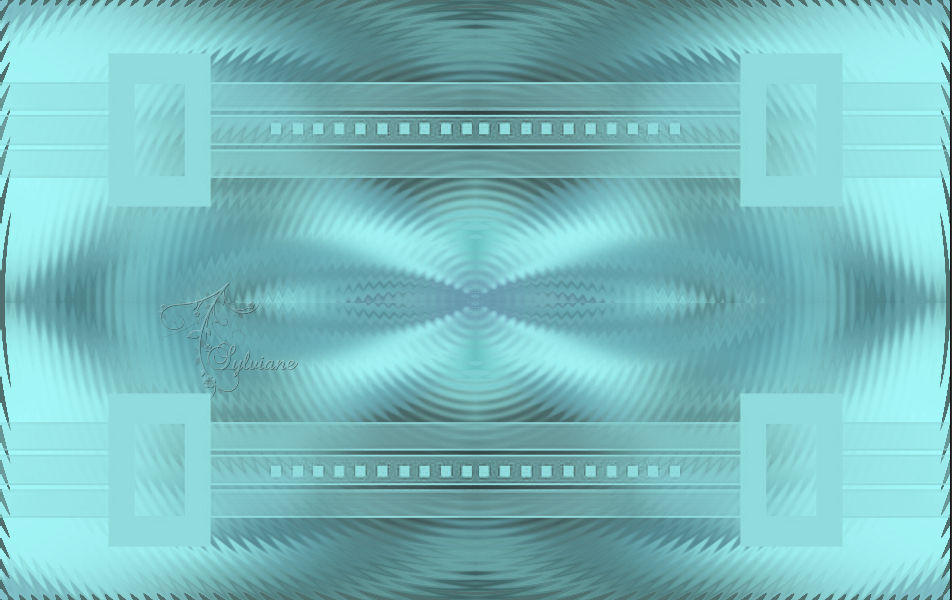
Effects - geometric effects – Circle
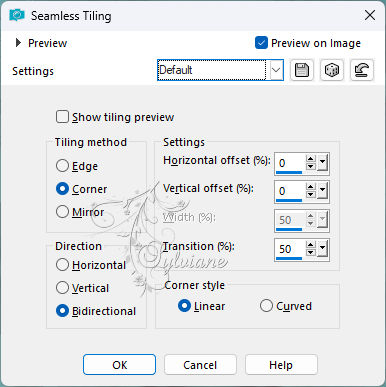
Effects - Image Effects - Seamless Tiling - Default:
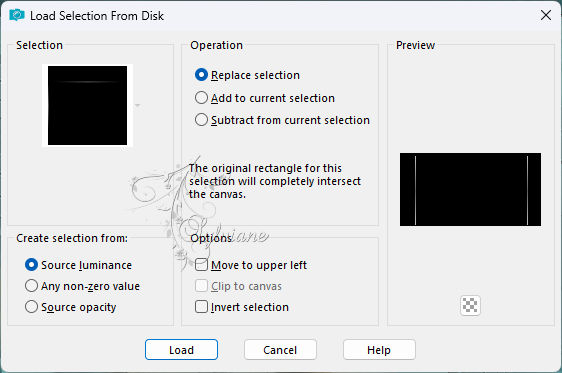
Selections - Load / Save - Load selection from disk - SELECTION 1 208 SWEETY
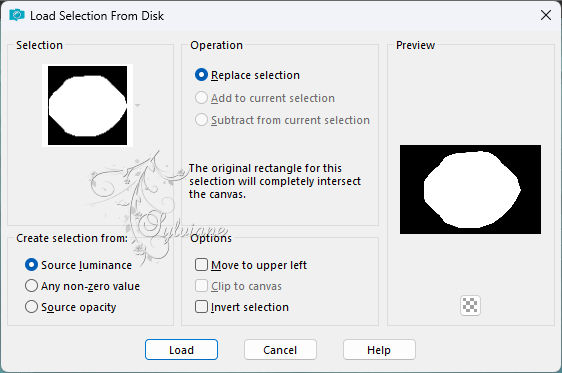
ERASE or DELETE on the keyboard.
Selection - Select None
If the effect seems a little too light, do:
Layers - duplicate
Layers – merge – merge down
Go to the TOP OF THE STACK layer (Raster 1). Open the eye of this layer
Layers – merge – merge down
Effects - 3 D effects - Drop shadow
1 / 1 / 100 / 1 - color:#000000
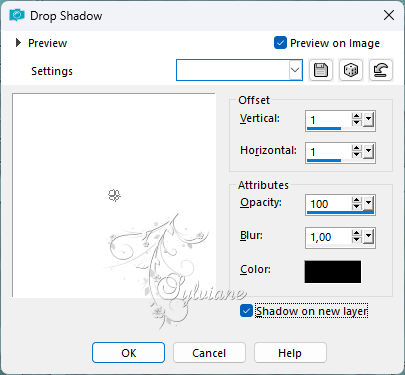
We are on the shadow layer:
Blend Mode:*Multiply* OR other as desired.
Opacity between 60 and 65%
You can close the mask, we don't need it anymore...
==================================================
6.
Open MISTED PAYSAGE 208 MARS 2024 SWEETY
Edit – Copy
Edit - Paste as new layer
It 's on top of the drop shadow layer
Layers – arrange – move down
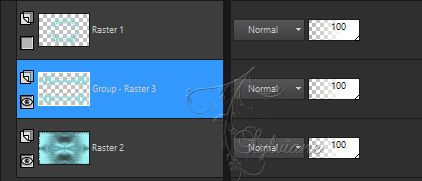
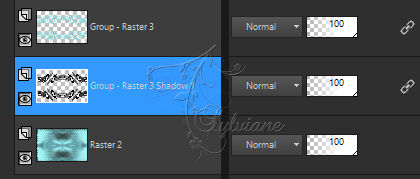
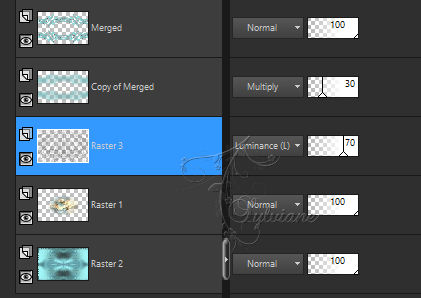
Our layers and our tag:
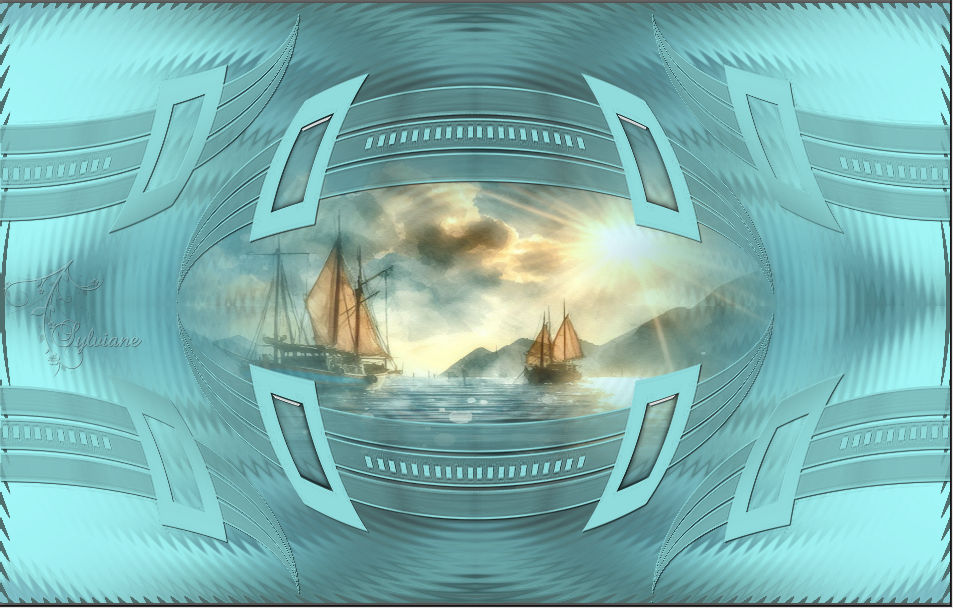
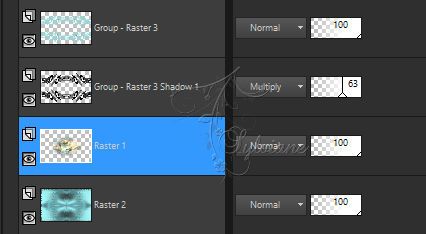
Close the eyes of the two BOTTOM * Raster 2 * and * Raster 1 * layers:

Move to the TOP OF THE STACK (Group – Raster 3).
Layers - Merge - Merge visible layers
Re-open the eyes of * Raster 2 * and * Raster 1 * but stay at the top of the stack
Layers - duplicate
Adjust - blur - gaussian blur
Range: 20
Blend Mode:* Multiply *. Opacity at 30% for my 2 versions -
Layers – arrange – move down
==================================================
7.
Back to the TOP layer (Merged)
Layers - New Raster Layer
Selections – select All
Open e0b3d2ca
Edit – Copy
Edit - Paste into selection
Selection - Select None
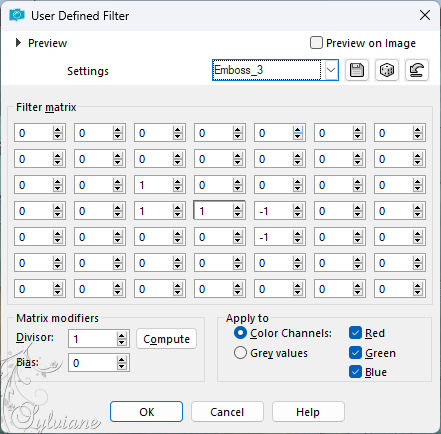
Effects - own filter - emboss 3
Effects – reflection effects – rotating mirror
Effects - Edge Effects - Enhance
Layers – arrange – move down (2x)
(It must be between * Raster 1 * and * Copy of Merged *)
Mode of this layer * Luminance (H) * OR other as desired:
Opacity at between 70 and 80% depending on your colors:
(For my 1st version at 80% and for my 2nd version at 70%
==================================================
8.
We get this:

Stay on the *Deco* e0b3d2ca.png
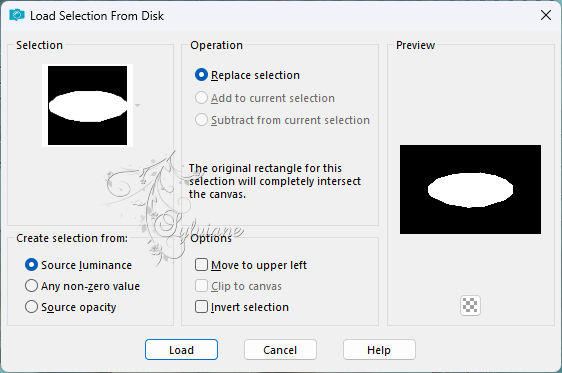
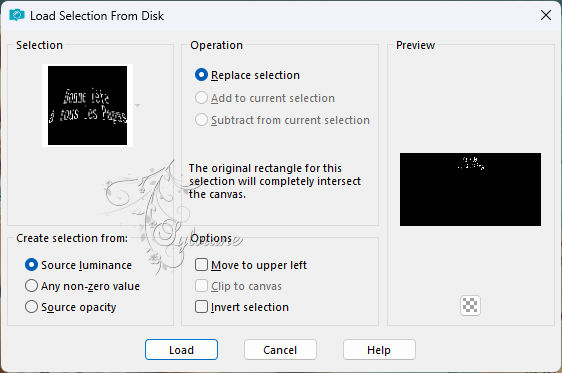
Selections - Load / Save - Load selection from disk - SELECTION 2 208 SWEETY

ERASE or DELETE on the keyboard +/- 10 times
Selection - Select None
For my 2nd version I found that the features of my decoration masked my landscape too much
I did the following: Load from the disk the selection 2 BIS 208
Edit===>CUT.
Layers - New Raster Layer
Edit - Paste into selection
Selection - Select None
Then I lowered its opacity to 35%
Layers – merge – merge down
On the BOTTOM layer (Raster 2)
Edit Copy Edit Paste as new image
Leave on hold we will need it later
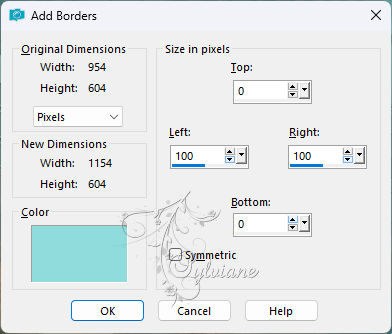
Image - Add Borders – Symmetric - 2 px - foreground color
==================================================
9.
Selections – select All
Image - Add Borders - with any color
Selections - Invert
Activate your image that you set aside at point 8
edit - copy
edit - paste into selection
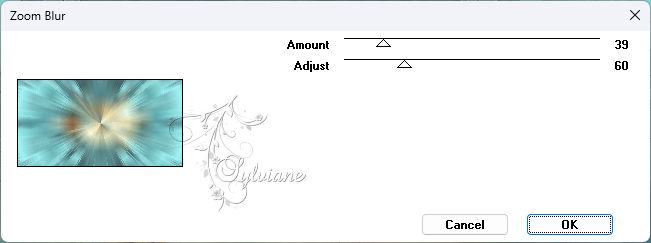
effects – plugin - VMToolbox - Zoom Blur
Selections – Promote selections to layer
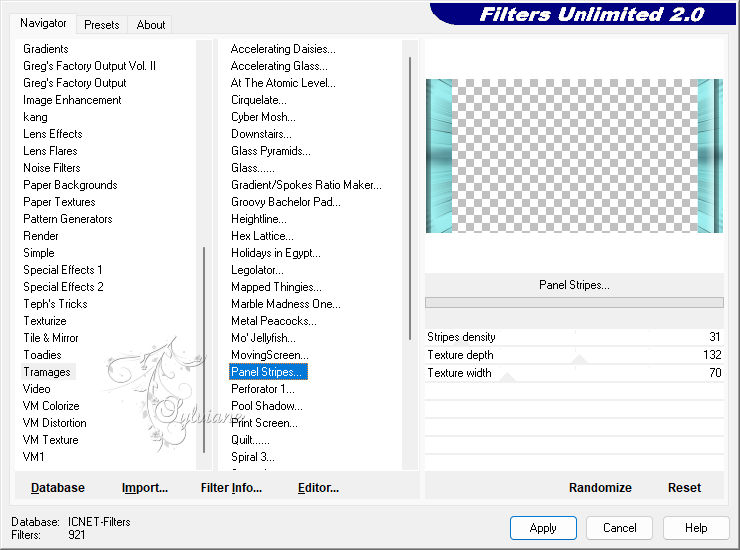
Effects – plugin - Filters Unlimited 20 – Tramages - Panel Stripes
Effects – reflection effects – rotating mirror
Blend Mode * Luminance (H) * OR other of your choice
Layers – merge – merge down
KEEP THE SELECTION ACTIVE ...
==================================================
10.
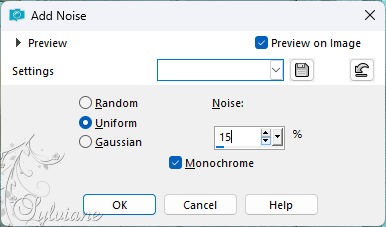
Adjust - Add / Remove Noise - Add Noise
Selections - Invert
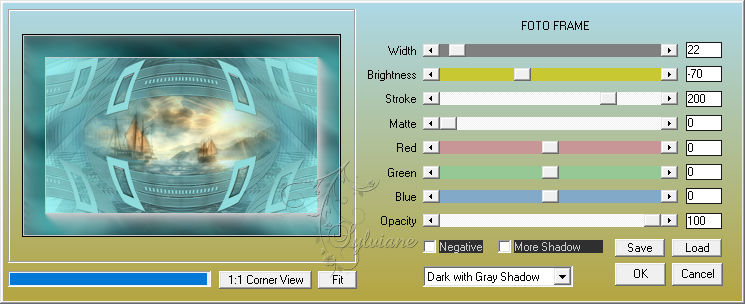
Effects – plugin - AAA Frames - Foto Frame
Selection - modify - contract – 20px
Selections - Invert
Selections – Promote selections to layer
Effects – reflection effects – rotating mirror
Layers – merge – merge down
Selections - Load / Save - Load selection from disk - SELECTION 3 208 SWEETY - (It will replace the previous selection)
Layers - New Raster Layer
Fill with your choice of AVP or ARP color
Selection - Select None
==================================================
11.
Open MAI 2024 GENEREE ET TUBE IA UN HEUREUX PAPA 21 05 24 SWEETY
Edit – Copy
Edit - Paste as new layer
Image - Resize - 70%
No check mark on resize all layers
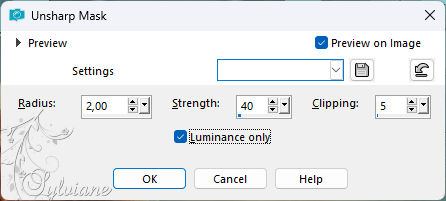
Adjust - sharpness - unsharp mask
Open MARS 2024 CUBE UN PAPA C'EST 16 03 24 SWEETY
Edit – Copy
Edit - Paste as new layer
(Place as on my model. See final).
Image - Resize - 75%
No check mark on resize all layers
Layer mode of choice or color in your tones
Adjust - sharpness - unsharp mask
Layers - New Raster Layer
Selections - Load / Save - Load selection from disk - SELECTION 4 208 SWEETY
Fill with the color of your choice.
Selection - Select None
Effects - 3 D effects - Drop shadow
1 /1 / 100 / 1.00 - kleur#000000
We're on the shadow layer. Layer mode on * Multiply * or other as desired
Apply a drop shadow of your choice to the other elements
==================================================
12.
Image - Add Borders – Symmetric - 2 px - ARP color of your choice
Affix your signature and mine if you wish
Layer – merge – merge all (flatten)
Resize to 950 pixels
Save as JPEG
Back
Copyright Translation 2024 by SvC-Design
------------------------------------------------------------------------------
Thanks to all who created