
This lesson is made with PSPX9
But is good with other versions.
© by SvC-Design
Materialen Download :
Here
******************************************************************
Materials:
decor_by_anamariac.png
wordart_byanamariac.png
1250182239_nikita_masque.png
perpective_1byAnaMariaC.PspSelection
perpective_2byAnaMariaC.PspSelection
perpective_3byAnaMariaC.PspSelection
perpective_4byAnaMariaC.PspSelection
paysage_175_franiemargot.png
vvs-deco0372.pspimage
vvs-woman1944.pspimage
******************************************************************
Plugin:
Plugins - ScreenWorkrs - Dot Screen
Plugins - Tramages - Panel Stripes
Plugins - It@lian Editors Effect - efecto fantasma
Plugins - Simple - Top Left Mirror
Plugins - Mehdi - Sorting Tiles
Plugins - Carolaine and Sensibility - CS-DLines
Plugins - Carolaine and Sensibility - CS-HLines
Plugin - Texturizer - Texture - Texturizer
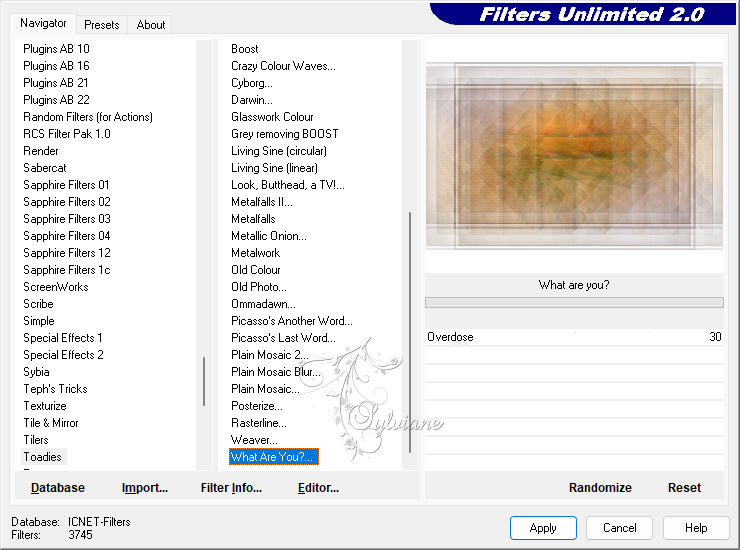
Plugins - Filters Unlimited 2.0 - Toadies - wat are you?
Plugins - MuR'as Meister - Perspective Tiling
******************************************************************
color palette
:

******************************************************************
methode
When using other tubes and colors, the mixing mode and / or layer coverage may differ
******************************************************************
General Preparations:
First install your filters for your PSP!
Masks: Save to your mask folder in PSP, unless noted otherwise
Texture & Pattern: Save to your Texture Folder in PSP
Selections: Save to your folder Selections in PSP
Open your tubes in PSP
******************************************************************
We will start - Have fun!
Remember to save your work on a regular basis
******************************************************************
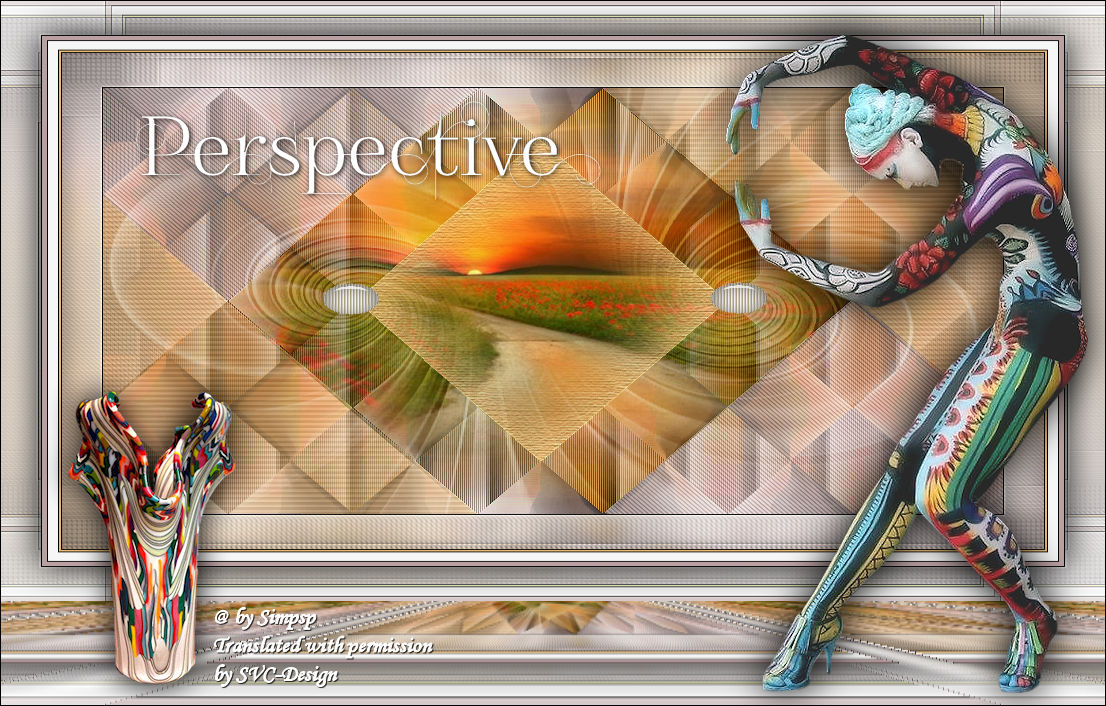
1.
Choose the colors to work with.
01- Foreground: #ac4b0a
02- Background: #baa0a1
Extra Colors:
03- #e7ba78
04- #FFFFFF
05 - #000000
2.
Open a new transparent image of 900x500px.
3.
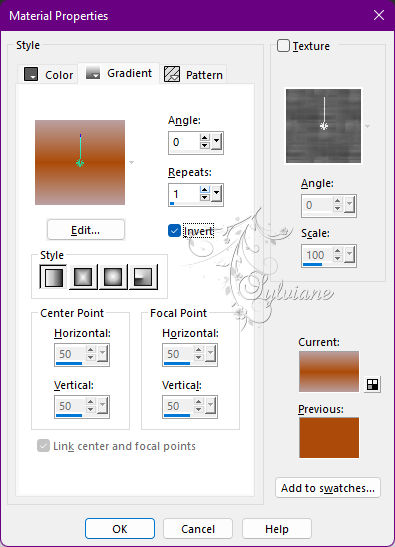
Paint with a Linear gradient, formed by colors 01 and 02:
4.
Selections - Select All.
Open paysage_175_franiemargot.png
Edit - Copy
Edit - Paste Into Selection.
Selections - Select None.
5.
Layer - Duplicate.
Image - Mirror - Mirror horizontal.
6.
Layers > Properties > General > Blend Mode: Normal > Opacity: 50%.
Layers - Merge - Merge Down.
Adjust - Sharpness - Sharpen.
7.
Plugins - ScreenWorkrs - Dot Screen.
Adjust - Sharpness - Sharpen.
8.
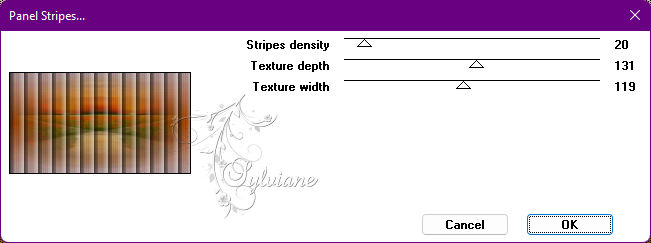
Plugins - Tramages - Panel Stripes
9.
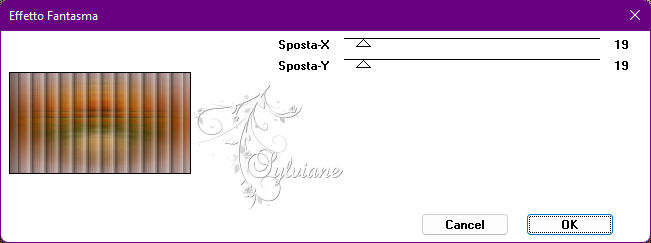
Plugins - It@lian Editors Effect - efecto fantasma
10.
Plugins - Simple - Top Left Mirror.
11.
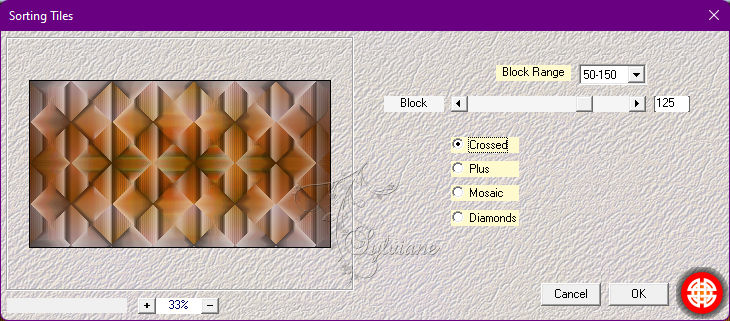
Plugins - Mehdi - Sorting Tiles
12.
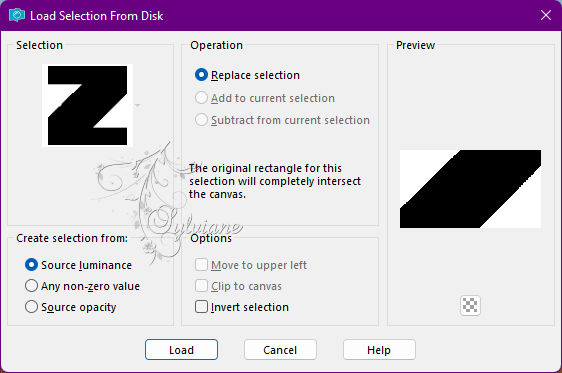
Selections - Load / Save - Load selection from disk perspective _ 1byAnaMariaC
13.
Layers - New Raster Layer.
Paint with Color 02: #baa0a1 (Background).
14.
Plugins - Carolaine and Sensibility - CS-DLines
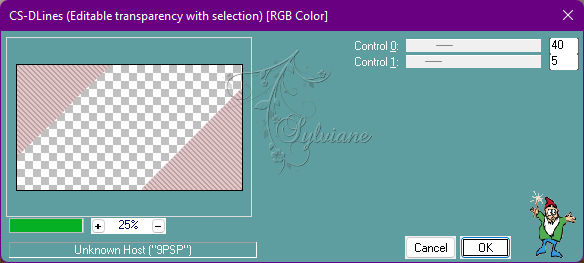
Edit - Repeat CS-DLines.
15.
Layers - Properties > General - Blend Mode: Normal > Opacity 50%.
Adjust - Sharpness - Sharpen.
Selections - Select None.
Layers - Merge - Merge Down.
16.
Selections - Load / Save - Load selection from disk - perspective_2byAnaMariaC
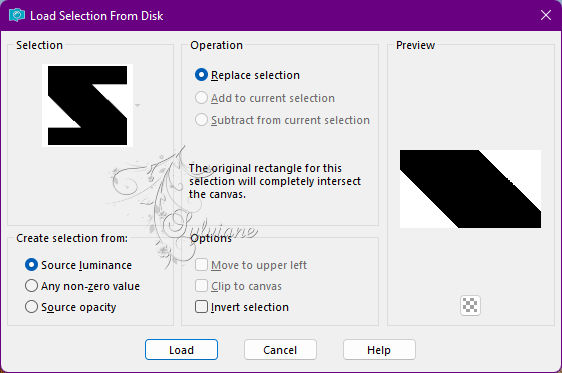
Layers - New Raster Layer.
Paint with Extra Color 03: #e7ba78
17.
Plugins - Carolaine and Sensibility - CS-HLines
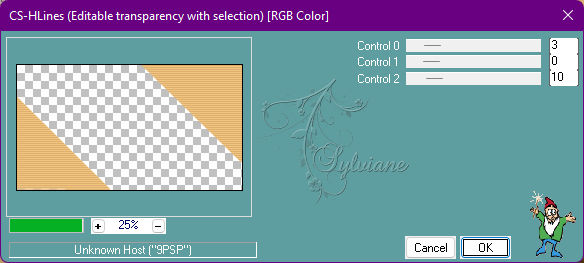
Edit - Repeat CS-HLines.
18.
Layers - Properties > General - Blend Mode: Normal > Opacity 50%.
Adjust - Sharpness - Sharpen.
Selections - Select None.
Layers - Merge - Merge Down.
19.
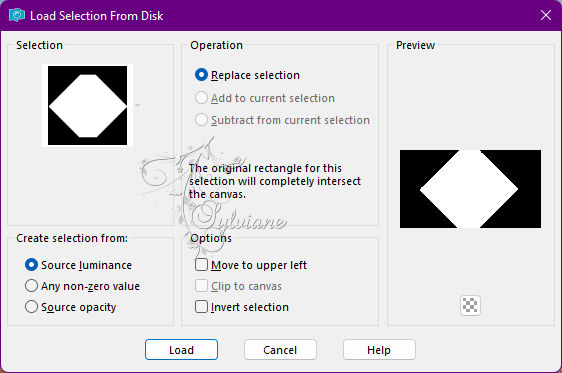
Selections - Load / Save - Load selection from disk - Perpective_3byAnaMariaC
20.
Open paysage_175_franiemargot.png
Edit - Copy
Edit - Paste Into Selection.
Adjust - Sharpness - Sharpen.
Selections - Select None.
21.
Layers - New Raster Layer.
Fill with Extra Color 04: #FFFFFF
22.
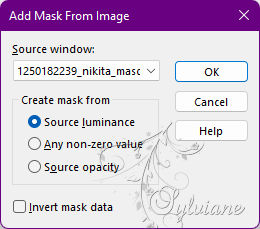
Layers - New Mask Layer - From image - 1250182239_nikita_masque.png
Layers - Merge - Merge Group.
23.
Layers - Properties > General - Blend Mode: Soft Light > Opacity: 100%.
Adjust - Sharpness - Sharpen.
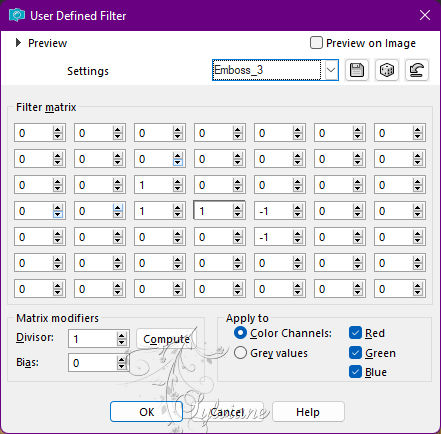
24.
Effects - User Defined Filter - Emboss_3
25.
Layers - Merge - Merge Down.
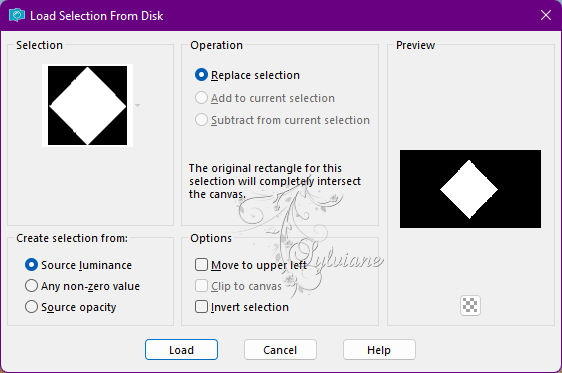
Selections - Load / Save - Load selection from disk - Perpective_4byAnaMariaC
Selections - Promote Selection to Layer.
26.
Open paysage_175_franiemargot.png
Edit - Copy
Edit - Paste Into Selection.
Adjust - Sharpness - Sharpen.
27.
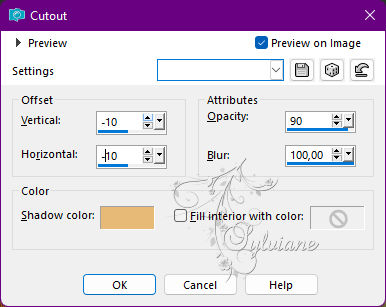
Layers - New Raster Layer.
Effects - 3D Effects - Cutout - Extra Color 03: #e7ba78
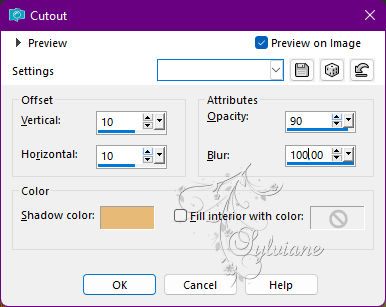
Layers - New Raster Layer.
Repeat - 3D Effects - Cutout - (-10/ -10/ 90/ 100.00)
28.
Selections - Select None.
Layers - Merge - Move Down.
Adjust - Sharpness - Sharpen.
29.
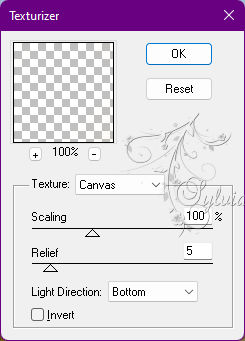
Plugin - Texturizer - Texture - Texturizer
Layers - Merge - Merge Down.
30.
Image – Add Borders –symmetric - 1 px > Color: #000000 (black).
Edit - Copy
Selections - Select All.
31.
Image – Add Borders –symmetric - 40 px > Any color.
Selections - Invert.
Edit - Past Into Selection.
32.
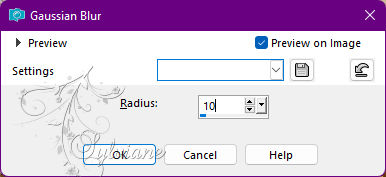
Adjust - Blur - Gaussian Bur
33.
Selections - Invert.
Effects - 3D Effects - Drop Shadow
0/0/100/60 color:#ffffff
34.
Selections - Invert.
Plugins - Carolaine and Sensibility - CS-DLines.
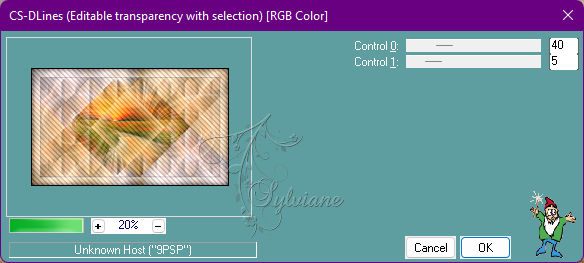
Selections - Promote Selection to Layer.
35.
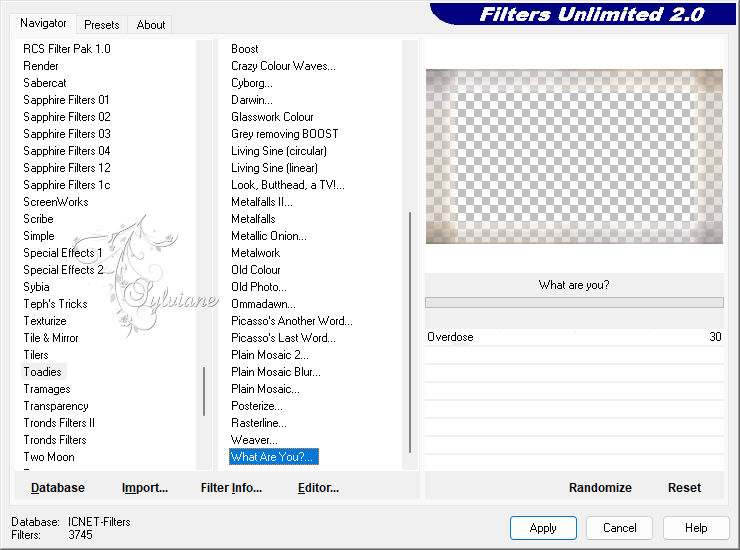
Plugins - Filters Unlimited 2.0 - Toadies - wat are you?
36.
Adjust - Sharpness - Sharpen More.
Selections - Select None.
Layers - Merge - Merge Down.
37.
Image – Add Borders –symmetric - 1 px > Color: #000000 (Color 05)
Image – Add Borders –symmetric - 2 px > Color: #e7ba78 (Color 03)
Image – Add Borders –symmetric - 1 px > Color: #000000 (Color 05)
Image – Add Borders –symmetric - 10 px > Color: #FFFFFF (Color 04).
Image – Add Borders –symmetric - 1 px > Color: #000000 (Color 05)
Image – Add Borders –symmetric - 5px > Color: #baa0a1(Background).
Image – Add Borders –symmetric - 1 px > Color: #000000 (Color 05)
38.
Selections - Select All.
Image – Add Borders –symmetric - 40 px > Color: #FFFFFF (Color 04).
Selections - Invert.
Plugins - Filters Unlimited 2.0 - Toadies - What Are You?
39.
Adjust - Sharpness - Sharpen More.
Selections - Invert.
Effects - 3D Effects - Drop Shadow: 0/0/100/60, Color: #000000 (Color 05)
Selections - Select None.
Layers - Duplicate.
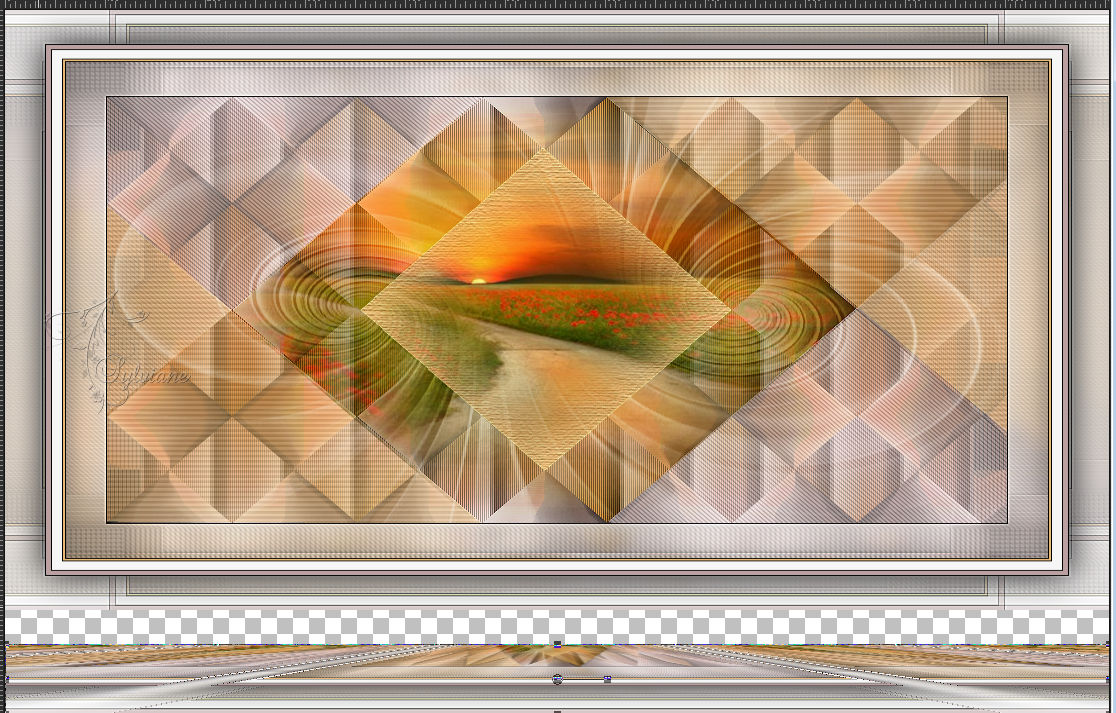
40.
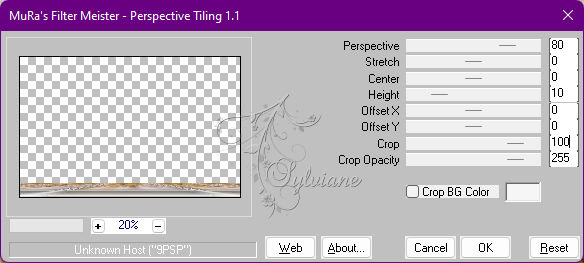
Plugins - MuR'as Meister - Perspective Tiling:
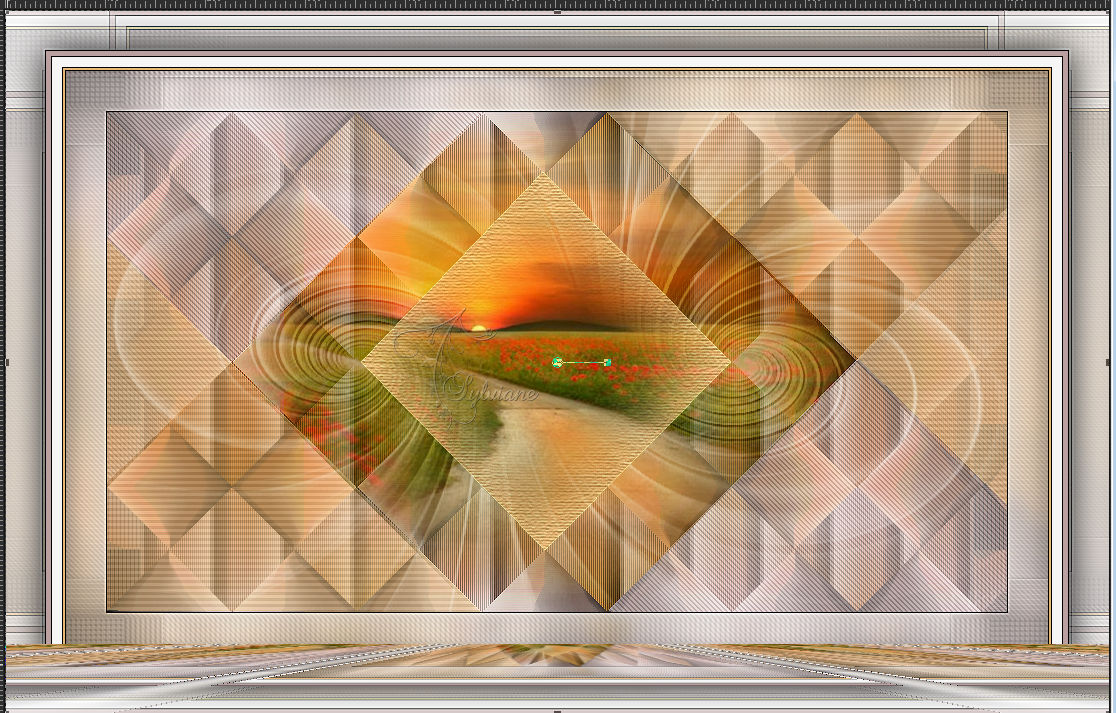
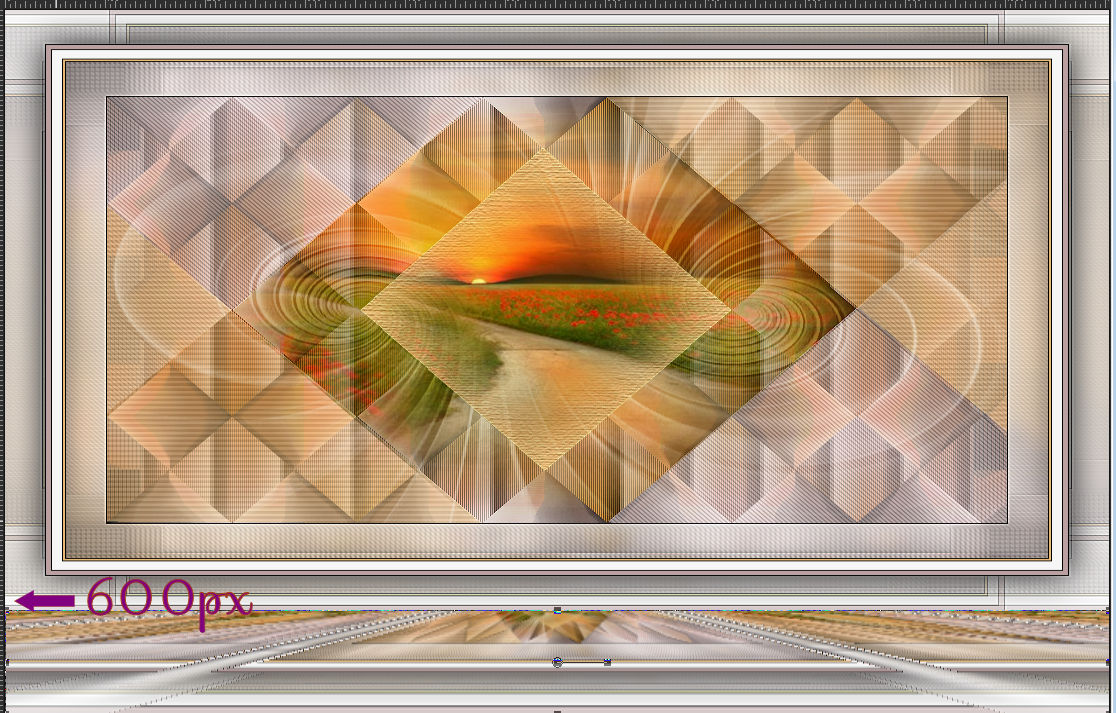
41.
Activate the Raster layer 1.
With the Pick Tool: Mode: Scale > Pull the point indicated from the bottom up:
Up to 600 rule numbering:
42.
Activate the Copy of Raster layer 1.
With the Pick Tool: Mode: Scale > Pull the point indicated from the bottom up:
Up to the 600 number
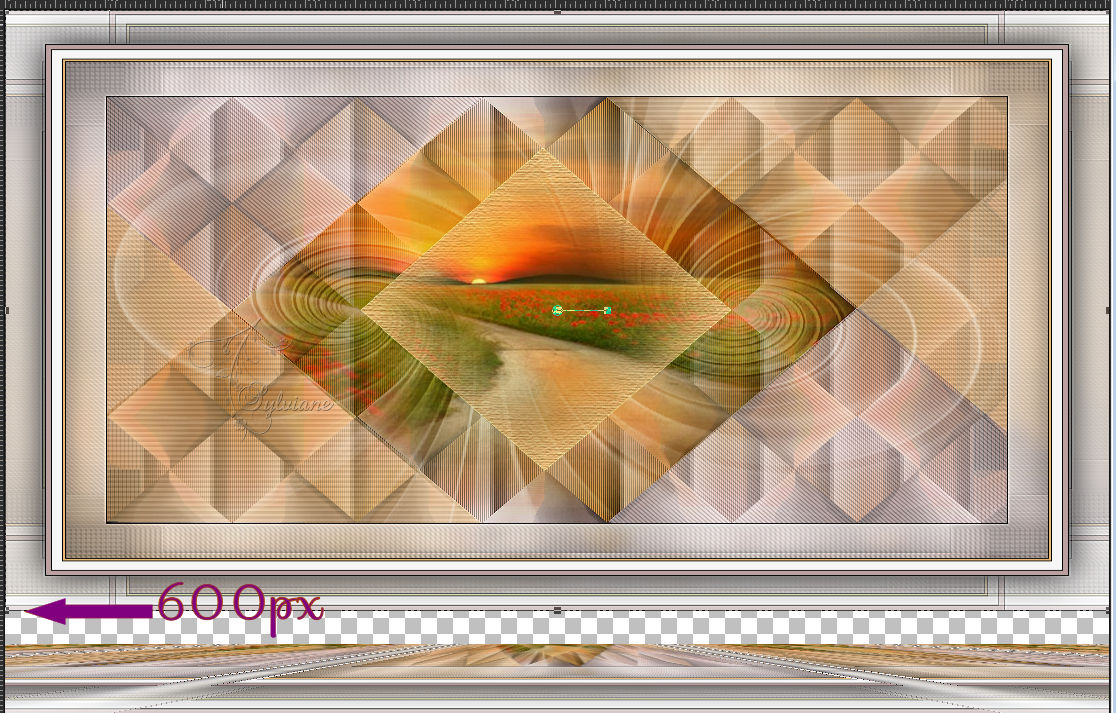
of the ruler touching the final step of layer Raster 1.
Note: Make sure that the transparity split between the Raster 1 and Copy of Raster 1 layers does not appear.
43.
Layers - Merge - Merge Down.
44.
Open decor_by_anamariac.png
Edit - Copy
Edit - Paste as New Layer.
Activate selection tool (Press K on your keyboard)
And enter the following parameters:
Pos X : 315 – Pos Y : 278
Press M.
45.
Open vvs-woman1944.pspimage
Edit - Copy
Edit - Paste as New Layer.
Image - Resize if necessary.
Adjust - Sharpness - Sharpen.
Position at your choice.
Effects - 3D Effects - Drop Shadow of your choice.
46.
Open vvs-deco0372.pspimage
Edit - Copy
Edit - Paste as New Layer.
Image - Resize if necessary.
Adjust - Sharpness - Sharpen.
Position at your choice.
Effects - 3D Effects - Drop Shadow of your choice.
47.
Open wordart_byanamariac.png
Edit - Copy
Edit - Paste as New Layer.
Position at your choice.
Effects - 3D Effects - Drop Shadow of your choice.
48.
Image – Add Borders –symmetric - 1 px > Color: #000000 (Color 05)
49.
Apply your watermark or signature
Layer – merge – merge all (flatten)
Save as JPEG
Back
Copyright Translation 2022 by SvC-Design