

This lesson is made with PSPX9
But is good with other versions.
© by SvC-Design
Materialen Download :
Here
******************************************************************
Materials:
creation.tine_masque322.jpg
creation.tine_masque346.jpg
hearts123.png
maman_vintage_tubed_by_thafs.pspimage
paspop.png
poppy.png
Ri@mommy's little girl.PspSelection
tekst-mommy's little girl-Ri@.png
******************************************************************
Plugin:
Effects – plugin - Filterfactory Gallery D – Beta Ball
Effects - Plugins - Graphic Plus - Cross Shadow
Effects – plugin – AAA Frames – Foto Frame
******************************************************************
color palette
:

******************************************************************
methode
When using other tubes and colors, the mixing mode and / or layer coverage may differ
******************************************************************
General Preparations:
First install your filters for your PSP!
Masks: Save to your mask folder in PSP, unless noted otherwise
Texture & Pattern: Save to your Texture Folder in PSP
Selections: Save to your folder Selections in PSP
Open your tubes in PSP
******************************************************************
We will start - Have fun!
Remember to save your work on a regular basis
******************************************************************
Foreground color # c7bbc0
Background color # c40218
1.
Open a new transparent image of 900 X 600 pixels.
2.
Fill the image with the background color.
3.
Effects – plugin - Filterfactory Gallery D – Beta Ball.

4.
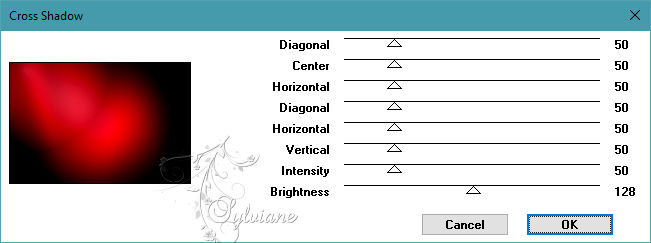
Effects - Plugins - Graphic Plus - Cross Shadow
5.
Effects - Texture effects - weave pattern.

6.
Adjust - sharpness - sharpen.
7.
Layers - new raster layer.
8.
Selections - select all.
9.
Open maman_vintage_tubed_by_thafs.pspimage
Edit - copy.
Back to your image.
Edit - paste into selection.
10.
Selection - Select None
11.
Effects - Image Effects - Seamless Tiling - default.
12.
Adjust - blur - Radial blur.

13.
Effects - Edge Effects - Enhance More
14.
Blend mode - overlay.
15.
Layers - new raster layer.
16.
Fill the layer with the foreground color.
17.
Layers - New Mask Layer - From Image - creation.tine_masque346.jpg

18.
Layers - Merge - Merge group.
19.
Blend mode : screen
20.
Layer opacity 30.
21.
Layers - new raster layer.
22.
Fill the layer with the foreground color.
24.
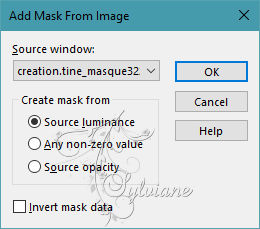
Layers - New Mask Layer - From Image - creation.tine_masque322.jpg
25.
Layers - Merge - Merge group.
26.
Opacity : 50.
27.
Image - Mirror – mirror Horizontal
28.
Open poppy.png
Edit - copy.
Back to your image.
Edit - paste as a new layer.
29.
Blend mode - Luminance (legacy)
30.
Opacity : 40.
31.
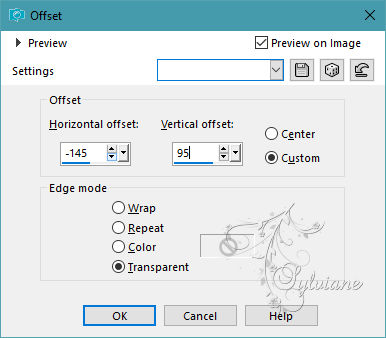
Effects - image effects - offset.
32.
Layers - merge - merge all layers.
33.
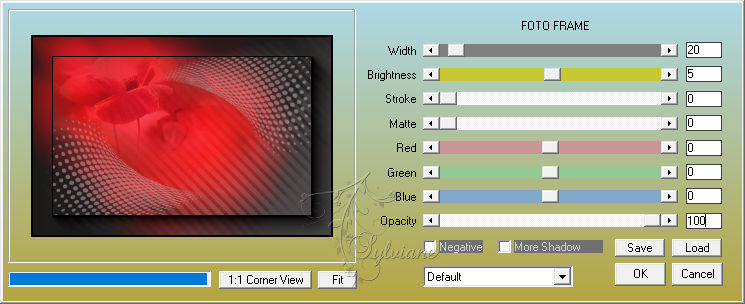
Effects – plugin – AAA Frames – Foto Frame.
34.
Open maman_vintage_tubed_by_thafs.pspimage
Edit - copy.
Back to your image.
Edit - paste as a new layer.
This one is right away.
35.
Image - resize - 85% - all layers unchecked.
36.
Effects - 3D effects - drop shadow.
0/ 0 /60 / 30 - color black.
37.
Layers - new raster layer.
38.
Selections - Load / Save - Load selection from disk - Ri@mommy's little girl.PspSelection

39.
Flood fill the selection with the color white.
40.
Layer opacity 50.
50.
Selection - Select None
51.
Layers - duplicate.
52.
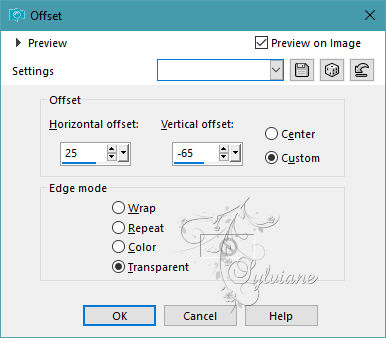
Effects - image effects - offset.
53.
Layers - merge - merge down.
54.
Open tekst-mommy's little girl-Ri@.png
Edit - copy.
Edit - paste as a new layer.
55.
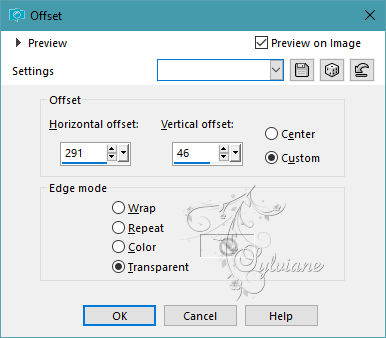
Effects - image effects - offset.
56.
Open hearts123.png
Edit - copy.
Back to your image.
Edit - paste as a new layer.
Place the tube in the upper left corner of the frame.
57.
Layers - duplicate.
Place it left at the top against the dark line.
58.
Open paspop.png
Edit - copy.
Back to your image.
Edit - paste as a new layer.
59.
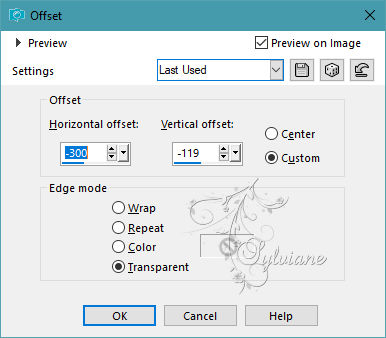
Effects - image effects - offset.
60.
Effects - 3D effects - drop shadow.
0/ 0 / 60 / 30 - color black.
61.
Layers - merge - merge all layers.
62.
Image - Add Borders – symmetric - 3 pixels - color #fc4051.
Image - Add Borders – symmetric - 3 pixels - foreground color.
Image - Add Borders – symmetric - 3 pixels - background color.
63.
Place your name or watermark
Layers – merge – merge all layers.
Image – resize – 600 pixels – longest sides
Save as JPEG
Back
Copyright Translation 2023 by SvC-Design