
This lesson is made with PSPX9
But is good with other versions.
© by SvC-Design
Materialen Download :
Here
******************************************************************
Materials:
H9o5ckaRbH4lMTH5bOg6bpvpSaE.png
HSGnvxPLq-MTfh5uERqNxvpZOuM.png
Jolcsi984.png
Tekst Jolcsi.png
******************************************************************
Plugin:
Plugins - Mehdi - Wavy Lab
Plugins - MuRa's Seamles - Shift
Plugins - Mehdi - Sorting Tiles
Plugins - Unlimited 2.0 &< Bkg kaleidoscope - Nomads Rug
Plugins - VanDerLee - UnPlugged-X- verticale tile
Plugins - Mura's Meister - Pole Transform
******************************************************************
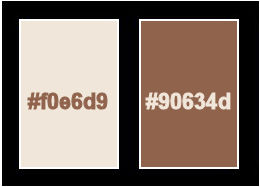
color palette
:
******************************************************************
methode
When using other tubes and colors, the mixing mode and / or layer coverage may differ
******************************************************************
General Preparations:
First install your filters for your PSP!
Masks: Save to your mask folder in PSP, unless noted otherwise
Texture & Pattern: Save to your Texture Folder in PSP
Selections: Save to your folder Selections in PSP
Open your tubes in PSP
******************************************************************
We will start - Have fun!
Remember to save your work on a regular basis
******************************************************************
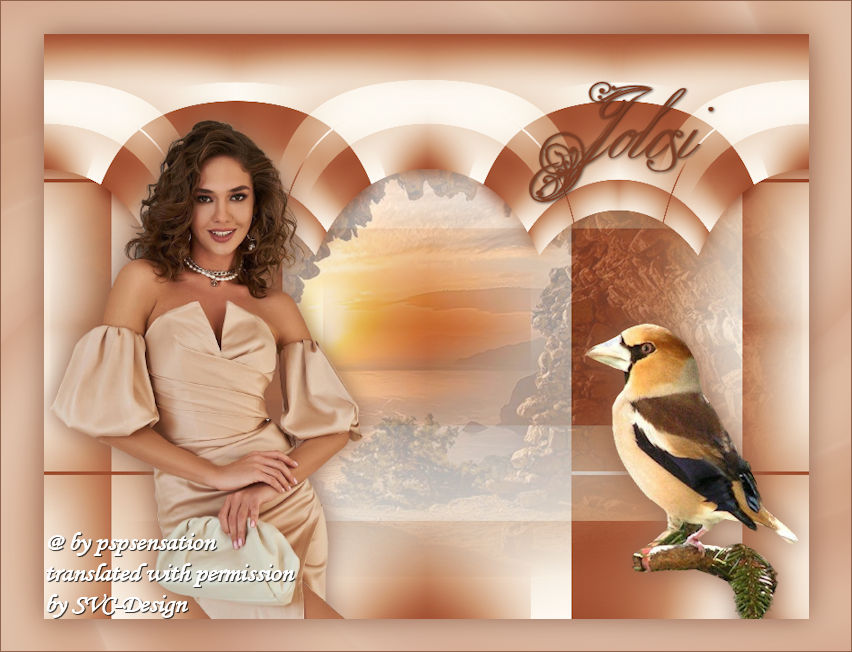
1.
Open your tubes and make them to size.
Preferably always reduce by 85% so that the tube remains the best.
2.
Choose a light foreground and a dark background color with your eyedropper.
3.
Open a new transparent image of 850 x 650 pixels
4.
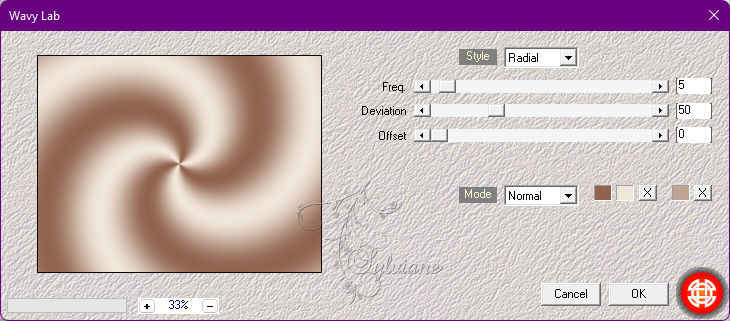
Plugins - Mehdi - Wavy Lab
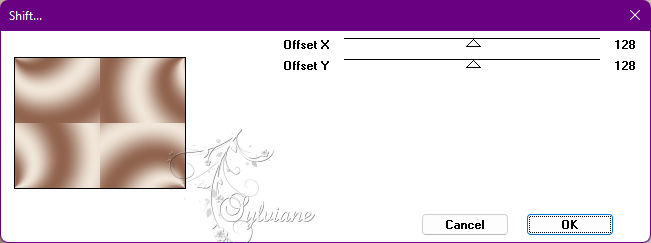
5.
Plugins - MuRa's Seamles - Shift
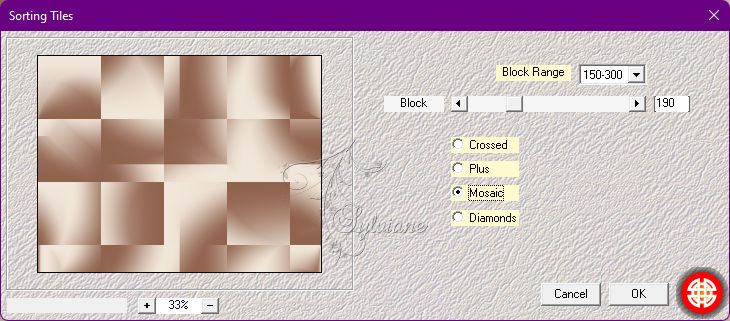
6.
Plugins - Mehdi - Sorting Tiles
7.
Plugins - Unlimited 2.0 &< Bkg kaleidoscope - Nomads Rug
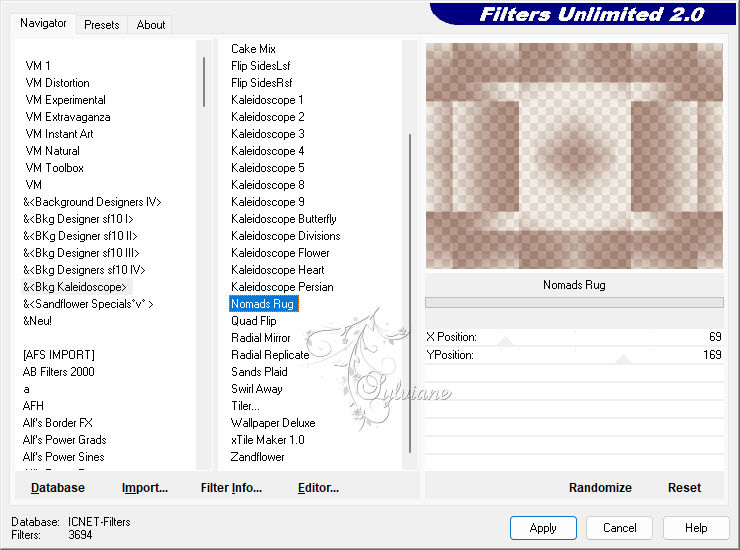
Now duplicate the layer 4 times so that it is clear, Merge layers - Merge visible layers.
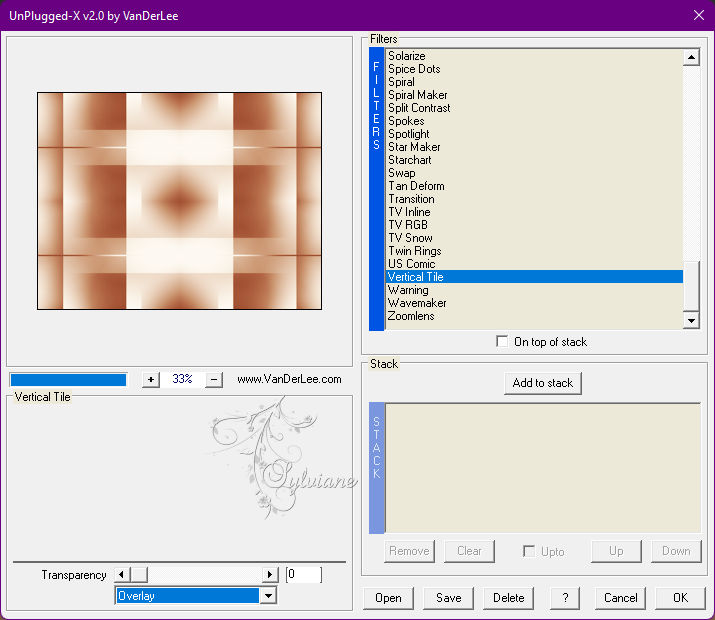
8.
Plugins - VanDerLee - UnPlugged-X- verticale tile
9.
Layers - Duplicate
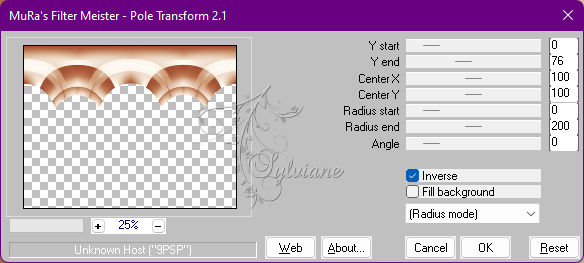
10.
Plugins - Mura's Meister - Pole Transform 2.1 - Note the checkmark inverse must be checked.
11.
Layers - Duplicate
12.
Activate Copy of Merged
13
Set Blend Mode to Multiply
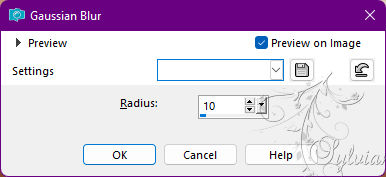
14.
Adjust - Blur - Gaussian blur
15.
Activate your layer raster 1
Open H9o5ckaRbH4lMTH5bOg6bpvpSaE.png
edit – copy
16.
Back to your worksheet
edit - paste as new layer.
Play with the opacity, mine is set to 40.
17.
Now make your top layer active
Open Jolcsi984.png
edit - copy.
18.
Back to your worksheet
Edit - paste as new layer.
And put it in a nice place for me that was left.
19.
Effects - 3D effects - drop shadow.
0/0/100/40 -background color.
20.
Open HSGnvxPLq-MTfh5uERqNxvpZOuM.png
edit - copy.
21.
Back to your worksheet
edit - paste as new layer.
And put it in a nice place.
22.
Effects - 3D effects - drop shadow.
0/0/100/40 -background color.
23.
Open Tekst Jolcsi.png
edit - copy.
24.
Back to your worksheet
paste as a new layer.
And put it nicely at the top.
25.
Effects - 3D effects - drop shadow.
1/1/60/4 color:#000000
26.
Activate your raster 1
Layers - Duplicate
and lock this layer by clicking on the eye
27.
Activate 1 of your other layers.
Layers - merge - merge visible layers.
28.
Image - resize - by 90%.
29.
Effects - 3D effects - drop shadow.
0/0/100/40 -background color.
You can repeat the step if it is too light.
30.
Unlock the bottom layer again by clicking on the eye again.
And make Grid 1 active
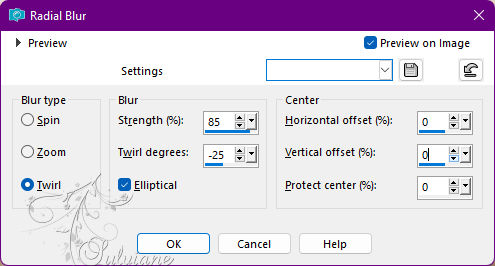
31.
Adjust - blur - radial blur
32.
Layers - new raster layer and put your watermark on it.
33.
Image – Add Borders –symmetric - 1 pixel - color : background
34.
Image - resize to 850 pixels.
Adjust - sharpness - sharpen.
35.
Save as JPEG
Back
Copyright Translation © 2022 by SvC-Design