But is good with other versions.
******************************************************************
Materials:
LA_Extrude 1.f1s
LA_Glass 12.f1s
Narah_Mask_0933.jpg
Narah_Mask_1158.jpg
Narah_Mask_1166.jpg
LA_20.png
LA_24.png
LA_2023.png
LA_2024.png
LA_Chamagner 1.png
LA_Champagner Set 2.png
LA_Christmas Balls.pspimage
LA_Clock 4.png
LA_FRAME.pspimage
LA_Fireworks.png
LA_Gold Balloons.png
LA_Gold Deco.png
LA_HG.png
LA_SIG 141.pspimage
LA_Stars.png
******************************************************************
Plugin:
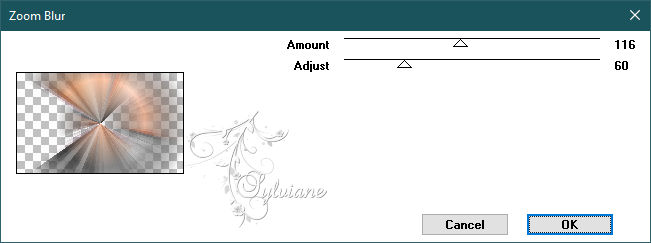
Effects - Plugins - VM Toolbox - Zoom Blur
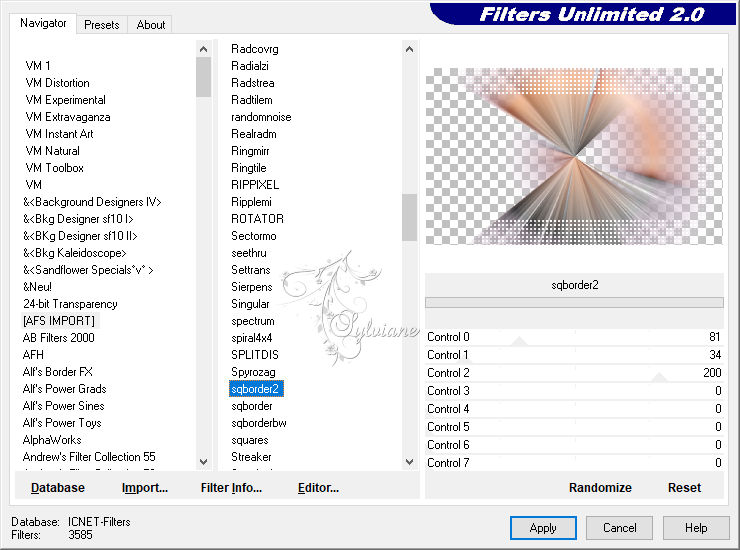
Effects - Plugins - Filters Unlimited 2.0 - AFS [IMPORT] - sqborder2
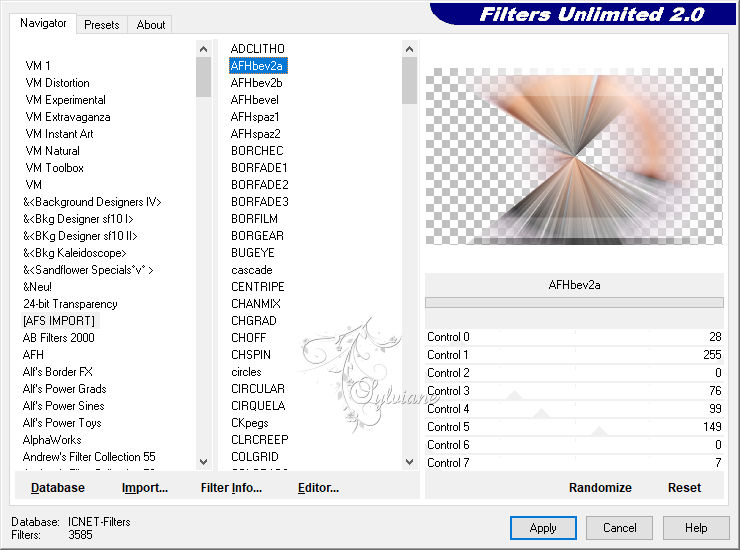
Effects - Plugins - Filters Unlimited 2.0 - AFS [IMPORT] - AFSbev2a
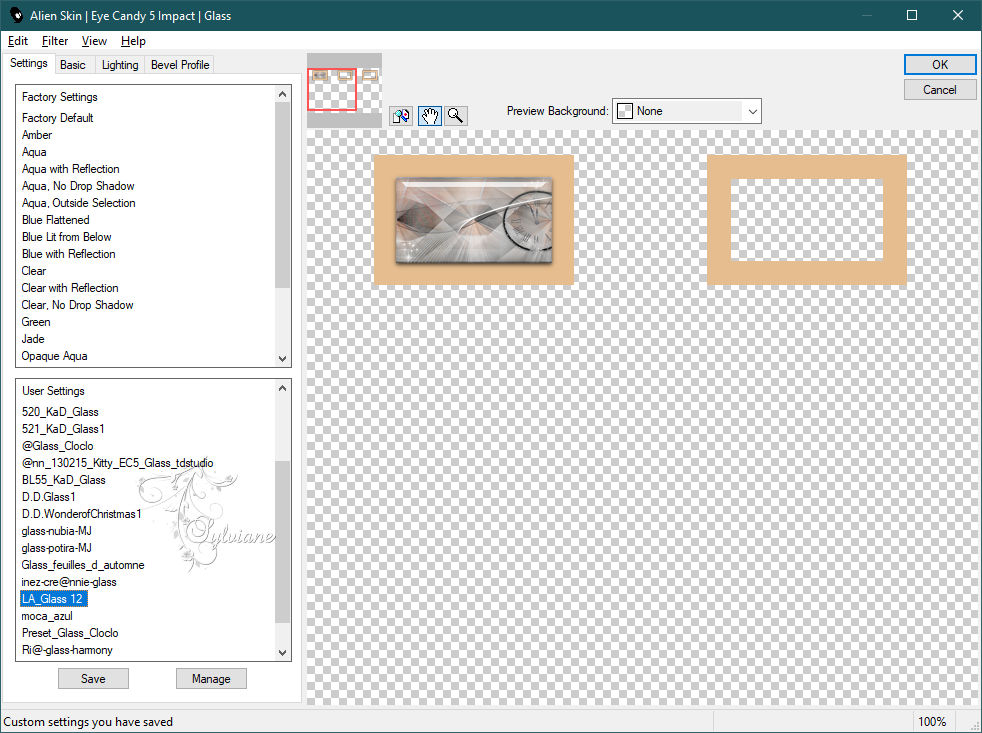
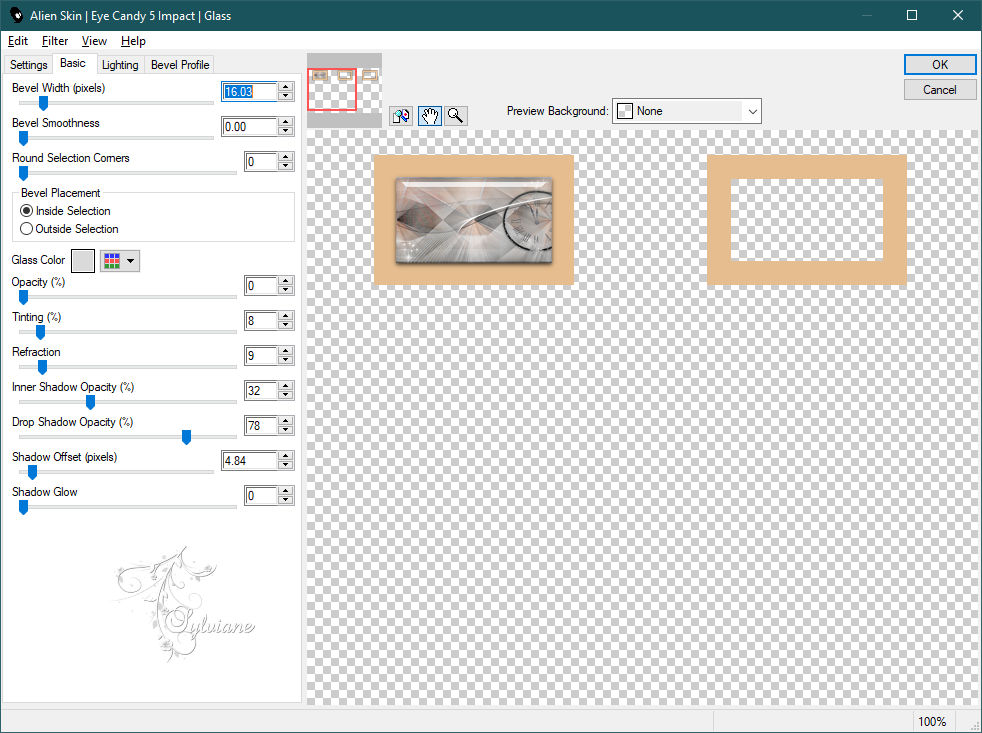
Effects – plugin - Alien Skin Eye Candy 5 Impact – Glass - LA_Glass 12.f1s
Effects – plugin -Mura's Meister - Copies
Effects – plugin - Alien Skin Eye Candy 5 Impact – Extrude -
preset LA_Extrude 1
******************************************************************
color palette
:

******************************************************************
methode
When using other tubes and colors, the mixing mode and / or layer coverage may differ
******************************************************************
General Preparations:
First install your filters for your PSP!
Masks: Save to your mask folder in PSP, unless noted otherwise
Texture & Pattern: Save to your Texture Folder in PSP
Selections: Save to your folder Selections in PSP
Open your tubes in PSP
******************************************************************
We will start - Have fun!
Remember to save your work on a regular basis
******************************************************************
foreground color:#ffffff
background color:#000000
1.
Open LA_SIG 141
Window - duplicate
Minimize the original - we are working on the copy
Open your tube or license tube
Image – Resize: 600 x 600 pixels

Edit - Copy.
and minimize tube
Edit - Paste as new layer.
Effects - Plugins - VM Toolbox - Zoom Blur
2.
Effects - Plugins - Filters Unlimited 2.0 - AFS [IMPORT] - sqborder2
Effects - Plugins - Filters Unlimited 2.0 - AFS [IMPORT] - AFSbev2a - standaard
3.
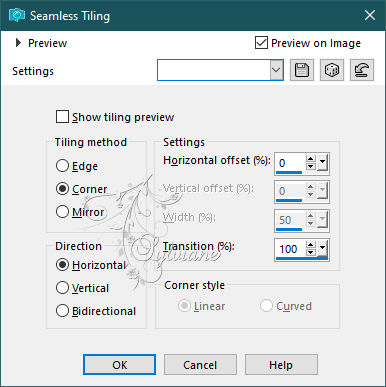
Effects - Image Effects - Seamless Tiling
Open LA_HG.png
Edit - Copy.
Edit - Paste as new layer.
4.
Layers - New raster layer.
Fill layer with white color.
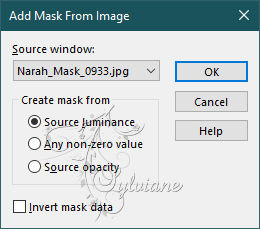
Layers - New Mask Layer - From Image - Narah_Mask_0933.jpg
Layers – Merge - Merge group.
Effects - Edge effects - Enhance.
Blendmode: Soft Light
5.
Open LA_Clock 4.png
Edit - Copy.
Edit - Paste as new layer.
Move the tube to the right, as shown below.
Set the layer to Darken mode, or according to your colors.
6.
Open LA_Fireworks.png
Edit - Copy.
Edit - Paste as new layer.
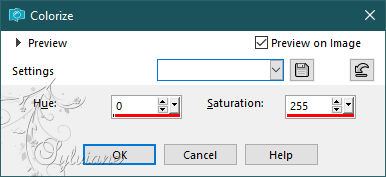
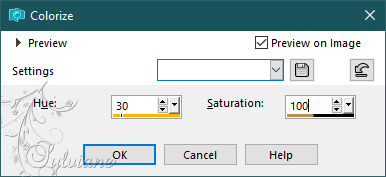
Adjust – hue and saturation – colorize
Move tube to top left corner.
Set the layer to Lighten mode and reduce the opacity to 30% or according to your colors.
Edit - Paste as new layer - the LA_Fireworks tube is still in memory.
Adjust – hue and saturation – colorize
Move this tube to the lower left corner
Set the layer to Lighten mode and reduce the opacity to 30%, or as your colors dictate.
Again - Edit - Paste as new layer - the LA_Fireworks tube is still in memory.
Colorize the tube or keep it gray, as in my example.
Move the tube a little to the left.
Set the layer to Lighten mode and reduce the opacity to 30%, or as your colors dictate.
7.
Open LA_Stars.png
Edit - Copy.
Edit - Paste as new layer.
Layers - New raster layer.
Fill with #000000
Layers - New Mask Layer - From Image - Narah_Mask_1158.jpg
Layers - Merge - Merge Group
Layers - New raster layer
Fill with #FFFFFF
Layers - New Mask Layer - From Image - Narah_Mask_1166.jpg
Layers - Merge - Merge Group
Effects - 3D effects - Drop shadow
1/1/50/1 – color:#000000
8.
Edit – copy special- copy merged
edit - paste as a new image - and minimize the image you'll need several times.
Now choose two image colors.
Foreground color :#e6bd8f,
background color : #4a4a4a
9.
Layers - New raster layer.
Selections - Load / Save - Load selection from Alpha Channel - Auswahl #1
Fill selection with foreground color.
Selections - Load / Save - Load selection from Alpha Channel -
#Auswahl #2
Edit - Paste into selection (the image from step 8).
Adjust – scharpness – scharpen
Effects – plugin - Alien Skin Eye Candy 5 Impact – Glass - LA_Glass 12.f1s
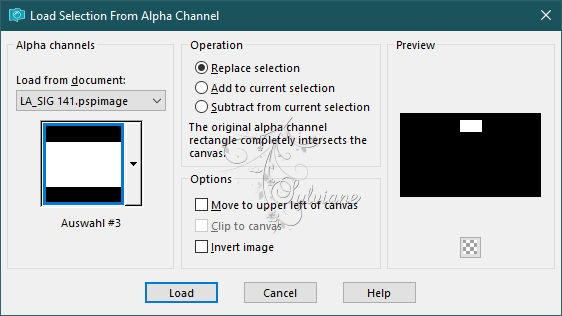
Selections - Load / Save - Load selection from Alpha Channel - Auswahl #3.
Edit - Paste into selection (the image from step 8 is still in memory).
Adjust – scharpness – scharpen
Effects – plugin - Alien Skin Eye Candy 5 Impact – Glass - LA_Glass 12.f1s - as before
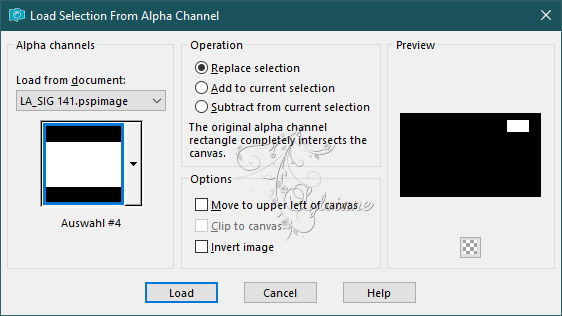
Selections - Load / Save - Load selection from Alpha Channel - Auswahl #4.
Edit - Paste into selection.
Adjust – scharpness – scharpen
Effects – plugin - Alien Skin Eye Candy 5 Impact – Glass - LA_Glass 12.f1s - as before
Selection - Select None
Open LA_2023.png
Edit - Copy.
Edit - Paste as new layer.
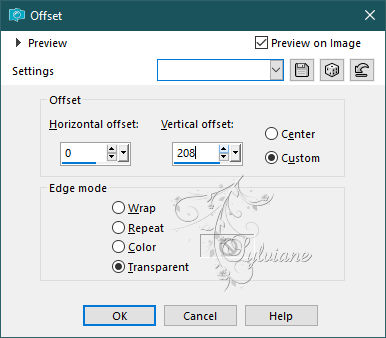
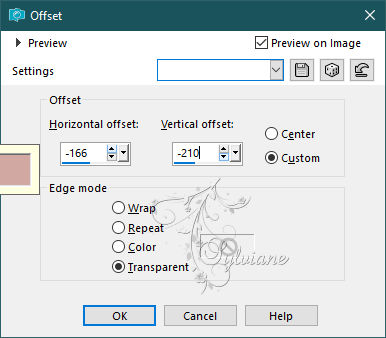
Effects - Image effects - Offset.
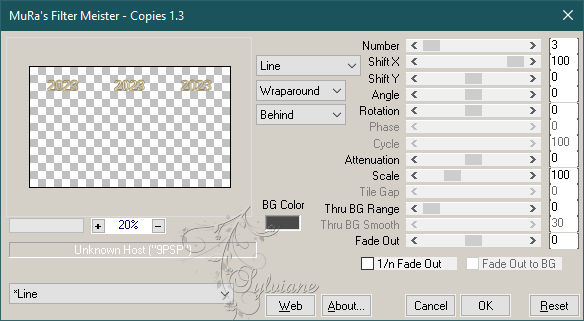
Effects – plugin -Mura's Meister - Copies.
Layers – merge – merge down
10.
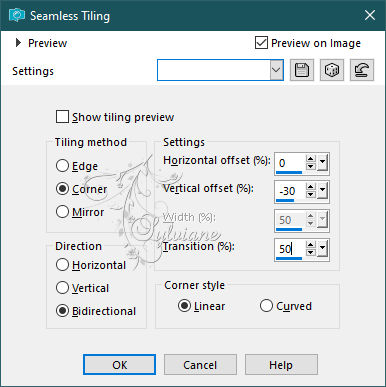
Effects - Image Effects - Seamless Tiling
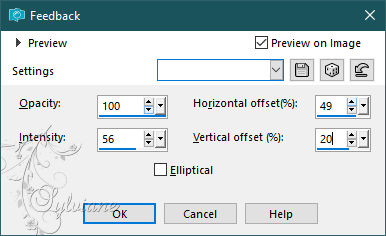
Effects – reflection effects – feedback
Selections - Load / Save - Load selection from Alpha Channel - Auswahl #5
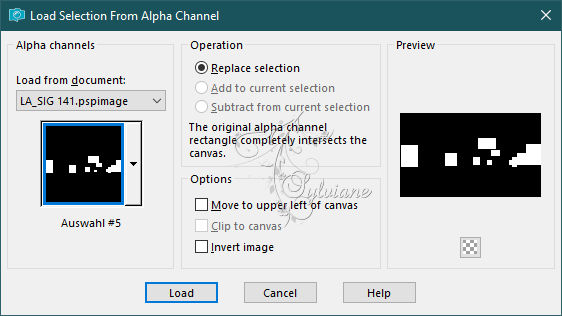
Press delete on the keyboard
Selection - Select None
11.
Layers - New raster layer.
Selections - Load / Save - Load selection from Alpha Channel - Auswahl #1 again.
Fill selection with background color.
Activate the image from step 8
Edit - Copy.
Selections - Load / Save - Load selection from Alpha Channel - Auswahl #2.
Edit - Paste into selection.
Adjust – scharpness – scharpen
Effects – plugin - Alien Skin Eye Candy 5 Impact – Glass - LA_Glass 12.f1s - as before
Selections - Load / Save - Load selection from Alpha Channel - Auswahl #3
Edit - Paste into selection.
Adjust – scharpness – scharpen
Effects – plugin - Alien Skin Eye Candy 5 Impact – Glass - LA_Glass 12.f1s - as before
Selections - Load / Save - Load selection from Alpha Channel - Auswahl #4.
Edit - Paste into selection.
Adjust – scharpness – scharpen
Effects – plugin - Alien Skin Eye Candy 5 Impact – Glass - LA_Glass 12.f1s - as before
Selection - Select None
Open LA_2024.png
Edit - Copy.
Edit - Paste as new layer.
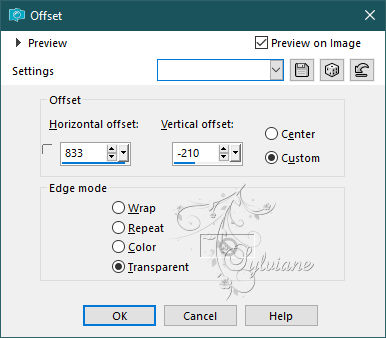
Effects - Image effects - Offset, as before.
Effects - 3D effects - Drop shadow.
2/2/80/2 -color:000000
Effects – plugin - Mura's Meister - Copies, as before

Layers – merge – merge down
12.
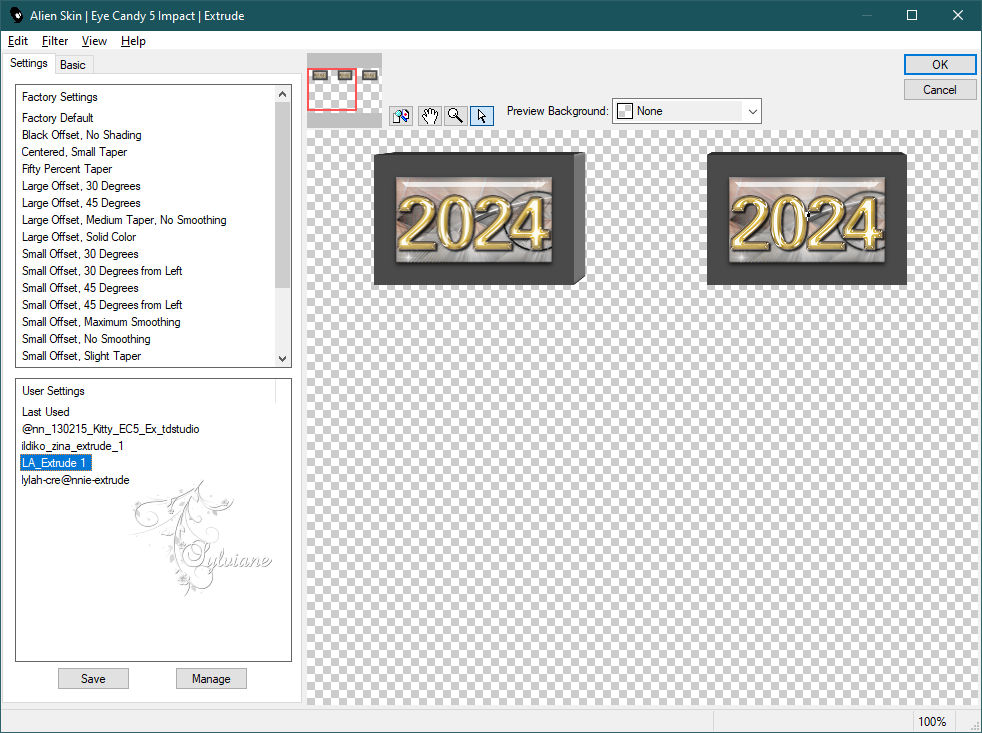
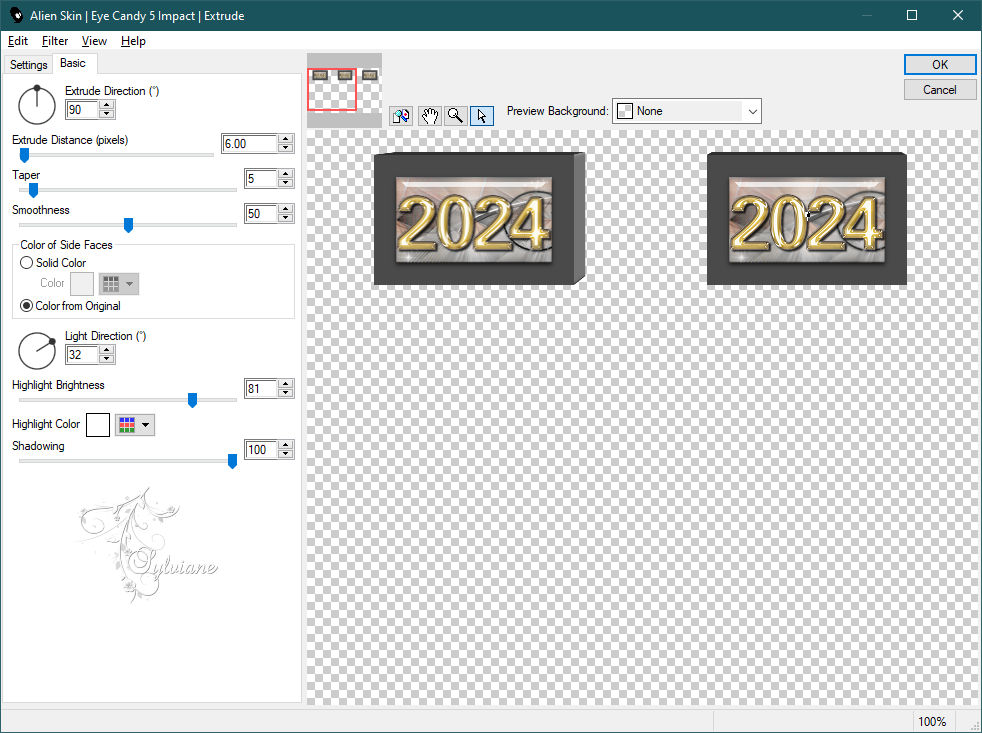
Effects – plugin - Alien Skin Eye Candy 5 Impact – Extrude -
preset LA_Extrude 1
Effects - Image Effects - Seamless Tiling - as above.
Effects – reflection effects – feedback - as before.
Selections - Load / Save - Load selection from Alpha Channel - Auswahl #6.
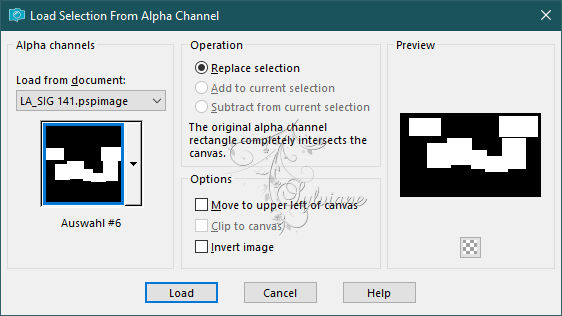
Press delete on the keyboard
Selection - Select None
Effects - 3D effects - Drop shadow.
0/0/80/15 – color:ffffff
13.
Layers - New raster layer.
Selections - Load / Save - Load selection from Alpha Channel - Auswahl #2.
Re-activate the image from step 8
Edit - Copy.
Edit- Paste into selection.
Adjust – scharpness – scharpen
Effects – plugin - Alien Skin Eye Candy 5 Impact - Glass, as before.
Selection - Select None
Layers - Duplicate.
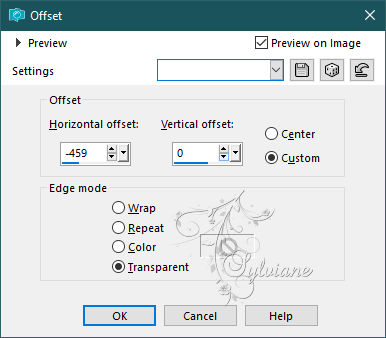
Effects - Image effects – Offset
Position on the layer below.
Effects - Image effects – Offset
14.
Position yourself on the top layer of the stack.
Open LA_20.png
Edit - Copy.
Edit - Paste as new layer.
Effects - Image effects - Offset.
Open LA_24.png
Edit - Copy.
Edit - Paste as new layer.
Effects - Image effects - Offset.

Layers – merge – merge down
Effects - 3D effects - Drop shadow.
2/2/80/2 color:000000
15.
Open LA_Gold Deco.png
Edit - Copy.
Edit - Paste as new layer.
Move the tube to the bottom left corner,
so that it closes tightly with the left and bottom edges.
Blendmode: Hard Light
lopacity to 80%,
or to your liking, as the image will certainly differ according to color.
Open one of the bottles LA_Champagne2
Edit - Copy.
Edit - Paste as new layer.
Move the image to the bottom right corner.
Effects - 3D Effects - Drop Shadow.
0/0/80/20 color:#000000
16.
Open LA_Christmas Balls
Colorize balls to your liking.
Edit – copy special- copy merged
Edit - Paste as new layer.
Move the balls next to the bottle.
Open a set of glasses LA_Champagner Set 3
Edit - Copy.
Edit - Paste as new layer.
Move the glasses to the side of the balls, or to your liking.
Effects - 3D effects - Drop shadow.
0/0/60/20 color:#000000
17.
Open LA_Gold Balloons.png
Edit - Copy.
Edit - Paste as new layer.
Move the tube a little further up.
Activate the Text tool, choose a font or use the font provided.

Selections – Promote selections to layer
Position text as required,
leaving a space on the left for your tube.
Effects - 3D effects - Drop shadow
2/2/100/2 - - foreground color.
Repeat Drop Shadow, as before, but with the background color.
Rename this layer Text
18.
Activate your tube or license tube
Image>Resize all layers to a height of 590 pixels and lock proportions checked.
Edit - Copy.
Edit - Paste as new layer.
Adjust – scharpness – scharpen
Effects - 3D Effects - Drop Shadow.
0/0/60/20 – color:#000000
Move the tube to the left.
(be careful not to cover the small frame with the number 20).
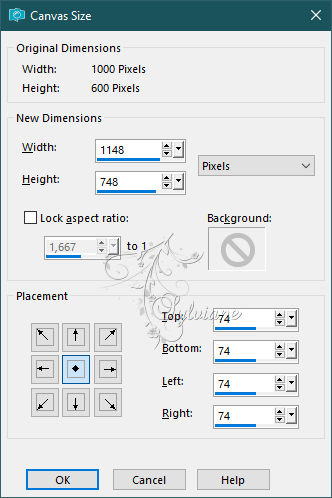
Image – canvas size
Open LA_FRAME
Colorize the deco, if you like.
Edit – copy special- copy merged
Edit - Paste as new layer.
Sign your work on a new layer.
If you don't want to make the animation:
Layer – merge – merge all (flatten)
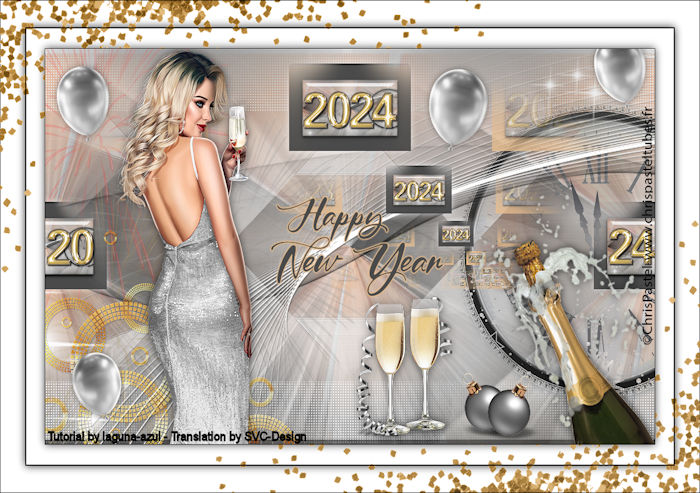
save as jpg.
Animation:
19.
Position yourself on the text layer
Activate the image from step 8
Edit - Copy.
Edit - Paste as new layer.
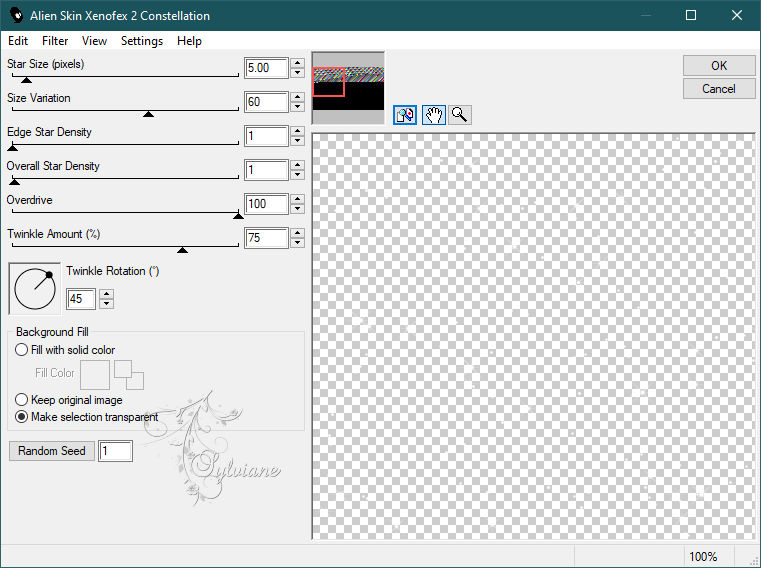
Effects – plugin - Alien Skin Xenofex 2- Constellation.
Edit – copy special- copy merged
Open Animation Shop and
Edit – Paste - Paste as new animation.
20.
Return to PSP.
Edit - Cancel Constellation.
Repeat Effects – plugin - Skin Xenofex 2 - Constellation, click on Random Seed and ok.
Edit – copy special- copy merged
Return to Animation Shop and
Edit – Paste - Paste after active image.
On PSP.
Edit - Cancel Constellation.
Repeat Effects – plugin -Skin Xenofex 2 - Constellation, click on Random Seed and ok.
Edit – copy special- copy merged
Return to Animation Shop
Edit – Paste - Paste after active image.
Check result by clicking on View
and save as gif.
Back
Copyright Translation 2023 by SvC-Design
------------------------------------------------------------------------------
Thanks to all who created
 |
| |
| |
| |
| |
| |
| |
| |
| |
| |
| |
| |
| |
| |
| |
| |
| |
| & |
| |
| |